

The Ultimate Heart-Shaped Valentine’s Day Cake: 13 Pro Tips for Success

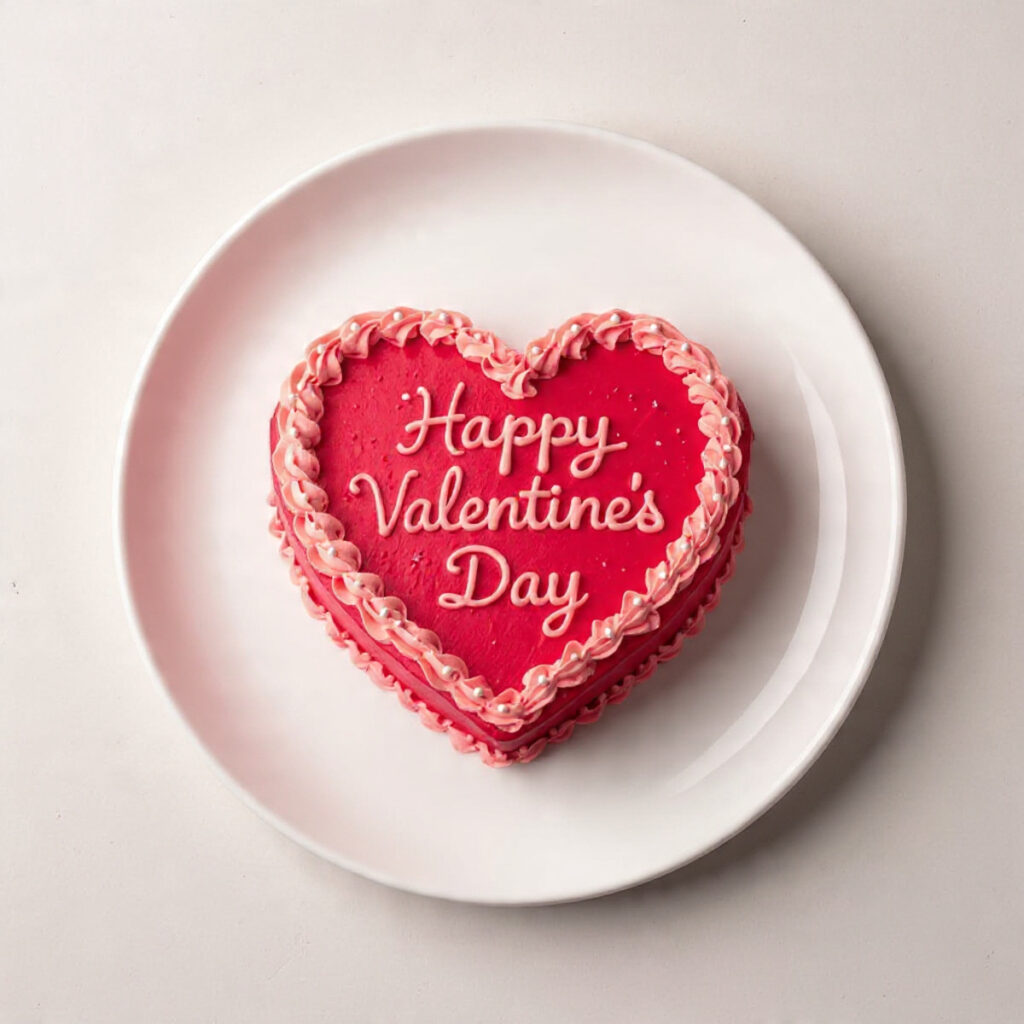
Valentine’s Day is the perfect occasion to express your love through homemade treats, and nothing says “I love you” quite like a beautifully crafted heart-shaped cake. This stunning dessert combines tender, moist cake layers with velvety frosting and elegant decorations that will make your Valentine feel truly special. Whether you’re an experienced baker or just starting your culinary journey, this comprehensive guide will walk you through creating a show-stopping Valentine’s Day cake that tastes as incredible as it looks.
Understanding the Heart-Shaped Valentine’s Day Cake
This classic Valentine’s cake features layers of soft vanilla or chocolate cake shaped into a perfect heart, filled and frosted with smooth buttercream, and decorated with romantic touches like fresh berries, chocolate ganache drizzle, or delicate piped flowers. The beauty of this recipe lies in its versatility—you can customize the flavors, colors, and decorations to match your loved one’s preferences while maintaining that essential Valentine’s Day charm.
Essential Ingredients
For the Cake Layers
The foundation of any great cake starts with quality ingredients measured precisely. For this heart-shaped masterpiece, you’ll need:
Dry Ingredients:
- 2¾ cups all-purpose flour (345g)
- 2½ teaspoons baking powder
- ½ teaspoon baking soda
- ¾ teaspoon salt
- 1¾ cups granulated sugar (350g)
Wet Ingredients:
- 1 cup unsalted butter (2 sticks), softened to room temperature
- 4 large eggs, room temperature
- 1 tablespoon pure vanilla extract
- 1¼ cups whole milk, room temperature
- ½ cup sour cream, room temperature
Optional Flavor Variations:
- 2 tablespoons cocoa powder for a marble effect
- 1 teaspoon almond extract for depth
- Zest of one lemon for brightness
For the Buttercream Frosting
A luxurious buttercream is essential for both filling and decorating your cake:
- 1½ cups unsalted butter (3 sticks), softened
- 6 cups powdered sugar (720g), sifted
- ¼ cup heavy cream
- 2 teaspoons pure vanilla extract
- ¼ teaspoon salt
- Red or pink gel food coloring (optional)
For Decoration
The finishing touches transform your cake from lovely to absolutely spectacular:
- Fresh strawberries or raspberries
- White chocolate shavings or curls
- Edible rose petals
- Pink or red sprinkles
- Fresh flowers (ensure they’re food-safe)
- Chocolate ganache for drizzling
- Pearl dust or edible glitter
Equipment You’ll Need
Proper tools make the baking process smoother and more enjoyable. Gather these items before you begin:
- One 8-inch round cake pan
- One 8-inch square cake pan (for the heart shape method)
- Alternatively, one heart-shaped cake pan
- Electric mixer (stand or hand)
- Mixing bowls in various sizes
- Rubber spatula
- Wire cooling racks
- Offset spatula for frosting
- Piping bags and tips
- Parchment paper
- Cake turntable (highly recommended)
- Sharp serrated knife
- Toothpicks for testing doneness
Detailed Preparation Method
Step 1: Prepare Your Kitchen and Pans
Begin by preheating your oven to 350°F (175°C). This temperature ensures even baking and a perfectly golden exterior. While the oven heats, prepare your cake pans using one of two methods.
For the traditional two-pan heart shape, you’ll need one 8-inch round pan and one 8-inch square pan. Grease both pans generously with butter or non-stick spray, then line the bottoms with parchment paper cut to fit perfectly. Dust lightly with flour, tapping out any excess. This double protection ensures your cakes release cleanly after baking.
If you’re using a heart-shaped pan, simply grease and line it with parchment paper following the same method.
Step 2: Mix the Dry Ingredients
In a large mixing bowl, whisk together the flour, baking powder, baking soda, and salt. Whisking for at least 30 seconds ensures these ingredients are evenly distributed throughout the mixture, which is crucial for consistent rise and texture. Set this bowl aside—you’ll be alternating between dry and wet ingredients later.
Step 3: Cream the Butter and Sugar
In the bowl of your stand mixer fitted with the paddle attachment (or using a hand mixer in a large bowl), beat the softened butter on medium speed for about one minute until it’s smooth and creamy. Gradually add the granulated sugar, continuing to beat for 3-4 minutes. The mixture should become pale, fluffy, and noticeably increased in volume. This process incorporates air into the batter, contributing to the cake’s light texture.
Scrape down the sides and bottom of the bowl with your rubber spatula to ensure everything is evenly mixed.
Step 4: Add Eggs and Vanilla
With the mixer on medium-low speed, add the eggs one at a time, beating well after each addition. Wait until each egg is fully incorporated before adding the next—this prevents the mixture from appearing curdled. After all eggs are added, pour in the vanilla extract and beat for another 30 seconds. The mixture should look smooth and glossy.
Step 5: Combine Wet Ingredients
In a separate measuring cup or small bowl, whisk together the milk and sour cream until smooth. The sour cream adds moisture and a subtle tang that balances the sweetness of the cake.
Step 6: Alternate Dry and Wet Ingredients
This is where technique matters most for achieving the perfect crumb. With your mixer on low speed, add the dry ingredients in three additions, alternating with the milk mixture in two additions. The pattern should be: dry, wet, dry, wet, dry. Begin and end with the dry ingredients.
After each addition, mix only until the ingredients are just combined—you should still see a few streaks of flour before adding the next portion. Once everything is added, give the batter a final gentle fold with your rubber spatula to ensure no pockets of flour remain at the bottom of the bowl. Be careful not to overmix, as this develops gluten and creates a tough, dense cake.
Step 7: Bake the Cake Layers
Divide the batter evenly between your prepared pans. For the round and square pan method, you’ll want slightly more batter in the square pan since it has a larger surface area. A kitchen scale is helpful here—the square pan should hold about 60% of the batter, with 40% going into the round pan.
Tap each pan gently on the counter a few times to release any large air bubbles trapped in the batter. Place the pans in your preheated oven, positioning them on the center rack with space between them for air circulation.
Bake for 28-33 minutes, rotating the pans halfway through for even browning. The cakes are done when a toothpick inserted into the center comes out with just a few moist crumbs (not wet batter), and the tops spring back lightly when touched.
Step 8: Cool the Cakes
Remove the pans from the oven and let them cool in the pans for 10 minutes on wire racks. This brief resting period allows the cakes to set enough to be handled without breaking apart. After 10 minutes, run a thin knife around the edges of each pan, then carefully invert the cakes onto the wire racks. Peel off the parchment paper and let the cakes cool completely—at least 1-2 hours. This patience is vital; frosting a warm cake will result in melted, sliding frosting.
Step 9: Shape Your Heart
If you used round and square pans, here’s how to create the perfect heart shape: Cut the round cake in half. Position the square cake so it looks like a diamond (one corner pointing toward you). Place each half of the round cake against the top two sides of the diamond, with the cut sides aligned against the square cake’s edges. You’ve now created a heart shape! Trim any uneven edges to perfect the shape.
If you used a heart-shaped pan, simply level the top of your cake with a serrated knife to create a flat surface for stacking or decorating.
Step 10: Prepare the Buttercream Frosting
While your cakes cool, make the buttercream. In a clean mixer bowl, beat the softened butter on medium speed for 2-3 minutes until it’s light and fluffy. Reduce the speed to low and gradually add the sifted powdered sugar, one cup at a time. The sifting is important—it prevents lumps in your frosting.
After all the sugar is incorporated, add the heavy cream, vanilla extract, and salt. Increase the mixer speed to medium-high and beat for 4-5 minutes. The frosting should be light, fluffy, and spreadable. If it seems too thick, add cream one tablespoon at a time. If too thin, add more powdered sugar.
For pink or red frosting, add gel food coloring gradually with a toothpick, mixing thoroughly between additions until you achieve your desired shade. Gel colors are superior to liquid ones as they don’t alter the frosting’s consistency.
Step 11: Assemble the Cake
If you’re creating a layered cake, you’ll need to slice your heart horizontally into two or three layers using a long serrated knife. A rotating cake turntable makes this much easier. Place your first layer on a cake board or serving plate.
Apply a generous amount of frosting to the top of this layer, spreading it evenly with an offset spatula. You want about ¼ to ½ inch of frosting between layers. Carefully place the next layer on top, pressing down gently to secure it.
Step 12: Create the Crumb Coat
The crumb coat is a thin layer of frosting that seals in crumbs and creates a smooth base for your final frosting layer. Using an offset spatula, spread a thin layer of frosting over the entire cake—top and sides. Don’t worry if cake crumbs mix into this layer; that’s exactly what it’s designed to catch.
Refrigerate the cake for 30 minutes to let this coat firm up. This step is the secret to achieving a beautifully smooth final finish.
Step 13: Apply the Final Frosting Layer
Once the crumb coat is set, apply your final, generous layer of frosting. Work from top to bottom, using smooth strokes with your offset spatula. For an ultra-smooth finish, dip your spatula in hot water, dry it, then run it along the frosting. The warmth slightly melts the buttercream, creating a flawless surface.
Alternatively, create texture by using the back of a spoon to make swirls, or drag a cake comb around the sides for ridged patterns.
Making Your Cake Look Amazing
The decoration phase is where your cake transforms from homemade to professionally stunning. Here are detailed techniques for various decoration styles:
Classic Elegance with Fresh Berries
Arrange fresh strawberries around the top edge of your cake, either whole or sliced into decorative shapes. Create strawberry roses by slicing strawberries thinly, then rolling them into rose shapes. Scatter fresh raspberries and blueberries in the center for color contrast. The natural red tones of berries complement the Valentine’s theme perfectly while adding fresh flavor.
Lightly dust the berries with powdered sugar just before serving for a romantic, snow-kissed effect.
Chocolate Ganache Drip
For a sophisticated touch, create a chocolate ganache drip. Heat ½ cup heavy cream until steaming (not boiling), then pour over 4 ounces chopped chocolate. Let sit for 2 minutes, then stir until smooth. Cool the ganache until it’s thick but still pourable—about 10 minutes.
Using a spoon or squeeze bottle, create drips around the top edge of your cake, letting the ganache naturally drip down the sides. Fill in the top with more ganache for a dramatic effect. The contrast between pink buttercream and dark chocolate is visually stunning.
Piped Buttercream Decorations
Reserve some buttercream in a piping bag fitted with various tips to create decorative elements. Use a star tip to pipe rosettes or shells around the base and top border. A petal tip allows you to create beautiful buttercream roses. For Valentine’s Day, consider piping small hearts around the sides or spelling out “Love” across the top.
Practice your piping on parchment paper first if you’re new to this technique. The frosting can be scraped up and reused until you achieve the design you want.
Edible Flowers and Petals
Fresh edible flowers like roses, violets, or pansies add an elegant, romantic touch. Ensure any flowers you use are specifically labeled as edible and haven’t been treated with pesticides. Gently wash and pat them dry before placing them on your cake. Arrange them asymmetrically for a modern look, or create a neat border for classic elegance.
Dried rose petals can be scattered across the top for a vintage aesthetic.
Gold and Shimmer Accents
For a luxurious finish, dust portions of your cake with edible gold or pearl dust using a clean, dry brush. Focus on the edges of piped decorations or lightly brush across the entire surface for subtle shimmer. This technique catches the light beautifully in photographs.
Mix pearl dust with a tiny amount of clear alcohol (like vodka) to create an edible paint for more dramatic gold accents.
White Chocolate Curls and Shavings
Create elegant white chocolate curls by running a vegetable peeler along the edge of a room-temperature white chocolate bar. The chocolate should be slightly warm—if it’s too cold, it will crumble instead of curl. Arrange these curls on top of your cake, allowing them to fall naturally for an organic look.
For shavings, use a fine grater and sprinkle the chocolate over the cake like snow.
Color Gradient Effect
Create an ombré effect by dividing your buttercream into several portions and tinting each a progressively deeper shade of pink or red. Start with the darkest shade at the bottom of your cake and gradually transition to lighter shades toward the top. Smooth the transitions with a clean spatula for a seamless gradient.
This technique requires patience but creates a show-stopping modern aesthetic.
Heart-Themed Fondant Decorations
If you’re comfortable working with fondant, cut out small hearts in various sizes using cookie cutters. Dust them with luster dust or paint them with food coloring mixed with alcohol. Attach them to your cake using a small dab of buttercream, creating a cascading heart effect down one side.
Message and Personal Touches
Make your cake truly personal by adding a heartfelt message. Use a piping bag with a small round tip to write directly on the cake, or create a chocolate plaque by spreading melted chocolate on parchment paper, letting it set, then writing on it with contrasting chocolate.
Consider incorporating your loved one’s favorite colors, flavors, or decorative elements that reference shared memories or inside jokes.
Pro Tips for Bakery-Quality Results
Temperature Matters: All your ingredients should be at room temperature before mixing. This ensures they emulsify properly, creating a smooth, even batter. Set out your butter, eggs, milk, and sour cream at least one hour before baking.
Measure Accurately: Baking is a science. Use the spoon-and-level method for flour (spoon it into the measuring cup, then level with a knife) rather than scooping directly, which compacts the flour and results in dry cake.
Don’t Overmix: Once you add flour to your batter, mix only until just combined. Overmixing develops gluten, making your cake tough and dense rather than tender and light.
Level Your Layers: Use a serrated knife and a turntable to carefully level any domed cake tops before assembling. This ensures stable, professional-looking layers.
Chill Between Steps: Refrigerating your cake after the crumb coat and before final decorating makes the process much easier and yields better results.
Plan Ahead: This cake can be made over two days. Bake the cake layers one day, wrap them tightly in plastic wrap, and store at room temperature. Make the frosting and decorate the next day for less stress and better time management.
Storage and Serving Suggestions
Your finished cake can be stored at room temperature for up to 2 days if your kitchen isn’t too warm, or refrigerated for up to 5 days. If refrigerating, let the cake sit at room temperature for 30-60 minutes before serving to allow the frosting to soften and the flavors to come forward.
For the cleanest slices, use a sharp knife dipped in hot water and wiped clean between each cut. This melts through the frosting smoothly without dragging or tearing the cake layers.
Serve generous slices with fresh whipped cream, vanilla ice cream, or simply on their own—this cake is rich and flavorful enough to stand alone.
Conclusion
Creating a delicious heart-shaped Valentine’s Day cake is a beautiful way to show someone you care. While the process requires time and attention to detail, the result is a stunning, professional-looking dessert that will make your celebration truly memorable. The combination of moist, tender cake, silky buttercream, and elegant decorations creates not just a dessert, but an edible expression of love.
Remember, baking is as much about the love and care you put into the process as it is about following the recipe. Don’t be discouraged if your first attempt isn’t perfect—each cake you make will teach you something new and bring you closer to mastering this romantic art. The most important ingredient is the thoughtfulness behind creating something special with your own hands.
This Valentine’s Day, skip the store-bought desserts and create something truly from the heart. Your loved one will taste the difference, and the memories you create together while enjoying this beautiful cake will be just as sweet as the dessert itself.
Print
The Ultimate Heart-Shaped Valentine’s Day Cake: 13 Pro Tips for Success
A stunning heart-shaped Valentine’s Day cake featuring moist vanilla cake layers, silky buttercream frosting, and romantic decorations. Perfect for celebrating love with a homemade dessert that’s as beautiful as it is delicious.
- Total Time: 1 hour
- Yield: 12-16 servings
Ingredients
- 2¾ cups all-purpose flour (345g)
- 2½ teaspoons baking powder
- ½ teaspoon baking soda
- ¾ teaspoon salt
- 1¾ cups granulated sugar (350g)
- 1 cup unsalted butter, softened (2 sticks)
- 4 large eggs, room temperature
- 1 tablespoon pure vanilla extract
- 1¼ cups whole milk, room temperature
- ½ cup sour cream, room temperature
Instructions
- Preheat and Prep: Preheat oven to 350°F (175°C). Grease one 8-inch round pan and one 8-inch square pan. Line with parchment paper.
- Mix Dry Ingredients: Whisk together flour, baking powder, baking soda, and salt. Set aside.
- Cream Butter and Sugar: Beat softened butter for 1 minute. Add sugar and beat for 3-4 minutes until fluffy and pale.
- Add Eggs: Add eggs one at a time, beating well after each. Mix in vanilla extract.
- Combine Wet Ingredients: Whisk together milk and sour cream in a separate bowl.
- Alternate Mixing: On low speed, add dry ingredients in 3 additions, alternating with milk mixture in 2 additions. Begin and end with dry ingredients. Mix until just combined.
- Bake: Divide batter between pans (60% in square, 40% in round). Bake 28-33 minutes until toothpick comes out clean.
- Cool: Cool in pans 10 minutes, then turn out onto wire racks. Cool completely (1-2 hours).
- Shape Heart: Cut round cake in half. Position square cake as a diamond. Place round halves against top two edges to form a heart.
- Make Buttercream: Beat butter 2-3 minutes. Gradually add powdered sugar. Add cream, vanilla, and salt. Beat 4-5 minutes until fluffy. Add food coloring if desired.
- Crumb Coat: Apply thin frosting layer over entire cake. Refrigerate 30 minutes.
- Final Frosting: Apply generous final layer of frosting. Smooth with offset spatula.
- Decorate: Add fresh berries, chocolate drizzle, piped decorations, or your chosen embellishments.
Notes
- Room Temperature Ingredients: Ensure butter, eggs, milk, and sour cream are at room temperature for best results.
- Heart-Shaped Pan Alternative: You can use a heart-shaped pan instead of the round + square method.
- Make Ahead: Cake layers can be baked 1 day ahead, wrapped tightly, and stored at room temperature.
- Storage: Store finished cake at room temperature up to 2 days or refrigerate up to 5 days. Bring to room temperature before serving.
- Leveling Layers: Use a serrated knife to level domed cake tops for professional-looking layers.
- Frosting Consistency: If frosting is too thick, add cream 1 tablespoon at a time. If too thin, add more powdered sugar.
- Clean Slices: Dip knife in hot water and wipe clean between cuts for neat slices.
- Prep Time: 30 minutes
- Cook Time: 30 minutes
- Category: Dessert
- Method: Baking
- Cuisine: American
- Diet: Vegetarian


1 Comment
[…] cooking meat or an experienced home cook looking to refine your technique, this guide will give you the knowledge and confidence to make perfect chicken thighs every single time. By the end, you’ll […]
Comments are closed.