

Heart-Shaped Pancakes: 10 Brilliant Secrets for the Fluffiest Valentine’s Breakfast (2026)
Introduction
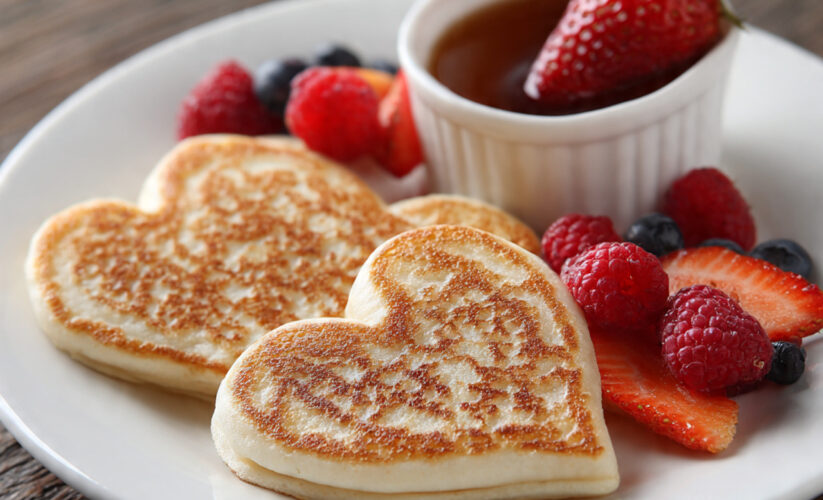
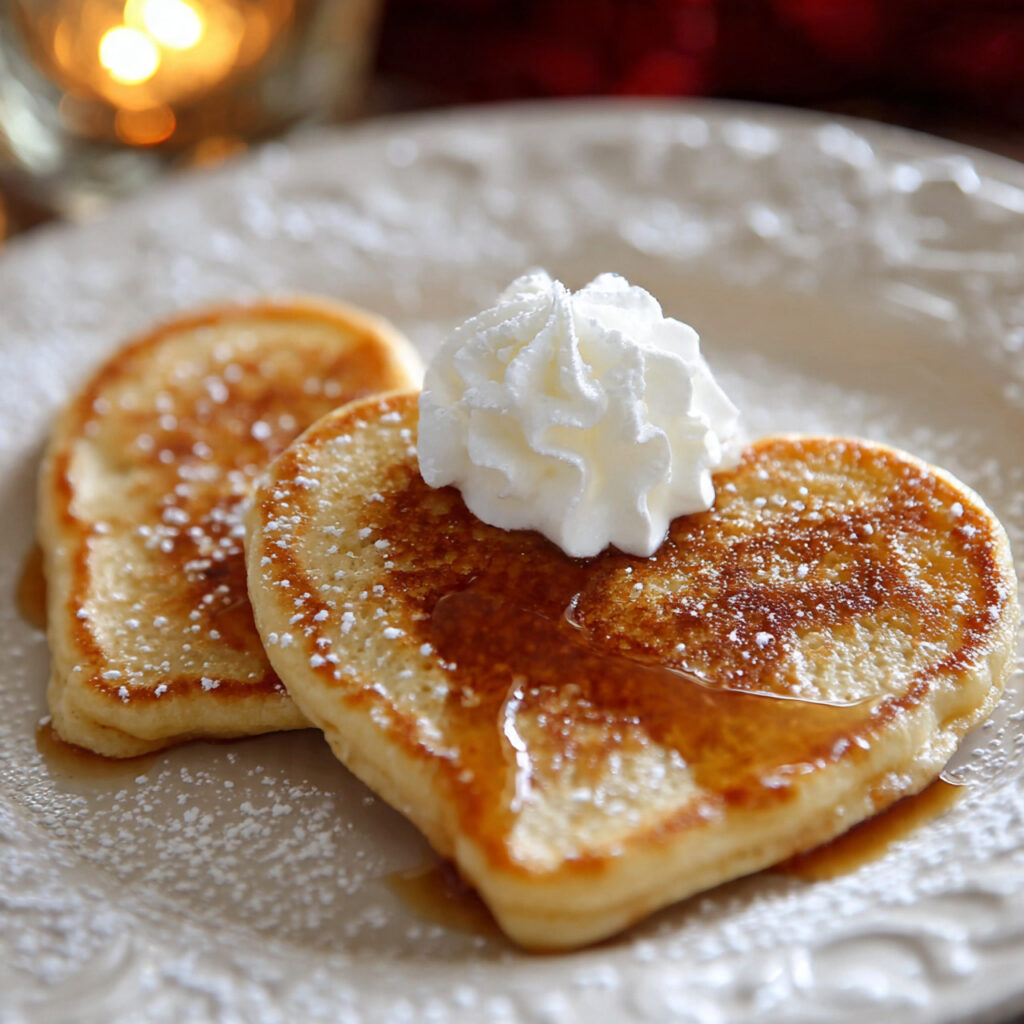
Heart-Shaped Pancakes are the sweetest way to start any special morning, transforming a simple breakfast into a memorable expression of love and care. These adorable pancakes aren’t just for Valentine’s Day—they’re perfect for anniversaries, Mother’s Day, birthdays, or any time you want to show someone they’re loved.
What makes Heart-Shaped Pancakes so magical is how they combine nostalgic
with thoughtful presentation. The fluffy texture, golden-brown exterior, and charming shape create an Instagram-worthy breakfast that tastes even better than it looks.
Best of all, you don’t need fancy equipment or expert skills to make perfect Heart-Shaped Pancakes. With a few simple techniques and the right batter consistency, anyone can create these delightful treats that will have everyone at your breakfast table smiling from ear to ear.
Why This Heart-Shaped Pancakes Recipe Works
This recipe delivers consistently fluffy, tender pancakes with the perfect amount of sweetness. The secret lies in the careful balance of ingredients and the proper technique that creates just enough gluten for structure without making the pancakes tough.
Unlike some recipes that produce dense or rubbery, this batter includes buttermilk for tanginess and tenderness, while baking powder and baking soda work together to create impressive rise and fluffiness. The result? Pancakes that are light as air on the inside with beautifully golden edges.
The shaping method is straightforward for kids to help yet sophisticated enough to impress guests at a brunch gathering. Whether you’re making breakfast for two or feeding a crowd, this recipe scales beautifully and keeps pancakes warm and fluffy while you finish .
Ingredients
For the Pancake Batter:
- 2 cups (250g) all-purpose flour
- 3 tablespoons granulated sugar
- 2 teaspoons baking powder
- 1 teaspoon baking soda
- ½ teaspoon salt
- 2 cups (480ml) buttermilk (or make your own: 2 cups milk + 2 tablespoons lemon juice, let sit 5 minutes)
- 2 large eggs, at room temperature
- ¼ cup (60ml) melted butter, slightly cooled
- 1 teaspoon pure vanilla extract
- Red or pink food coloring (optional, for pink pancakes)
For Cooking:
- Butter or cooking spray for the griddle
- Additional butter for greasing cookie cutters or squeeze bottles
For Serving:
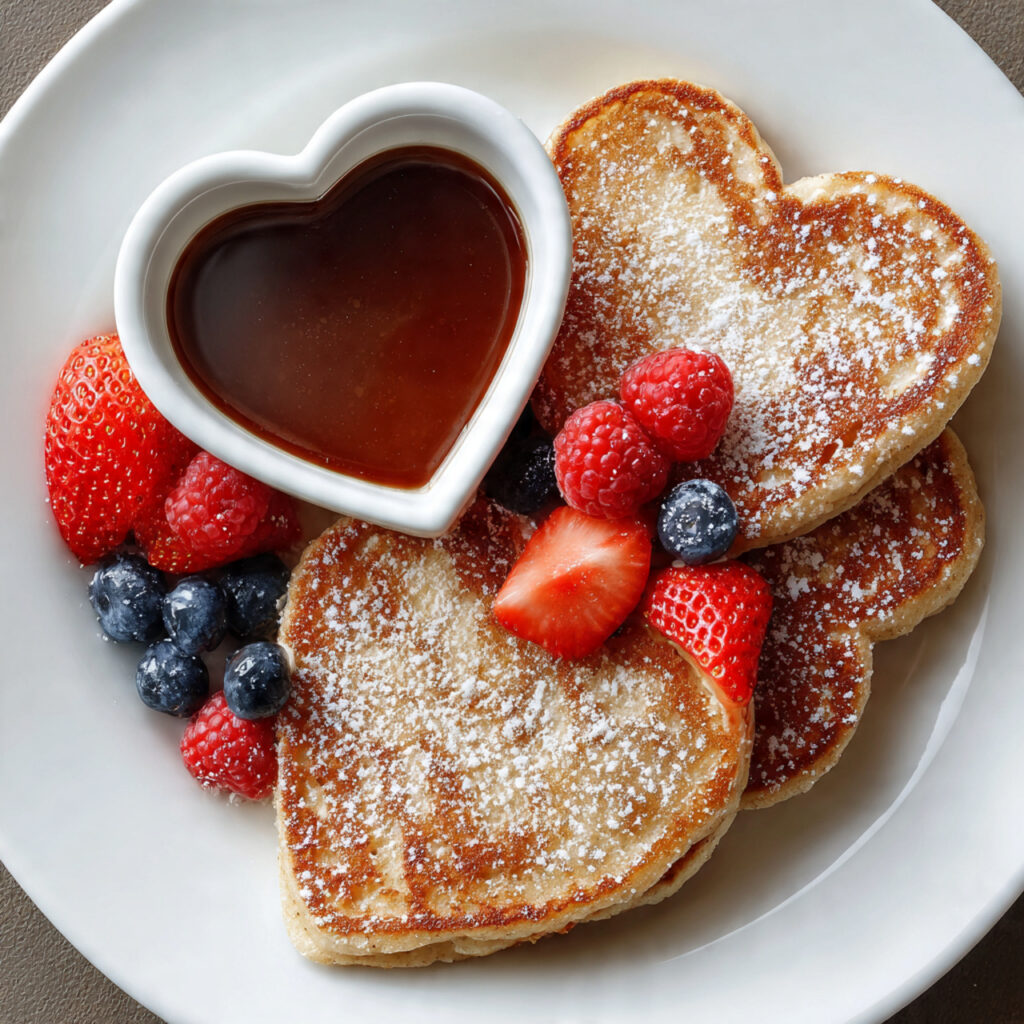
- Pure maple syrup, warmed
- Fresh strawberries, sliced
- Fresh raspberries
- Fresh blueberries
- Whipped cream or whipped coconut cream
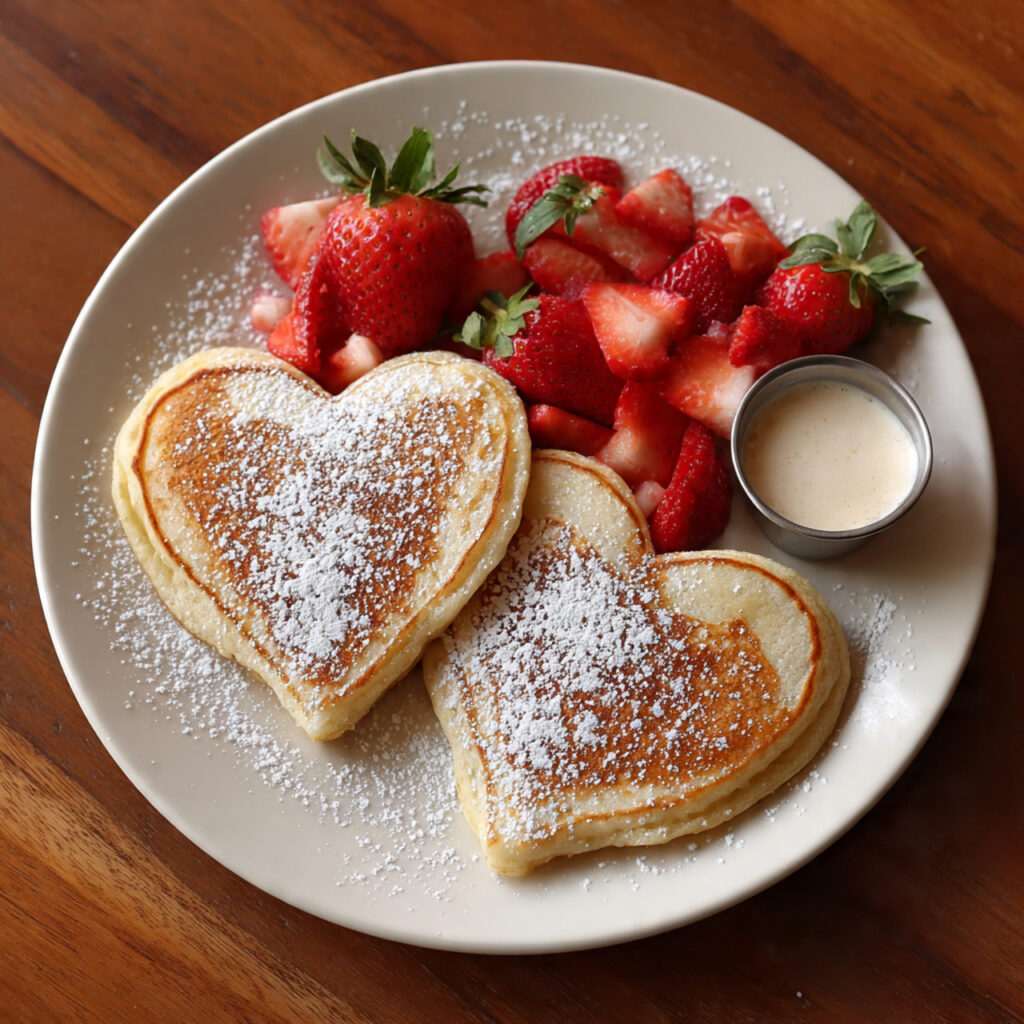
- Powdered sugar for dusting
- Chocolate chips or mini chocolate chips
- Nutella or chocolate hazelnut spread
- Strawberry or raspberry sauce
- Banana slices
- Chopped pecans or walnuts
- Greek yogurt with honey
Optional Garnishes:
- Heart-shaped strawberry slices
- Edible flowers (pesticide-free)
- Sprinkles (red, pink, or white)
- Caramel or chocolate sauce drizzle
- Fresh mint leaves
Step-by-Step Instructions
Step 1: Prepare Your Ingredients
Start by gathering all your ingredients and bringing eggs and buttermilk to room temperature—this takes about 20-30 minutes on the counter. Room temperature ingredients mix more easily and create a smoother batter with better texture.
If you don’t have buttermilk, make your own by adding 2 tablespoons of lemon juice or white vinegar to 2 cups of milk. Stir and let sit for 5 minutes until slightly thickened and curdled—this creates the perfect buttermilk substitute.
Melt your butter and let it cool slightly while you prepare the dry ingredients. Hot butter can cook the eggs when mixed into the batter, creating an unpleasant texture.
Step 2: Mix the Dry Ingredients
In a large mixing bowl, whisk together flour, sugar, baking powder, baking soda, and salt. Whisk thoroughly for at least 30 seconds to ensure the leavening agents are evenly distributed throughout the flour.
This step is crucial—lumps of baking powder create bitter spots in your pancakes, while uneven distribution leads to inconsistent rising. Take your time here to set yourself up for success.
Make a well in the center of the dry ingredients. This classic technique helps you incorporate wet ingredients more evenly, preventing overmixing.
Step 3: Combine the Wet Ingredients
In a separate medium bowl, whisk together buttermilk, eggs, melted butter, and vanilla extract until well combined. The mixture should look smooth and slightly frothy.
If you want pink pancakes for an extra romantic touch, add 3-4 drops of red or pink food coloring to the wet ingredients now. Gel food coloring works better than liquid as it doesn’t thin the batter.
Pour the wet ingredients into the well you created in the dry ingredients. Using a wooden spoon or rubber spatula, gently fold the mixture together with broad strokes.
Step 4: Mix to Perfection (But Don’t Overmix!)
Here’s the golden rule: mix until the ingredients are just combined, with small lumps still visible in the batter. Overmixing develops too much gluten, resulting in tough, chewy pancakes instead of fluffy ones.
The batter should look somewhat lumpy and thick—this is exactly what you want. If you can still see streaks of flour, give it just a few more gentle folds. Stop mixing as soon as you no longer see dry flour.
Let the batter rest for 5-10 minutes while your griddle heats. This resting period allows the flour to fully hydrate and the leavening agents to start working, creating even fluffier pancakes.
Step 5: Shape Your Heart Pancakes
There are three methods for creating Heart-Shaped Pancakes, each with its own advantages:
Method 1: Cookie Cutter Technique (Easiest) Pour regular round pancakes onto your griddle. Once the edges look set and bubbles form on top, press a lightly greased heart-shaped cookie cutter into the pancake. Carefully remove excess batter around the cutter with a spatula, then remove the cutter and flip. This method works great for beginners.
Method 2: Free-Form Piping (Most Control) Transfer batter to a squeeze bottle or sturdy zip-top bag with the corner cut off. Draw a heart shape directly onto the griddle: start with a V at the top, pipe down and curve around one side, then repeat for the other side, meeting at a point at the bottom. Fill in the center with more batter. This technique takes practice but offers the most control.
Method 3: Two-Circle Technique (Classic) Pour two small circles of batter side by side, slightly touching at the top. Immediately add a small pour of batter at the bottom center, pulling down to create the heart’s point. As the pancakes cook, they’ll merge together naturally.
Step 6: Cook to Golden Perfection
Preheat your griddle or large non-stick skillet over medium heat (about 350°F/175°C if your griddle has a temperature control). Test the temperature by flicking a few drops of water onto the surface—they should sizzle and evaporate immediately.
Lightly grease the cooking surface with butter or cooking spray. Pour or pipe your heart-shaped batter onto the griddle, leaving at least 2 inches between pancakes for easy flipping.
Cook for 2-3 minutes on the first side. You’ll know they’re ready to flip when bubbles form across the entire surface and the edges look dry and set. The bubbles should pop and leave small holes that don’t fill back in.
Carefully flip the pancakes using a wide spatula—heart shapes can be more delicate than round pancakes, especially at the point. Cook for another 1-2 minutes on the second side until golden brown.
The first side always looks prettier, so if you’re stacking pancakes, place them first-side-up for the best presentation.
Step 7: Keep Warm and Serve with Love
Transfer cooked Heart-Shaped Pancakes to a baking sheet in a 200°F (95°C) oven to keep warm while you finish the batch. Place parchment paper between layers to prevent sticking.
Arrange pancakes on plates or a serving platter. Get creative with your presentation:
- Stack three pancakes with berries between each layer
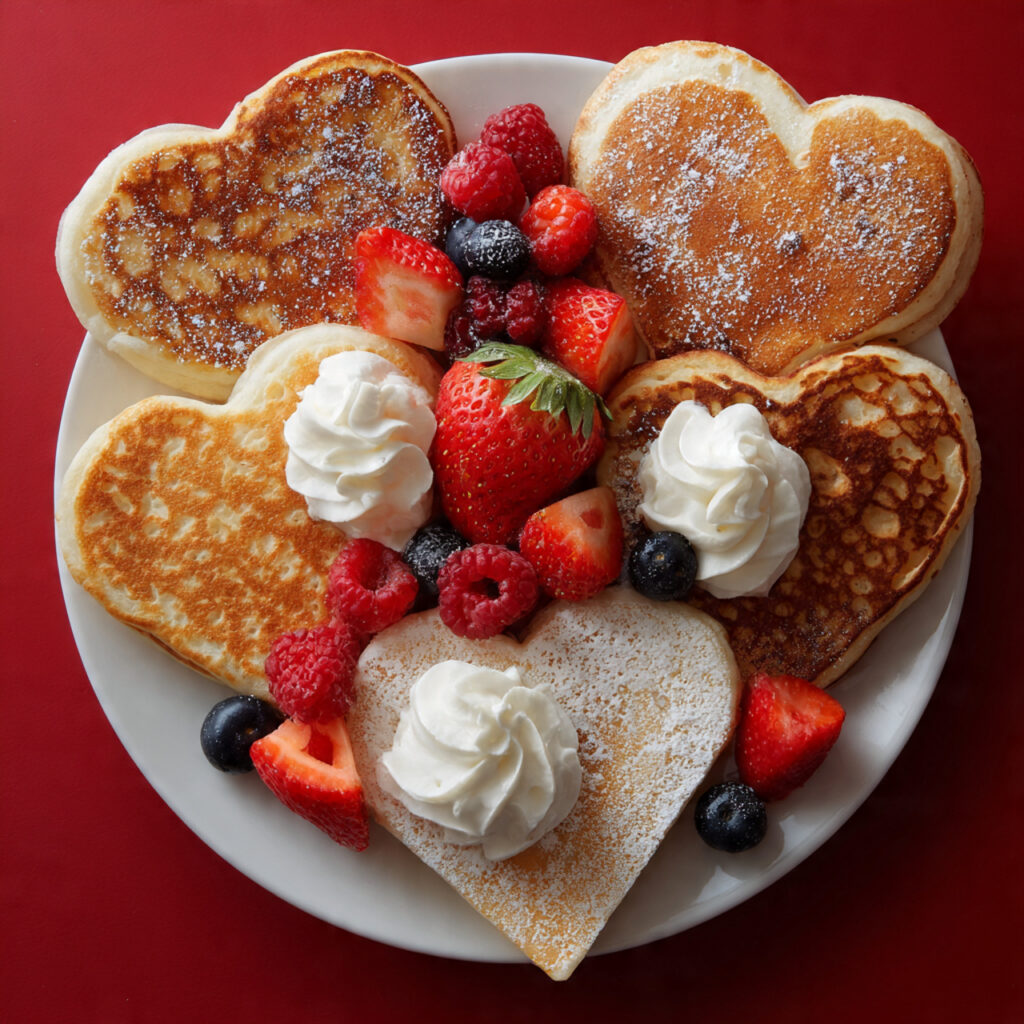
- Arrange overlapping hearts in a fan pattern
- Create a “bouquet” of heart pancakes with berry “flowers”
- Top with a dusting of powdered sugar using a heart-shaped stencil
Serve immediately with warm maple syrup and your choice of toppings. The magic is in the moment—pancakes are always best fresh off the griddle!
Pro Tips for Perfect Heart-Shaped Pancakes
Master the Temperature: Medium heat is crucial. Too hot and your pancakes burn on the outside while staying raw inside; too cool and they become tough and pale. Adjust as needed between batches.
Don’t Press Down: Resist the urge to press pancakes with your spatula while cooking. This squeezes out air pockets and creates dense, flat pancakes instead of fluffy ones.
Flip Only Once: Multiple flips make pancakes tough and less attractive. Wait for those telltale bubbles, flip confidently once, and leave them alone.
Grease Between Batches: Even non-stick surfaces need a light coating before each batch. Use a paper towel to spread a thin layer of butter, wiping away excess.
Consistent Size Matters: Try to make your pancakes roughly the same size so they cook evenly. Use a measuring cup (¼ cup for medium pancakes) for consistency.
The Toothpick Test: If you’re unsure whether a thicker pancake is done, insert a toothpick into the center. It should come out clean or with just a few moist crumbs.
Freeze for Later: Make a double batch and freeze extras in a single layer, then transfer to freezer bags. Toast straight from frozen for quick weekday breakfasts.
Add Mix-Ins Strategically: If adding chocolate chips or berries, sprinkle them onto the pancakes immediately after pouring the batter, before bubbles form.
Room Temperature Everything: Cold ingredients straight from the fridge create dense pancakes. Plan ahead and let everything warm up.
Use Fresh Leavening: Check your baking powder’s expiration date. Old baking powder won’t create the lift you need for fluffy pancakes.
Common Mistakes to Avoid
Overmixing the Batter: This is the number one pancake destroyer. Those lumps are your friends—they disappear during cooking, leaving you with tender pancakes. Overmixed batter creates rubbery, tough results.
Using Old Baking Powder or Baking Soda: Leavening agents lose potency over time. If your pancakes aren’t fluffy, expired ingredients are often the culprit. Test baking powder by adding it to hot water—it should fizz vigorously.
Skipping the Rest: Letting batter rest for 5-10 minutes allows the flour to fully absorb liquid and activates the leavening. Impatient cooks end up with dense pancakes.
Cooking on High Heat: This burns the outside before the inside cooks through. Medium heat gives you even cooking and beautiful golden color.
Flipping Too Early: If you flip before bubbles form and edges set, your heart shape will fall apart. Patience is essential here.
Making Pancakes Too Thick: Heart shapes work best when they’re not too thick. Aim for pancakes about ½ inch thick for the most attractive results and even cooking.
Using a Cold Pan: Always preheat your griddle properly. A properly heated surface creates that desirable crispy edge while keeping the interior fluffy.
Crowding the Griddle: Leave space between pancakes so they’re easy to flip and don’t merge together accidentally. This is especially important for heart shapes.
Not Adjusting Heat: Your first pancake is a test run. If it’s too dark or too light, adjust your heat before continuing with the rest.

Storage and Serving Suggestions
Immediate Serving: Heart-Shaped Pancakes taste best fresh off the griddle when they’re at peak fluffiness and have that perfect crispy edge.
Keeping Warm for a Crowd: Place cooked pancakes on a baking sheet in a 200°F (95°C) oven. Layer parchment paper between pancakes to prevent sticking. They’ll stay warm and fluffy for up to 30 minutes.
Refrigerator Storage: Let pancakes cool completely, then stack with parchment paper between each one. Store in an airtight container or zip-top bag in the refrigerator for up to 4 days.
Freezer Storage: Heart-Shaped Pancakes freeze beautifully! Cool completely, then freeze in a single layer on a baking sheet for 1-2 hours. Once solid, transfer to a freezer bag, separating layers with parchment paper. Freeze for up to 2 months.
Reheating Methods:
- Microwave: Place 2-3 pancakes on a microwave-safe plate, cover with a damp paper towel, and heat for 20-30 seconds per pancake
- Toaster: Works great for frozen pancakes! Toast on medium setting until heated through and slightly crispy
- Oven: Arrange pancakes on a baking sheet, cover with foil, and warm at 350°F (175°C) for 5-10 minutes
- Skillet: Heat a dry skillet over medium-low heat and warm pancakes for 1 minute per side
Make-Ahead Strategy:
- Batter: Mix dry ingredients up to 1 week ahead and store in an airtight container. Mix wet ingredients the night before and refrigerate. Combine the morning of cooking
- Full pancakes: Make pancakes the night before, refrigerate, and reheat in the morning for stress-free breakfast
- Freeze and reheat: Make a big batch on the weekend for quick weekday breakfasts
Creative Serving Ideas:
- Pancake Tower: Stack 3-4 heart pancakes with whipped cream and berries between layers
- Pancake Kebabs: Thread mini heart pancakes on wooden skewers with strawberries and banana slices
- Pancake Sandwiches: Use two pancakes with Nutella and banana filling, or cream cheese and berries
- Breakfast Board: Arrange heart pancakes on a large platter with bowls of various toppings for DIY decorating
- Pancake Parfaits: Layer cubed pancakes with yogurt and fruit in clear glasses
- French Toast Style: Dip leftover pancakes in egg mixture and re-cook for a delicious twist
Topping Bar Ideas: Create a toppings station with small bowls of:
- Multiple syrup flavors (maple, berry, butter pecan)
- Fresh fruit selections
- Whipped cream or whipped coconut cream
- Chocolate and caramel sauces
- Nuts and seeds
- Yogurt options
- Spreads like Nutella, peanut butter, or jam
Beverage Pairings:
- Hot chocolate with marshmallows
- Fresh-squeezed orange juice
- Strawberry smoothies
- Coffee or cappuccino
- Hot tea with honey
- Milk (regular, almond, or oat)
Frequently Asked Questions (FAQ)
Q: Can I make Heart-Shaped Pancakes without a cookie cutter? A: Absolutely! The squeeze bottle method works wonderfully and gives you the most control. Transfer your batter to a squeeze bottle or a zip-top bag with a small corner cut off. Pipe heart shapes directly onto the griddle—start with a V at the top, curve down both sides, and meet at a point at the bottom. Fill in the outline with more batter. This technique takes a bit of practice, but you’ll get the hang of it quickly.
Q: Why are my pancakes flat and not fluffy? A: Several factors can cause flat pancakes. Most commonly, it’s expired baking powder or baking soda—check those dates! Overmixing the batter also destroys the air pockets that create fluffiness. Additionally, make sure you’re not cooking on heat that’s too low, which prevents proper rising. Finally, letting batter sit too long (more than 30 minutes) allows the leavening to lose effectiveness.
Q: Can I make the batter the night before? A: It’s better to mix batter fresh for optimal fluffiness, but you can prep smart. Mix your dry ingredients up to a week ahead and store in an airtight container. Mix wet ingredients (except baking soda) the night before and refrigerate separately. Combine them in the morning, add the baking soda, and cook immediately for best results.
Q: How do I make Heart-Shaped Pancakes gluten-free? A: Substitute the all-purpose flour with a 1:1 gluten-free flour blend designed for baking (like Bob’s Red Mill or King Arthur Measure for Measure). Add ½ teaspoon xanthan gum if your blend doesn’t already include it. The texture will be slightly different but still delicious. Let the batter rest for 10 minutes before cooking to allow the flour to fully hydrate.
Q: My heart shapes don’t look perfect. What am I doing wrong? A: Perfect symmetry takes practice, so don’t stress! For cleaner shapes, make sure your batter is the right consistency—too thin and it spreads too much, too thick and it won’t flow smoothly. The cookie cutter method is most forgiving for beginners. Also, make sure your griddle is the right temperature; batter that spreads too quickly indicates the surface is too hot.
Q: Can I make these pancakes vegan? A: Yes! Replace the buttermilk with non-dairy milk (almond, soy, or oat) mixed with 2 tablespoons lemon juice or vinegar. Use flax eggs (2 tablespoons ground flaxseed + 6 tablespoons water, let sit 5 minutes) instead of regular eggs. Replace butter with melted coconut oil or vegan butter. The pancakes will be slightly less fluffy but still delicious.
Q: How do I prevent my pancakes from sticking to the griddle? A: This usually indicates insufficient greasing or heat that’s too low. Make sure to lightly grease your griddle before each batch, even if it’s non-stick. Butter works well but can burn at high heat, so consider using cooking spray or a light layer of neutral oil. Also ensure your griddle is properly preheated—the batter should sizzle gently when it hits the surface.
Q: Can I add chocolate chips or blueberries to Heart-Shaped Pancakes? A: Definitely! After pouring each heart-shaped pancake onto the griddle, immediately sprinkle your add-ins onto the uncooked surface before bubbles form. This embeds them into the batter. For chocolate chips, mini chips work better than regular-sized ones. Pat blueberries dry before adding to prevent excess moisture.
Q: What’s the best way to flip delicate heart-shaped pancakes? A: Use a large, flat spatula and wait until you see bubbles across the entire surface and the edges look completely set and dry. Slide the spatula fully under the pancake in one confident motion, getting under the entire shape including the point. Flip with a quick wrist action. If your hearts are falling apart, they’re either too thin or you’re flipping too early.

Conclusion: More Than Just Breakfast
Heart-Shaped Pancakes represent something beautiful about cooking for the people we love—the willingness to put in that extra bit of effort to create something special. While round pancakes taste just as good, taking the time to shape them into hearts sends a clear message: you’re worth the extra care.
These pancakes work their magic beyond Valentine’s Day. Imagine serving them on a regular Tuesday morning just because, or making them for your kids before school to brighten their day. They’re perfect for celebrating milestones, cheering up someone having a rough week, or marking family traditions around birthdays and anniversaries.
The beauty of this recipe lies in its simplicity. You don’t need expensive ingredients, fancy equipment, or professional training. With basic pantry staples and a little creativity, you can create restaurant-quality pancakes that look like they came from a gourmet brunch spot. The techniques you learn here—proper mixing, heat management, timing—transfer to countless other recipes, making you a better cook overall.
Don’t worry about achieving perfection on your first attempt. Even slightly lopsided hearts taste incredible, and honestly, those imperfections add character and authenticity. The flour on your countertop, the laughter while shaping hearts, the anticipation of that first bite—these moments create memories more valuable than geometric precision.
Consider starting a Heart-Shaped Pancakes tradition in your household. Maybe they become your Valentine’s Day breakfast ritual, your weekend special, or your way of celebrating each family member’s special day. Food traditions create connection and give us something to look forward to together.
The versatility of pancakes means endless experimentation. Once you’ve mastered the basic recipe, try adding cinnamon to the batter, experimenting with whole wheat flour, creating rainbow-colored hearts, or developing signature topping combinations. Each variation keeps breakfast interesting while maintaining that loving heart shape.
Remember that cooking for others is an act of love itself. Whether you’re making Heart-Shaped Pancakes for your partner, your children, your parents, or your friends, you’re giving the gift of time, care, and nourishment. In our fast-paced world where convenience often wins, choosing to cook from scratch shows genuine thoughtfulness.
The best part? Heart-Shaped Pancakes are genuinely fun to make. They invite creativity, encourage helping hands in the kitchen, and naturally bring smiles. Kids especially love getting involved—they can help pour batter, arrange toppings, and feel proud of what they’ve created.
So heat up that griddle, whisk together your batter, and prepare to fill your kitchen with the irresistible aroma of fresh pancakes. Whether this becomes your signature breakfast move or simply adds joy to one special morning, you’re about to discover that the best breakfasts truly do come from the heart.
Happy cooking, and may your Heart-Shaped Pancakes be as warm and wonderful as the love you’re expressing through them. Don’t forget to take a photo before everyone digs in—these moments are precious! Now grab that spatula and start flipping some love onto plates, one heart-shaped pancake at a time.
Print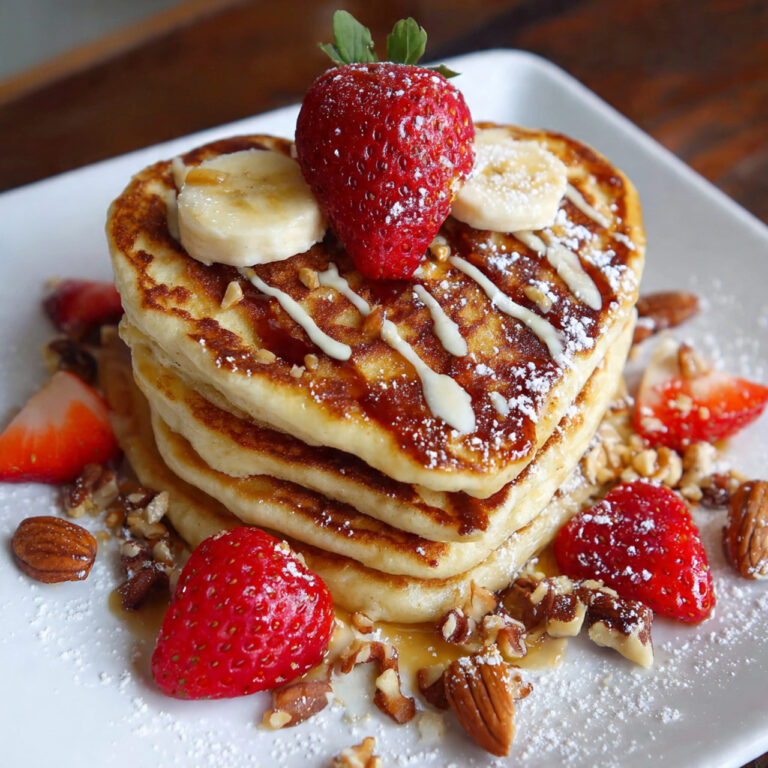
Heart-Shaped Pancakes: 10 Brilliant Secrets for the Fluffiest Valentine’s Breakfast (2025)
Fluffy, golden Heart-Shaped Pancakes made with buttermilk for extra tenderness and perfect rise. These adorable pancakes are ideal for Valentine’s Day breakfast, Mother’s Day brunch, or any special morning when you want to show love through food.
- Total Time: 30 minutes
- Yield: 12 medium heart-shaped pancakes (serves 4-6)
Ingredients
- Dry ingredients: all-purpose flour, sugar, baking powder, baking soda, salt
- Wet ingredients: buttermilk, eggs, melted butter, vanilla extract, optional food coloring
- For cooking: butter or cooking spray
- Toppings: maple syrup, fresh berries, whipped cream, powdered sugar, chocolate chips
Instructions
Whisk together dry ingredients in a large bowl. In separate bowl, combine wet ingredients. Pour wet into dry and gently fold until just combined with small lumps remaining. Let batter rest 5-10 minutes. Heat griddle to medium and lightly grease. Pour or pipe heart shapes onto griddle. Cook until bubbles form and edges set, about 2-3 minutes. Flip and cook 1-2 minutes more until golden. Serve immediately with desired toppings.
Notes
Don’t overmix batter—lumps are good! Batter should be thick, not runny. Let batter rest before cooking for fluffiest results. Use fresh baking powder for best rise. Room temperature ingredients mix more smoothly. First pancake is always a test—adjust heat as needed. Freeze extras for quick weekday breakfasts.
- Prep Time: 10 minutes
- Cook Time: 20 minutes
- Category: Dessert . Breakfast
- Method: Griddle cooking
- Cuisine: American
- Diet: Gluten Free


3 Comments
[…] cream cheese glaze that melts into every crevice. These aren’t your average Sunday morning waffles; they’re the kind of breakfast that makes ordinary days feel like celebrations and turns […]
[…] Lava Cake is the ultimate showstopper dessert that never fails to impress with its dramatic molten chocolate center that flows like liquid gold […]
[…] Parmesan Hearts take the beloved Italian-American classic and transform it into something truly special—tender chicken cutlets shaped into hearts, […]
Comments are closed.