

Chocolate Raspberry Cake Recipe: 7 Secrets to Irresistible Bakery-Perfect Results
Introduction
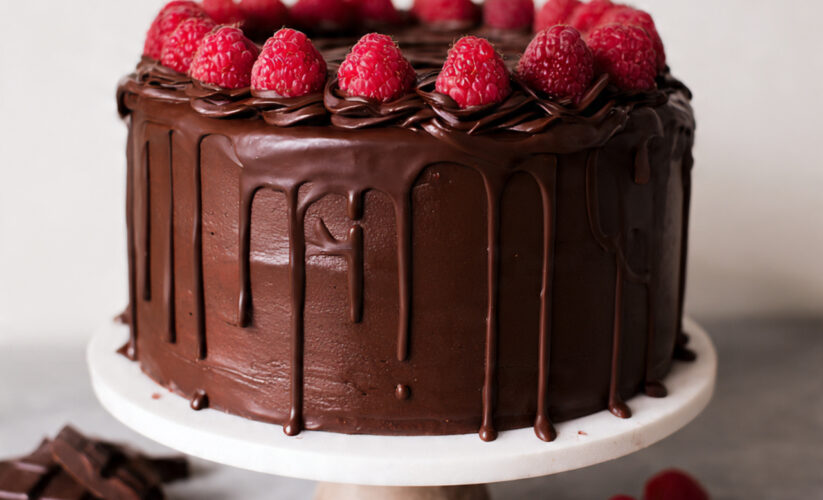
Chocolate Raspberry Cake is the ultimate showstopper dessert that combines rich, velvety chocolate layers with the bright, tangy sweetness of fresh raspberries. This classic flavor pairing has graced countless celebration tables, from intimate dinner parties to grand wedding receptions, and for good reason. The deep cocoa notes perfectly balance the fruit’s natural acidity, creating a harmonious taste experience that feels both indulgent and refreshing.
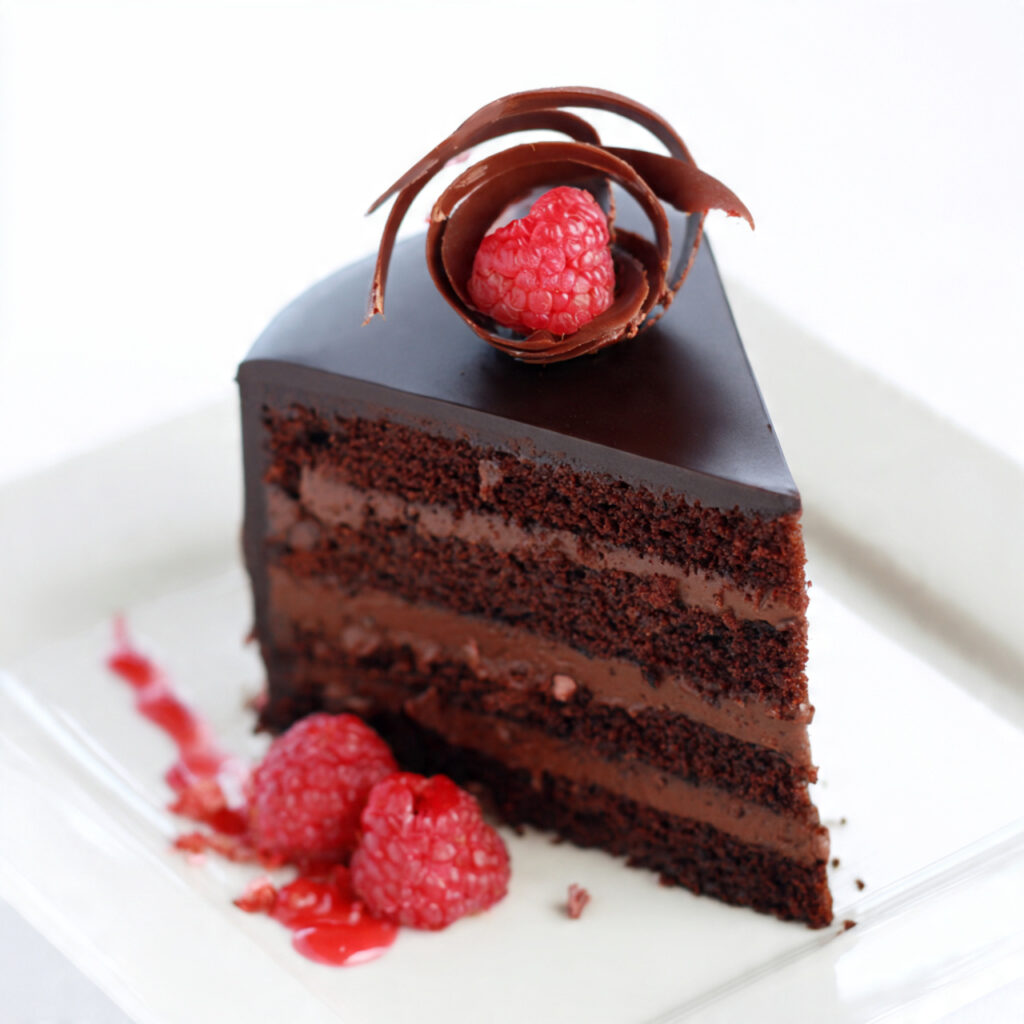
What makes this particular chocolate raspberry cake recipe truly special is its versatility and approachable technique. Whether you’re a seasoned baker or just beginning your culinary journey, this recipe breaks down each step into manageable tasks that yield professional-quality results. The moist chocolate cake layers practically melt on your tongue, while the raspberry component adds both visual appeal and a burst of flavor that cuts through the richness.
I’ve spent years perfecting this recipe, testing different ratios, techniques, and ingredient combinations. What you’ll find here is a tried-and-true method that consistently produces a stunning dessert worthy of any special occasion. This isn’t just another chocolate cake with some berries thrown on top. This is a thoughtfully crafted recipe where every element works in concert to create something truly memorable.
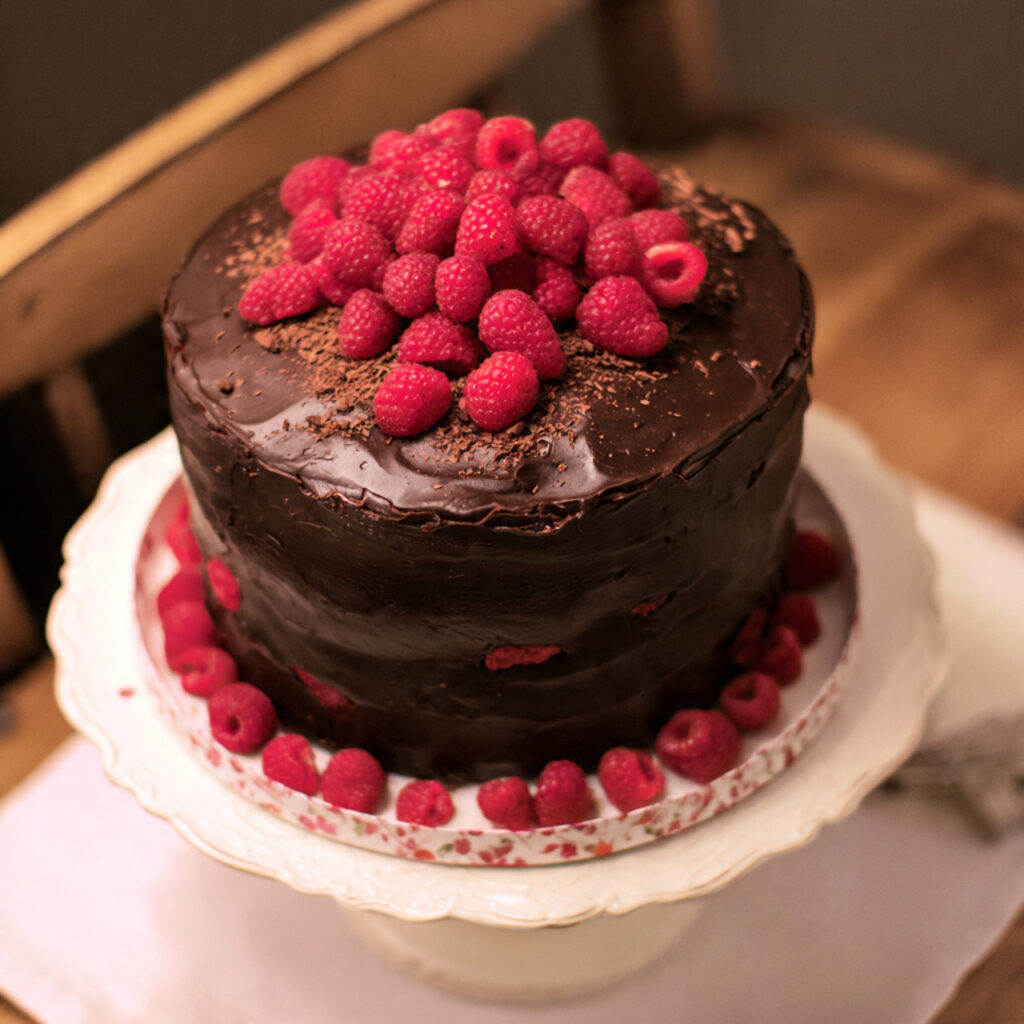
The beauty of this chocolate raspberry cake lies not only in its taste but also in its presentation. The deep brown layers contrasted with vibrant red raspberries create an Instagram-worthy dessert that will have your guests reaching for their phones before their forks. But don’t let the elegant appearance intimidate you—this recipe is surprisingly straightforward and forgiving.
Why This Chocolate Raspberry Cake Recipe Works
Before we dive into the ingredients and instructions, let’s talk about what sets this recipe apart. The chocolate cake base uses both cocoa powder and melted chocolate for maximum depth of flavor. The addition of buttermilk keeps the crumb incredibly tender and moist, while a touch of espresso powder amplifies the chocolate notes without adding any coffee flavor.
The raspberry element works on multiple levels—fresh raspberries folded into a silky buttercream, a layer of raspberry preserves for intensity, and whole berries for garnish. This three-pronged approach ensures you get that beautiful raspberry flavor in every single bite, not just occasional pockets.
Ingredients
For the Chocolate Cake Layers:
- 2 cups all-purpose flour, spooned and leveled
- 2 cups granulated sugar
- ¾ cup unsweetened cocoa powder, high-quality Dutch-process recommended
- 2 teaspoons baking soda
- 1 teaspoon baking powder
- 1 teaspoon salt
- 1 teaspoon instant espresso powder
- 2 large eggs, room temperature
- 1 cup buttermilk, room temperature
- 1 cup hot strong coffee (or hot water)
- ½ cup vegetable oil
- 2 teaspoons pure vanilla extract
- 4 ounces dark chocolate, melted and slightly cooled
For the Raspberry Buttercream:
- 1½ cups unsalted butter, softened to room temperature
- 5 cups confectioners’ sugar, sifted
- ⅓ cup heavy cream
- 2 teaspoons vanilla extract
- ¼ teaspoon salt
- 1 cup fresh raspberries, pureed and strained to remove seeds
- 2-3 drops pink or red food coloring (optional)
For Assembly and Decoration:
- ½ cup seedless raspberry preserves
- 2 cups fresh raspberries
- Dark chocolate shavings or curls
- Fresh mint leaves (optional)
Step-by-Step Instructions
Preparing the Chocolate Cake Layers
Step 1: Prepare Your Workspace
Preheat your oven to 350°F (175°C). Grease three 8-inch round cake pans with butter or cooking spray, then line the bottoms with parchment paper circles. Lightly dust with cocoa powder, tapping out any excess. This preparation is crucial for ensuring your cakes release cleanly from the pans.
Step 2: Mix the Dry Ingredients
In a large mixing bowl, whisk together the flour, sugar, cocoa powder, baking soda, baking powder, salt, and espresso powder. Make sure there are no lumps in the cocoa powder, as these can create dry pockets in your finished cake. Whisking for a full minute ensures everything is evenly distributed.
Step 3: Combine Wet Ingredients
In a separate medium bowl, whisk together the eggs, buttermilk, vegetable oil, and vanilla extract until smooth and well combined. The mixture should look homogeneous with no streaks of egg yolk visible.
Step 4: Build the Batter
Add the wet ingredients to the dry ingredients and mix on medium speed with an electric mixer for about 2 minutes. The batter will be thick at this point. Now slowly pour in the hot coffee while mixing on low speed. The batter will become quite thin—this is exactly what you want. Finally, fold in the melted chocolate until fully incorporated.
Step 5: Bake the Cakes
Divide the batter evenly among your three prepared pans, using a kitchen scale for precision if you have one. Each pan should contain approximately 1¾ cups of batter. Bake for 25-30 minutes, or until a toothpick inserted into the center comes out with just a few moist crumbs. The tops should spring back when gently pressed.
Step 6: Cool Properly
Let the cakes cool in their pans for 10 minutes, then carefully turn them out onto wire cooling racks. Remove the parchment paper and allow the cakes to cool completely before frosting, at least 1 hour. Attempting to frost warm cakes will result in melted, sliding frosting.
Making the Raspberry Buttercream
Step 7: Prepare the Raspberry Puree
Place fresh raspberries in a blender or food processor and blend until completely smooth. Strain through a fine-mesh sieve to remove all seeds, pressing with the back of a spoon to extract as much liquid as possible. You should end up with about ½ cup of seedless puree. Set aside to cool completely.
Step 8: Cream the Butter
In a large bowl, beat the softened butter with an electric mixer on medium-high speed for 3-4 minutes until light and fluffy. The butter should be noticeably paler in color and have increased in volume. This step incorporates air and creates a lighter buttercream.
Step 9: Add Sugar and Flavorings
Reduce the mixer speed to low and gradually add the confectioners’ sugar, one cup at a time. Once all the sugar is incorporated, add the heavy cream, vanilla extract, and salt. Increase speed to medium-high and beat for 3-4 minutes until smooth and creamy.
Step 10: Incorporate Raspberry Puree
Add the cooled raspberry puree to the buttercream and beat until fully combined and the frosting is a uniform pink color. If desired, add food coloring for a more vibrant hue. If the frosting seems too thin, refrigerate for 15-20 minutes to firm up slightly.
Assembling Your Chocolate Raspberry Cake
Step 11: Level Your Cakes
Using a long serrated knife or cake leveler, trim the domed tops off each cake layer to create flat, even surfaces. This ensures your finished cake will stack neatly and won’t lean.
Step 12: First Layer
Place one cake layer on your serving plate or cake stand. Spread a thin layer of raspberry preserves over the top, leaving a ¼-inch border around the edge. Then spread about 1 cup of raspberry buttercream over the preserves.
Step 13: Add Second Layer
Place the second cake layer on top, pressing down gently to adhere. Repeat the process with preserves and buttercream.
Step 14: Top Layer and Crumb Coat
Add the final cake layer. Apply a very thin layer of buttercream all over the cake—this is your crumb coat. It will trap any loose crumbs and create a smooth base for your final frosting. Refrigerate the cake for 30 minutes to set the crumb coat.
Step 15: Final Frosting
Apply the remaining buttercream in a thick, even layer over the entire cake. Use an offset spatula or bench scraper to smooth the sides and top. You can create swirls, keep it smooth, or use any decorative technique you prefer.
Step 16: Decorate
Arrange fresh raspberries on top of the cake in your desired pattern. Add chocolate shavings or curls for extra elegance. Garnish with mint leaves if using. Refrigerate until ready to serve.
Pro Tips for the Perfect Chocolate Raspberry Cake
Use Room Temperature Ingredients
This cannot be stressed enough. Room temperature eggs, buttermilk, and butter incorporate much more smoothly into batters and frostings, creating better texture and structure. Plan ahead and set out your ingredients 1-2 hours before baking.
Don’t Skip the Coffee
Even if you’re not a coffee drinker, don’t omit the coffee from this recipe. It doesn’t make the cake taste like coffee—instead, it acts as a flavor enhancer that makes the chocolate taste richer and more complex. If you absolutely must substitute, use hot water, but the results won’t be quite as spectacular.
Invest in Quality Cocoa
The cocoa powder is a star ingredient here, so quality matters. Dutch-process cocoa gives a deeper, more complex chocolate flavor with less acidity than natural cocoa. Brands like Valrhona, Guittard, or even Hershey’s Special Dark will elevate your results.
Strain Your Raspberry Puree Thoroughly
Those tiny raspberry seeds can create an unpleasant grainy texture in your buttercream. Take the time to press every bit of liquid through that sieve. Your effort will be rewarded with silky-smooth frosting.
Chill Between Layers
While it might seem tedious, refrigerating your cake after the crumb coat makes the final frosting process infinitely easier. The firm crumb coat prevents the layers from sliding and keeps crumbs from mixing into your beautiful final layer.
Make It Ahead
The cake layers can be baked up to two days in advance. Wrap them tightly in plastic wrap and store at room temperature. You can also freeze unfrosted layers for up to three months. The buttercream can be made a day ahead and stored in the refrigerator, then re-whipped before using.
Control Your Oven Temperature
Invest in an oven thermometer if you don’t have one. Many home ovens run hot or cold, which can dramatically affect baking times and results. Knowing your oven’s true temperature helps you adjust accordingly.
Common Mistakes to Avoid
Overmixing the Batter
Once you add the wet ingredients to the dry, mix just until combined. Overmixing develops the gluten in the flour, resulting in tough, dense cake instead of tender, fluffy layers. A few small lumps are perfectly fine.
Opening the Oven Door Too Early
Resist the temptation to check on your cakes before the 20-minute mark. Opening the oven releases heat and can cause cakes to sink in the middle. Use your oven light to peek if you must.
Frosting Warm Cakes
I mentioned this earlier, but it bears repeating. Warm cakes will melt your buttercream, causing it to slide right off. Practice patience and let those layers cool completely. If you’re in a hurry, you can refrigerate cooled (but not hot) cakes to speed up the process.
Too Much Raspberry Preserves
While the preserves add wonderful flavor and moisture, using too much creates a slippery layer that can cause your cake to slide. Stick to the recommended ½ cup total, divided between the two filling layers.
Not Softening Butter Properly
Butter for buttercream should be soft but still hold its shape—it should leave a slight indent when pressed but not be greasy or melting. If your kitchen is cold, cut the butter into chunks to help it soften evenly. If you’ve over-softened it, pop it in the fridge for 10 minutes to firm back up.
Using Old Baking Powder or Baking Soda
These leavening agents lose potency over time. If your baking powder or baking soda is more than six months old, do the freshness test. For baking powder, mix a teaspoon with hot water—it should fizz vigorously. For baking soda, mix with vinegar and look for bubbling. If they don’t react strongly, replace them.
Skipping the Parchment Paper
Even in a well-greased pan, cakes can stick. That circle of parchment paper on the bottom is insurance against disaster. Don’t skip it.
Storage and Serving Suggestions
Room Temperature Storage
If you’ll be serving your chocolate raspberry cake within 2 days, you can store it at room temperature. Cover it loosely with a cake dome or inverted large bowl. The buttercream creates a protective seal that keeps the cake moist.
Refrigerator Storage
For longer storage or in warm weather, refrigerate your cake. The buttercream contains dairy and fresh raspberries, so refrigeration is necessary beyond two days. Store in an airtight container or covered with plastic wrap for up to 5 days. Before serving, let the cake sit at room temperature for 30-45 minutes to take the chill off and allow the flavors to fully develop.
Freezing Instructions
Chocolate raspberry cake freezes beautifully, making it perfect for advance preparation. Once fully assembled and decorated, freeze the cake uncovered for 1 hour to firm up the frosting. Then wrap tightly in plastic wrap followed by aluminum foil. Freeze for up to 3 months. Thaw overnight in the refrigerator, still wrapped, then bring to room temperature before serving.
Serving Suggestions
This cake is stunning on its own, but here are some ways to elevate the presentation even further:
- Serve each slice with a dollop of fresh whipped cream or vanilla ice cream
- Drizzle plates with raspberry coulis before placing cake slices
- Add a dusting of powdered sugar just before serving for an elegant finish
- Pair with a glass of dessert wine, champagne, or raspberry liqueur
- Serve alongside fresh raspberry compote for extra fruit flavor
Portion Sizes
An 8-inch three-layer cake typically yields 12-16 servings, depending on how you slice it. For a party, cut smaller slices as this is quite a rich dessert. Use a sharp knife dipped in hot water and wiped clean between cuts for neat slices.
Frequently Asked Questions
Can I make this chocolate raspberry cake with frozen raspberries?
Yes, you can use frozen raspberries for the puree and filling, but fresh raspberries work best for decoration as they hold their shape better. If using frozen berries for the puree, thaw them completely and drain any excess liquid before blending. Keep in mind that frozen raspberries often release more liquid, so you may need to reduce the puree slightly by simmering it for a few minutes to concentrate the flavor.
Can I make this as a two-layer cake instead of three?
Absolutely. Simply divide the batter between two 9-inch pans instead of three 8-inch pans. Increase the baking time to 30-35 minutes. You’ll have one layer of filling instead of two, and you may have leftover frosting. The resulting cake will be slightly shorter but equally delicious.
What can I substitute for buttermilk?
If you don’t have buttermilk on hand, make a quick substitute by adding 1 tablespoon of white vinegar or lemon juice to a measuring cup, then filling to the 1-cup line with regular milk. Stir and let sit for 5 minutes before using. This creates the acidity needed for the recipe.
My buttercream is too thin. How do I fix it?
Thin buttercream usually means the butter was too warm or you added too much liquid. First, try refrigerating the frosting for 15-20 minutes, then re-whip. If it’s still too soft, gradually add more confectioners’ sugar, ¼ cup at a time, beating well after each addition. Conversely, if your buttercream is too thick, add more heavy cream one teaspoon at a time.
Can I use a different type of berry?
While raspberries provide the classic flavor, you can experiment with other berries. Strawberries, blackberries, or a mixed berry combination all work well. Adjust the amount of preserves and puree as needed based on the berry’s natural sweetness and liquid content. Blueberries tend to be less tart, so you might want to add a squeeze of lemon juice.
How do I prevent my cake layers from doming?
Doming happens when the edges of the cake set faster than the center. To minimize this, use baking strips (fabric strips soaked in water and wrapped around pans) to insulate the edges. Alternatively, reduce your oven temperature by 25°F and bake a bit longer. Some doming is normal and easily corrected by leveling.
Can I make this cake gluten-free?
Yes, substitute a 1:1 gluten-free baking flour blend for the all-purpose flour. Look for brands that include xanthan gum. The texture may be slightly different, but the cake will still be delicious. Make sure all other ingredients are certified gluten-free, including the cocoa powder and confectioners’ sugar.
Why did my cake sink in the middle?
Several factors can cause sinking: opening the oven door too early, underbaking, too much leavening, or expired leavening agents. Make sure you’re measuring ingredients accurately and your oven temperature is correct. The cake should spring back when gently touched and a toothpick should come out with moist crumbs but no wet batter.
Final Thoughts
This chocolate raspberry cake represents the pinnacle of what home baking can achieve. Yes, it requires time and attention to detail, but the results are absolutely worth every minute. The combination of deep chocolate flavor with bright, fruity raspberry notes creates a sophisticated dessert that feels special without being overly complicated.
Whether you’re celebrating a birthday, anniversary, holiday, or simply want to treat yourself to something extraordinary, this cake delivers on every level. The recipe is forgiving enough for beginners yet impressive enough to wow even the most discerning dessert lovers.
Remember, baking is as much about the journey as the destination. Take your time, follow the steps, and don’t be afraid to make this recipe your own by adjusting sweetness levels or decoration styles. Most importantly, enjoy the process and the delicious results.
Happy baking!
Print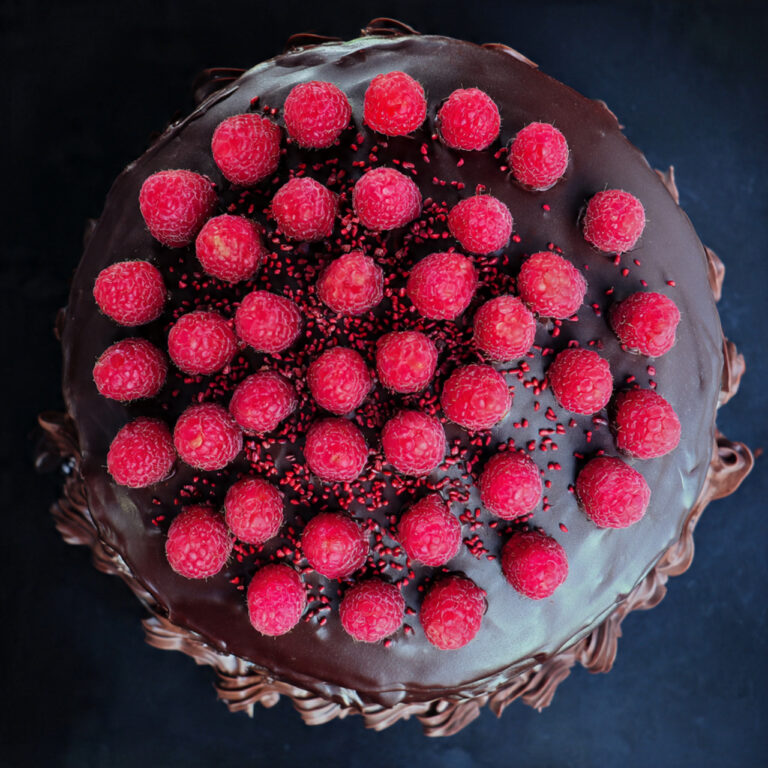
Chocolate Raspberry Cake Recipe: 7 Secrets to Irresistible Bakery-Perfect Results
A decadent three-layer chocolate cake filled with tangy raspberry buttercream and fresh berries, creating the perfect balance of rich chocolate and bright fruit flavors.
- Total Time: 1 hour 15 minutes
- Yield: 12-16 servings
Ingredients
- Chocolate cake layers: flour, sugar, cocoa powder, baking soda, baking powder, salt, espresso powder, eggs, buttermilk, coffee, oil, vanilla, dark chocolate
- Raspberry buttercream: butter, confectioners’ sugar, heavy cream, vanilla, salt, fresh raspberries
- Assembly: raspberry preserves, fresh raspberries, chocolate shavings
Instructions
Prepare three 8-inch chocolate cake layers, make raspberry buttercream, assemble with preserves and frosting between layers, crumb coat, final frost, and decorate with fresh berries and chocolate.
Notes
Cakes can be made ahead and frozen. Buttercream can be made 1 day in advance. Use quality cocoa and strain raspberry puree thoroughly for best results.
- Prep Time: 45 minutes
- Cook Time: 30 minutes
- Category: Desserts
- Method: Baking
- Cuisine: American
- Diet: Vegetarian


1 Comment
[…] bread is the crown jewel of Italian baking—a pillowy, olive oil-soaked flatbread with a golden, dimpled crust that’s both crispy and tender. When you […]
Comments are closed.