

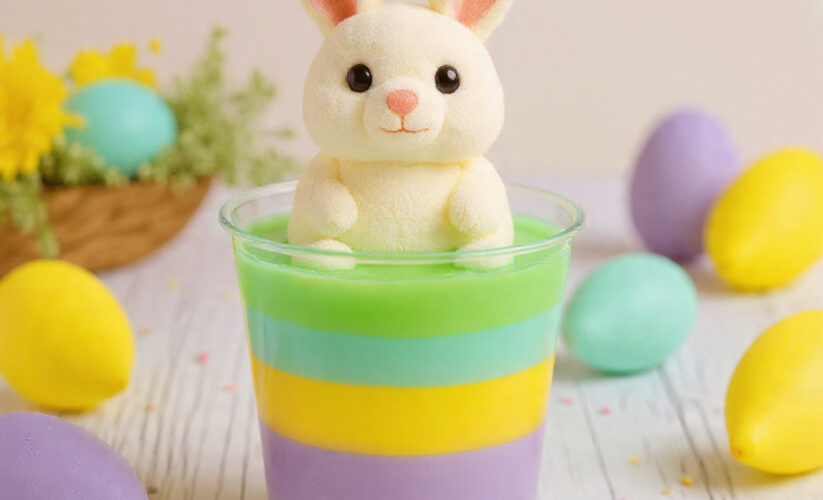
Easy Easter Pretzels Snack Recipe: A Festive Spring Treat That’s Ready in 15 Minutes

Introduction: The Perfect Easter Snack That Everyone Will Love
This Easy Easter Pretzels Snack Recipe is about to become your go-to spring treat for every Easter celebration, classroom party, and family gathering. If you’re searching for a colorful, delicious, and ridiculously simple snack that captures the joy of Easter in every bite, you’ve found it. These festive pretzels combine the perfect balance of sweet and salty, featuring creamy white chocolate, crunchy pretzel twists, and vibrant pastel candies that scream springtime celebration.
What makes this Easy Easter Pretzels Snack Recipe so special is its incredible versatility and minimal time commitment. Whether you’re a busy parent preparing for an Easter egg hunt, a teacher planning a classroom celebration, or simply someone who loves creating festive treats without spending hours in the kitchen, these Easter pretzels deliver maximum impact with minimal effort. The entire process takes just 15 minutes of active preparation time, and the results look like they came straight from a specialty bakery.
The beauty of this recipe lies in its foolproof nature. Unlike complicated Easter desserts that require precise temperatures, multiple steps, or advanced baking skills, these pretzels are nearly impossible to mess up. You’ll be melting chocolate, dipping pretzels, adding colorful toppings, and creating Easter magic before you know it. The combination of textures—from the crispy pretzel to the smooth chocolate coating to the candy crunch—creates an addictive snack that appeals to kids and adults alike.
Easter celebrations call for recipes that bring people together, and these pretzels do exactly that. They’re perfect for sharing, gifting, or serving at spring parties. You can customize them with your favorite Easter candies, adjust the sweetness level, and even create themed variations for different occasions throughout the spring season. From Easter baskets to dessert tables, these pretzels add a pop of color and a burst of flavor wherever they appear.
Why This Easy Easter Pretzels Snack Recipe Works Every Time
The success of this Easy Easter Pretzels Snack Recipe comes down to three key factors: simplicity, accessibility, and visual appeal. First, the recipe requires just four basic ingredients that you can find at any grocery store. There’s no hunting for specialty items or exotic ingredients—everything you need is readily available year-round, though Easter-themed candies make the most frequent appearances during spring.
Second, the preparation method is incredibly forgiving. Unlike temperamental chocolate work that requires precise temperature control, this recipe uses a straightforward melting method that works consistently. The white chocolate coating sets beautifully at room temperature, creating that satisfying snap when you bite into a pretzel. You don’t need any special equipment beyond a microwave or double boiler, a baking sheet, and parchment paper.
Third, the visual impact of these pretzels is undeniable. The bright pastel colors of Easter M&Ms and spring sprinkles against the white chocolate canvas create an Instagram-worthy snack that looks far more complicated than it actually is. When arranged on a platter or packaged in clear bags with ribbon, these pretzels become impressive gifts that show thoughtfulness and care.
The recipe also scales effortlessly. Making a small batch for your immediate family? Done. Need to prepare treats for an entire school class or church congregation? Simply multiply the ingredients and set up an assembly line. The pretzels store well, can be made days in advance, and transport easily, making them ideal for busy schedules and last-minute celebrations.
Ingredients You’ll Need for Perfect Easter Pretzels
Main Ingredients
Pretzel Twists (16 ounces): The foundation of this recipe, pretzel twists provide the perfect salty crunch that balances the sweetness of the chocolate coating. Choose regular twisted pretzels for the classic look, or experiment with pretzel rods, squares, or mini pretzels for different presentations. Look for fresh pretzels with no signs of staleness—they should snap crisply when broken.
White Chocolate Chips or Melting Wafers (24 ounces): The star coating that transforms ordinary pretzels into Easter treats. White chocolate melting wafers (also called candy melts or almond bark) work slightly better than chips because they melt more smoothly and set with a glossier finish. However, quality white chocolate chips work beautifully too. Avoid using white chocolate baking bars, as they can be more finicky to melt.
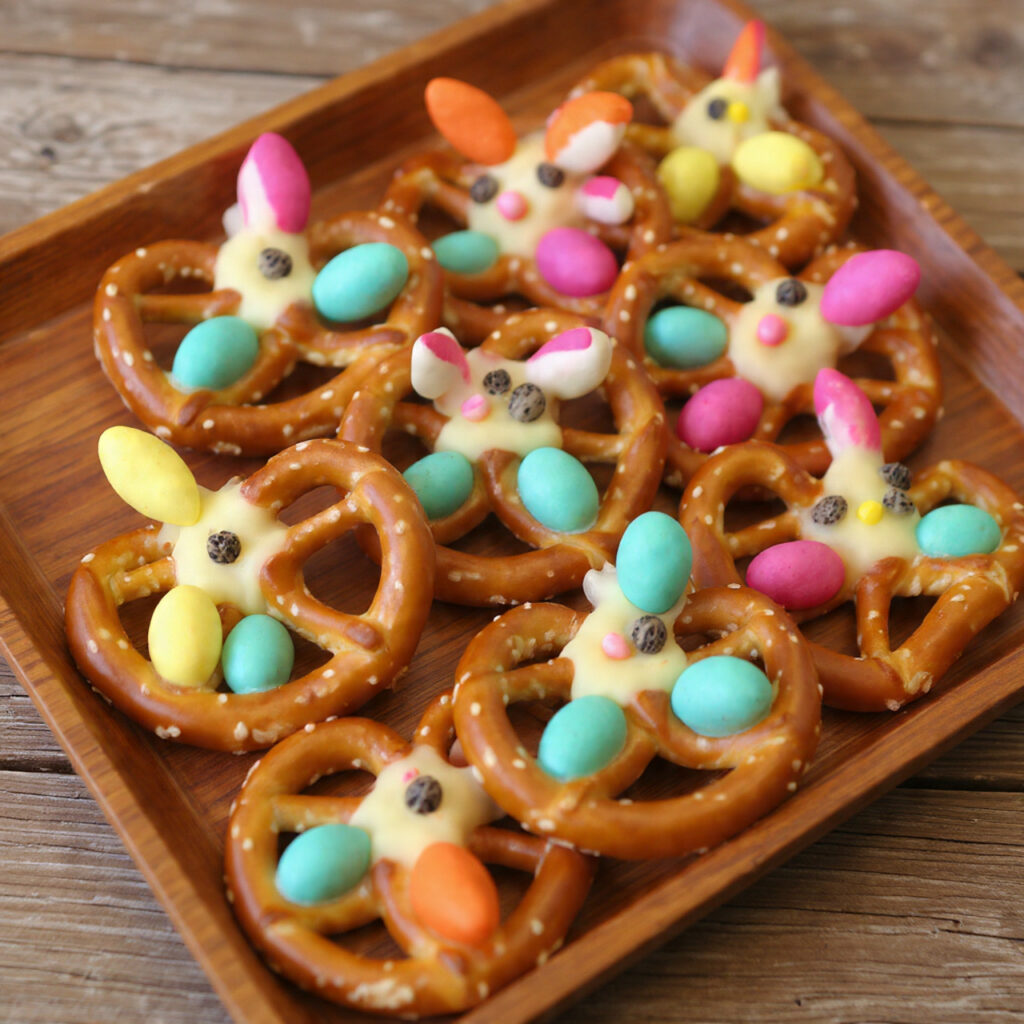
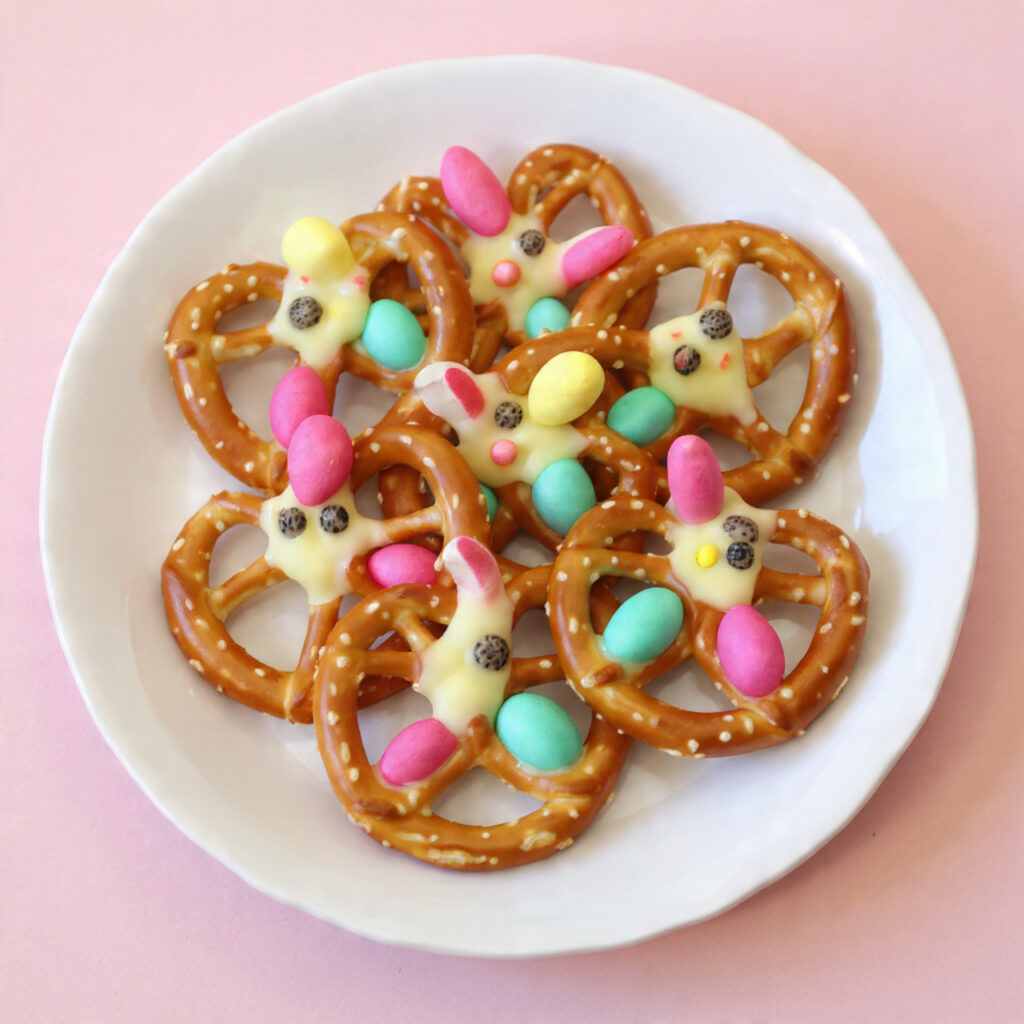
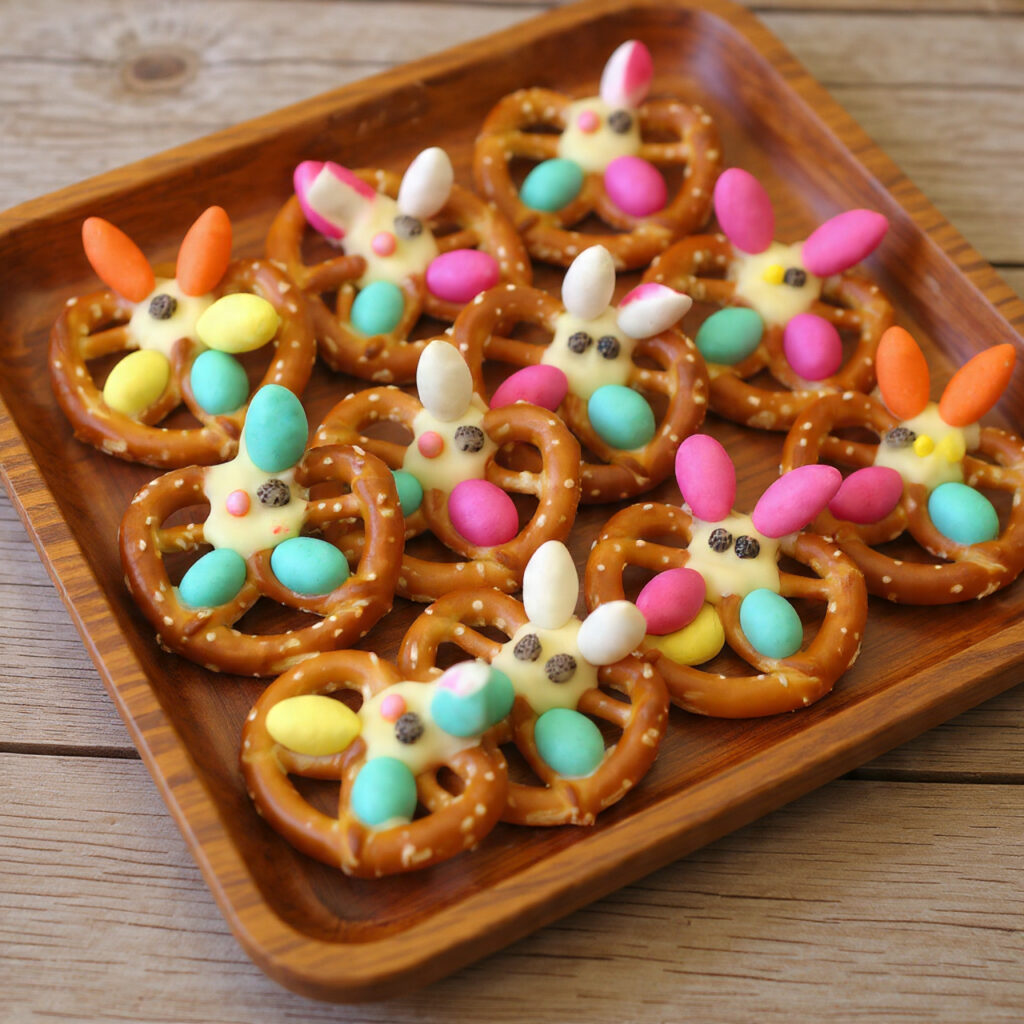
Pastel Easter M&Ms (1 cup): These colorful candies bring the Easter theme to life with their soft spring colors—pink, purple, yellow, green, and blue. The candy shell adds textural contrast and additional sweetness. You can substitute with other Easter candies like mini chocolate eggs, pastel-colored chocolate chips, or seasonal Reese’s Pieces.
Spring Sprinkles (½ cup): Choose pastel-colored jimmies, nonpareils, or themed sprinkle mixes featuring bunnies, eggs, and flowers. The sprinkles add visual interest and help create that professional, bakery-style appearance. Mix different types of sprinkles for more texture and color variation.
Optional Add-Ins and Variations
- Pink or green candy melts for color-drizzling decoration
- Coconut flakes for added texture and tropical flavor
- Crushed freeze-dried strawberries for a fruity twist
- Mini marshmallows for extra springtime sweetness
- Edible glitter for sparkling Easter glamour
- Pastel-colored sanding sugar for sophisticated shimmer
Step-by-Step Instructions for Making Easy Easter Pretzels
Step 1: Prepare Your Workspace
Begin by setting up your workstation for maximum efficiency. Line two large baking sheets with parchment paper or silicone baking mats. This prevents the chocolate-coated pretzels from sticking and makes cleanup incredibly easy. Arrange your workspace with the pretzels on one side, melted chocolate in the center, and toppings within easy reach. Having everything organized before you start dipping ensures smooth workflow and prevents the chocolate from hardening before you finish.
Place your Easter M&Ms in a small bowl and your sprinkles in another shallow dish. If you’re working with kids, this is a great time to set up individual stations where each person can have their own toppings and decorated pretzels. Protect your work surface with additional parchment paper if needed, as the dipping process can get delightfully messy.
Step 2: Melt the White Chocolate Perfectly
Pour your white chocolate chips or melting wafers into a microwave-safe bowl. Microwave on 50% power for 30-second intervals, stirring thoroughly between each interval. This gradual heating prevents scorching and ensures smooth, glossy chocolate. The white chocolate is ready when it’s completely melted and flows easily off your spoon without any lumps.
Alternatively, you can use a double boiler method. Fill a saucepan with two inches of water and bring to a gentle simmer. Place a heat-safe bowl over the saucepan (ensuring the bottom doesn’t touch the water) and add your white chocolate. Stir constantly until melted and smooth. The double boiler method offers more control and reduces the risk of overheating.
If your chocolate seems too thick for dipping, add one teaspoon of coconut oil or vegetable shortening and stir until incorporated. This thins the chocolate slightly and makes coating the pretzels easier while maintaining that beautiful sheen when set.
Step 3: Dip and Coat the Pretzels
Working with one pretzel at a time, hold it by one loop and dip it into the melted white chocolate. Submerge about three-quarters of the pretzel, leaving a small uncoated section for holding. Gently shake off excess chocolate by tapping your wrist against the edge of the bowl—this prevents pooling and creates a more refined appearance.
Place the coated pretzel on your prepared baking sheet. The chocolate will pool slightly around the base, which is perfectly normal and actually helps the pretzel stay in place. Continue dipping pretzels until you’ve coated your desired amount, spacing them about half an inch apart on the baking sheet to prevent them from touching as the chocolate sets.
Work relatively quickly during this process, as the white chocolate can harden as it cools. If you notice the chocolate in your bowl starting to set up, simply reheat it for 15-20 seconds in the microwave and stir until smooth again.
Step 4: Decorate with Easter Toppings
This is where the magic happens and your pretzels transform into Easter masterpieces. While the white chocolate is still wet (within 2-3 minutes of dipping), immediately add your toppings. Place 3-4 Easter M&Ms on each pretzel, pressing them gently into the chocolate so they adhere properly. The candies will sink slightly into the coating, which helps them stay put once everything hardens.
Next, grab a pinch of spring sprinkles and scatter them generously over each pretzel. Don’t be shy with the sprinkles—the more color, the more festive your pretzels will look. The sprinkles should stick easily to the wet chocolate. If you wait too long and the chocolate begins to harden, the toppings won’t adhere properly.
For an extra decorative touch, use a spoon to drizzle contrasting colored melted chocolate (pink, yellow, or green) in zigzag patterns across the pretzels. This professional finishing technique elevates the presentation and adds another layer of visual interest.
Step 5: Allow Pretzels to Set Completely
Let your decorated pretzels rest at room temperature for 30-45 minutes until the chocolate has completely hardened. You’ll know they’re ready when the white chocolate has lost its shine and feels firm to the touch. The pretzels should lift cleanly off the parchment paper without any chocolate sticking.
For faster setting, you can place the baking sheets in the refrigerator for 15-20 minutes. However, be aware that rapid temperature changes can sometimes cause chocolate to develop condensation or “sweat” when brought back to room temperature. If you choose this method, allow the pretzels to come back to room temperature gradually before packaging or serving.
Once fully set, your Easy Easter Pretzels Snack Recipe is complete and ready to serve, package, or store. The pretzels should maintain their crisp texture and the chocolate coating should have a satisfying snap when bitten.
Pro Tips for Perfect Easy Easter Pretzels Every Time
Temperature Control is Key
The temperature of your white chocolate directly impacts the final result. Overheated chocolate becomes thick, grainy, and difficult to work with, while chocolate that’s not warm enough won’t coat smoothly. Aim for a temperature around 90-95°F if you have a thermometer. The chocolate should feel warm but not hot when you touch the bowl.
If your chocolate seizes (becomes thick and clumpy), it’s usually due to water contamination. Even a tiny drop of water can cause this problem. To rescue seized chocolate, try stirring in a tablespoon of coconut oil or shortening. While the texture may not be perfect, it often becomes workable enough to complete your project.
Choose Quality Ingredients
Not all white chocolate is created equal. Higher-quality white chocolate or melting wafers contain more cocoa butter, which results in smoother melting, better flavor, and a more professional finish. Check the ingredient list—good white chocolate should list cocoa butter as one of the first ingredients, not vegetable oils.
Fresh pretzels make a noticeable difference too. Stale or soft pretzels won’t provide the satisfying crunch that makes this snack so addictive. If your pretzels seem slightly soft, you can crisp them up by spreading them on a baking sheet and warming them in a 250°F oven for 5 minutes, then cooling completely before dipping.
Work in Batches for Best Results
If you’re making a large quantity, work in batches of 10-12 pretzels at a time. Dip a batch, decorate them immediately, then move to the next batch. This ensures the chocolate on each pretzel is still wet when you add toppings, guaranteeing proper adhesion. Trying to dip too many pretzels before decorating often results in hardened chocolate that won’t hold the candies and sprinkles.
Create an Assembly Line for Efficiency
When making these pretzels with children or for large groups, set up an assembly line. Station one person at dipping, another at M&M placement, and a third at sprinkling. This systematic approach speeds up production and makes the process more enjoyable for everyone involved. Kids particularly love having their own specific job in the pretzel-making operation.
Customize for Dietary Needs
Create allergy-friendly versions by using dairy-free white chocolate chips and allergen-free candies. Many brands now offer vegan white chocolate that melts beautifully and tastes remarkably similar to traditional versions. For gluten-free guests, substitute gluten-free pretzels, which are widely available and work perfectly with this recipe.
Common Mistakes to Avoid When Making Easter Pretzels
Mistake #1: Overheating the Chocolate
The most frequent error when making this Easy Easter Pretzels Snack Recipe is scorching the white chocolate by using too high heat. White chocolate is more delicate than dark or milk chocolate and burns easily. Always use lower power settings (50% or less) in the microwave and heat in short intervals. Stirring between heating sessions distributes heat evenly and helps you monitor the melting progress. Remember, the chocolate continues melting from residual heat even after you stop heating it.
Mistake #2: Getting Water in the Chocolate
Water is chocolate’s enemy. Even a single drop can cause the chocolate to seize into an unusable, grainy mess. Ensure all bowls, spoons, and utensils are completely dry before using them with melted chocolate. This is especially important if you’re washing equipment between batches. Dry everything thoroughly with a clean kitchen towel before it comes into contact with the chocolate.
Mistake #3: Adding Toppings After Chocolate Has Set
Timing matters significantly in this recipe. The window for adding M&Ms and sprinkles is brief—approximately 2-3 minutes after dipping each pretzel. Once the white chocolate begins to harden, toppings won’t stick properly and will simply fall off. Decorate each pretzel immediately after dipping, or work with a partner where one person dips while another decorates.
Mistake #4: Using Stale or Poor-Quality Pretzels
The pretzel base is just as important as the chocolate coating. Stale, soft, or broken pretzels ruin the textural contrast that makes this snack so appealing. Always check the expiration date on your pretzel bag and test one before dipping your entire batch. The pretzel should be crispy and fresh-tasting, providing that satisfying crunch against the smooth chocolate.
Mistake #5: Storing Improperly
Storing these pretzels in humid environments or exposing them to temperature fluctuations causes the chocolate to bloom (develop white streaks) or become sticky. Always store in an airtight container at room temperature in a cool, dry place. Avoid refrigeration unless absolutely necessary, as it can cause condensation and affect texture.
Storage and Serving Suggestions for Easter Pretzels
Storage Guidelines
Store your finished Easter pretzels in an airtight container at room temperature for up to two weeks. Layer the pretzels between sheets of parchment paper to prevent them from sticking together. Keep the container in a cool, dry place away from direct sunlight, heat sources, or humid areas. The pantry or a cool kitchen cabinet works perfectly.
If you must refrigerate the pretzels due to hot weather, place them in an airtight container and allow them to come to room temperature before serving. This prevents condensation from forming on the chocolate, which can make the pretzels look wet and unappealing. The chocolate may also lose some of its glossy appearance when refrigerated.
For longer storage, Easter pretzels freeze beautifully for up to three months. Freeze them in a single layer on a baking sheet until solid, then transfer to freezer-safe containers or bags with parchment paper between layers. Thaw at room temperature for about 30 minutes before serving. The texture remains remarkably fresh when properly frozen and thawed.
Creative Serving Ideas
Present your Easy Easter Pretzels Snack Recipe in ways that showcase their festive appearance. Arrange them on a tiered serving stand for Easter brunch, creating an elegant dessert display. Pile them in a decorative bowl or glass jar as a centerpiece that guests can snack from throughout your celebration. The colorful pretzels add visual interest to any dessert table.
Create individual serving bags by placing 4-5 pretzels in clear cellophane treat bags tied with pastel ribbon. These make perfect party favors, classroom treats, or Easter basket additions. Add a personalized tag with a spring greeting for a thoughtful touch that shows extra care.
For Easter egg hunts, place a few pretzels in plastic Easter eggs as a special surprise. This unexpected treat delights children who discover something different from the typical candy. You can also use the pretzels as decorative elements on top of cakes, cupcakes, or ice cream sundaes for an Easter-themed dessert upgrade.
Pairing Suggestions
These sweet and salty pretzels pair wonderfully with various beverages and complementary snacks. Serve alongside:
- Fresh lemonade or fruit punch for a refreshing spring combination
- Hot chocolate or coffee for adults who enjoy sweet treats with their morning beverage
- Vanilla ice cream for a deconstructed dessert experience
- Fresh strawberries and cream to add fresh fruit balance
- Popcorn for a mixed snack bowl that offers variety
Frequently Asked Questions About Easy Easter Pretzels
Can I use milk chocolate or dark chocolate instead of white chocolate?
Absolutely! While white chocolate is traditional for Easter pretzels because it provides a clean canvas for pastel colors, milk chocolate and dark chocolate work equally well. Milk chocolate offers a creamier, more traditional chocolate flavor that many people prefer. Dark chocolate creates a more sophisticated treat with less sweetness and more depth. The dipping and decorating process remains exactly the same regardless of which chocolate you choose. Keep in mind that darker chocolates will make the colorful M&Ms and sprinkles less visually striking since they don’t contrast as dramatically.
How far in advance can I make Easter pretzels?
You can prepare this Easy Easter Pretzels Snack Recipe up to two weeks in advance when stored properly in an airtight container at room temperature. This makes them perfect for stress-free party planning. The pretzels actually maintain their crispy texture remarkably well over time, and the chocolate coating protects them from becoming stale. For optimal freshness and appearance, make them 3-5 days before your event. If you need to prepare them even earlier, freeze them for up to three months and thaw at room temperature the day before serving.
Why is my white chocolate not melting smoothly?
Several factors can cause white chocolate melting issues. The most common culprit is overheating—white chocolate scorches easily and becomes thick and grainy when heated too quickly or at too high a temperature. Always use low power (50%) in the microwave and heat in 30-second intervals, stirring between each. Water contamination is another frequent cause; even tiny amounts of moisture can cause chocolate to seize. Ensure all equipment is completely dry. Some white chocolate products contain less cocoa butter and more stabilizers, making them harder to melt smoothly. Adding a teaspoon of coconut oil or shortening can help thin the chocolate to the proper consistency.
Can I make these pretzels without dairy for allergic guests?
Yes! Many brands now produce dairy-free white chocolate chips and melting wafers that work beautifully in this recipe. Look for products made with coconut milk, oat milk, or other plant-based alternatives. The melting and setting process is virtually identical to dairy-based white chocolate. For the M&Ms, substitute with allergy-friendly chocolate candies or use dairy-free chocolate chips. Many specialty stores and online retailers offer a wide selection of allergy-friendly Easter candies that come in festive spring colors.
What’s the best way to package Easter pretzels as gifts?
Package your pretzels in clear cellophane bags (4-6 pretzels per bag) and tie with pastel ribbon or raffia for a classic presentation. Mason jars create rustic, reusable packaging that looks charming filled with colorful pretzels. Line a decorative Easter box with tissue paper and arrange pretzels in a single layer for an elegant gift. For shipping, place pretzels in an airtight container, then pack that container in a shipping box with bubble wrap or packing peanuts to prevent movement and breakage. Include a label noting the pretzels are best enjoyed within two weeks.
How do I prevent the chocolate from pooling at the bottom?
Some pooling is natural and unavoidable, but you can minimize it with proper technique. After dipping each pretzel, hold it over the bowl and gently shake or tap your wrist to remove excess chocolate. Allow the chocolate to drip for 5-10 seconds before placing the pretzel on the parchment paper. This simple step removes most of the excess coating. You can also use a fork or dipping tool instead of your fingers, which gives you more control over excess chocolate removal. If you prefer a thinner coating overall, allow your melted chocolate to cool slightly before dipping—it will coat more thinly when it’s not as fluid.
Can I add other toppings besides M&Ms and sprinkles?
The topping possibilities are endless! Crushed graham crackers, chopped nuts, mini chocolate chips, shredded coconut, toffee bits, crushed cookies, or even breakfast cereal can all work wonderfully. For a more elegant presentation, use edible gold or silver leaf, sanding sugar, or candied flower petals. Create themed variations for different occasions: red and pink for Valentine’s Day, pastels and florals for spring baby showers, or school colors for graduation parties. The key is adding toppings while the chocolate is still wet so they adhere properly.
Final Thoughts on This Easy Easter Pretzels Snack Recipe
This Easy Easter Pretzels Snack Recipe represents everything a holiday treat should be: simple enough for beginners, delicious enough for everyone, and festive enough to make any celebration special. The combination of salty pretzels, sweet white chocolate, and colorful Easter candies creates a flavor profile that satisfies multiple cravings simultaneously. Whether you’re making these for your own family, contributing to a potluck, or preparing treats for a school function, these pretzels deliver consistent results with minimal stress.
The recipe’s flexibility means you can adapt it to suit various dietary needs, flavor preferences, and occasions throughout the spring season. From Easter Sunday to spring birthday parties to end-of-school-year celebrations, these pretzels fit seamlessly into countless events. The make-ahead friendly nature and excellent storage qualities make them ideal for busy schedules and advance preparation.
Most importantly, making these pretzels creates opportunities for connection and memory-making. Involve children in the decorating process and watch their creativity shine as they arrange candies and sprinkles. Share the finished pretzels with neighbors, teachers, and loved ones to spread Easter joy. These small gestures of homemade treats carry more meaning than store-bought alternatives and demonstrate thoughtfulness and care.
As you master this Easy Easter Pretzels Snack Recipe, you’ll find yourself returning to it year after year, perhaps developing your own signature variations and family traditions around its preparation. The simple act of dipping pretzels and sprinkling candies becomes a cherished ritual that marks the arrival of spring and the celebration of Easter. Happy snacking, and may your Easter season be filled with delicious treats and joyful moments!
Print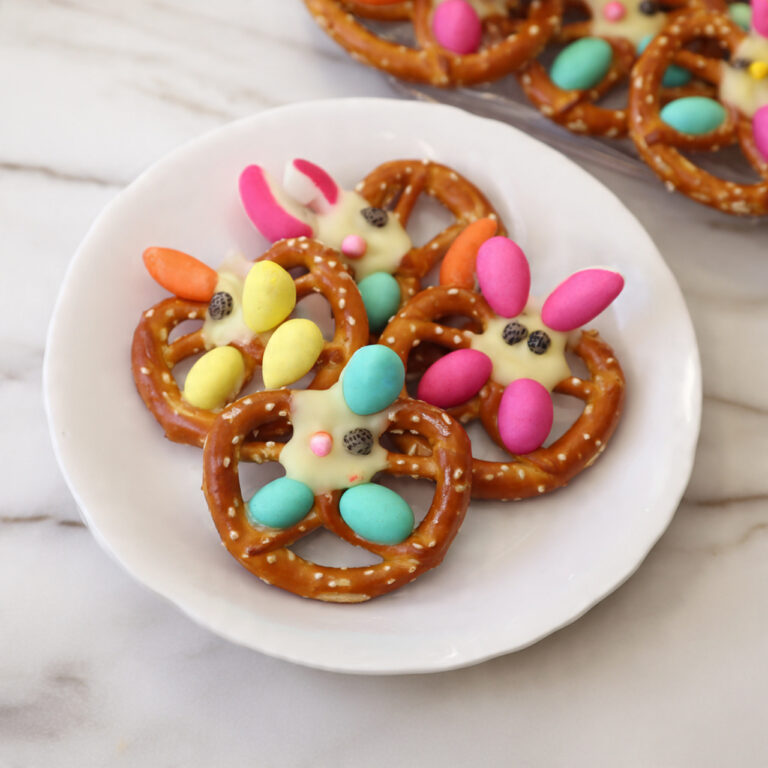
Easy Easter Pretzels Snack Recipe: A Festive Spring Treat That’s Ready in 15 Minutes
These Easy Easter Pretzels combine crispy pretzel twists with smooth white chocolate coating and colorful Easter candies for a festive spring snack that takes just 15 minutes to prepare. Perfect for Easter parties, spring celebrations, classroom treats, or gift-giving, these sweet and salty pretzels offer impressive visual appeal with minimal effort. The recipe requires only four main ingredients and no baking, making it accessible for cooks of all skill levels.
- Total Time: 45-60 minutes
- Yield: 60 pretzels
Ingredients
- 16 ounces pretzel twists (about 60 pretzels)
- 24 ounces white chocolate chips or melting wafers
- 1 cup pastel Easter M&Ms
- ½ cup spring-themed sprinkles (pastel jimmies, nonpareils, or themed mixes)
- Optional: 1 teaspoon coconut oil (for thinning chocolate if needed)
- Optional: Pink, green, or yellow candy melts for decorative drizzling
Instructions
- Prepare workspace: Line two large baking sheets with parchment paper or silicone baking mats. Arrange pretzels, toppings, and equipment within easy reach.
- Melt white chocolate: Place white chocolate chips in a microwave-safe bowl. Microwave at 50% power in 30-second intervals, stirring thoroughly between each interval, until completely melted and smooth (approximately 2-3 minutes total). Alternatively, melt using a double boiler method, stirring constantly.
- Adjust consistency: If chocolate seems too thick, stir in one teaspoon of coconut oil until fully incorporated and chocolate flows smoothly.
- Dip pretzels: Hold one pretzel by a single loop and dip three-quarters of it into melted white chocolate. Gently shake off excess chocolate by tapping wrist against bowl edge. Place coated pretzel on prepared baking sheet.
- Add toppings immediately: While chocolate is still wet (within 2-3 minutes), press 3-4 Easter M&Ms onto each pretzel. Sprinkle generously with spring sprinkles, ensuring good coverage.
- Optional drizzle: Melt contrasting colored candy melts and drizzle over pretzels in zigzag patterns using a spoon or piping bag.
- Allow to set: Let pretzels rest at room temperature for 30-45 minutes until chocolate has completely hardened. For faster setting, refrigerate for 15-20 minutes.
- Serve or store: Once fully set, transfer pretzels to an airtight container or serve immediately.
Notes
- Work in batches of 10-12 pretzels to ensure chocolate remains wet when adding toppings
- Keep all equipment completely dry to prevent chocolate from seizing
- Use fresh, crispy pretzels for best texture
- Substitute dairy-free white chocolate for allergy-friendly version
- Add toppings while chocolate is wet for proper adhesion
- Store in airtight container at room temperature for up to 2 weeks
- Freeze for up to 3 months for longer storage
- Prep Time: 15 minutes
- Cook Time: 30-45 minutes
- Category: Desserts
- Method: No-Bake, Dipping, Coating
- Cuisine: American
- Diet: Vegetarian


1 Comment
[…] St. Patrick’s Day Cupcakes are the ultimate way to celebrate March 17th with delicious, festive flair that captures the spirit of Ireland’s most beloved […]