

St. Patrick’s Day Fudge: A Creamy Green Treat That’s Pure Irish Magic

Introduction: The Ultimate St. Patrick’s Day Confection
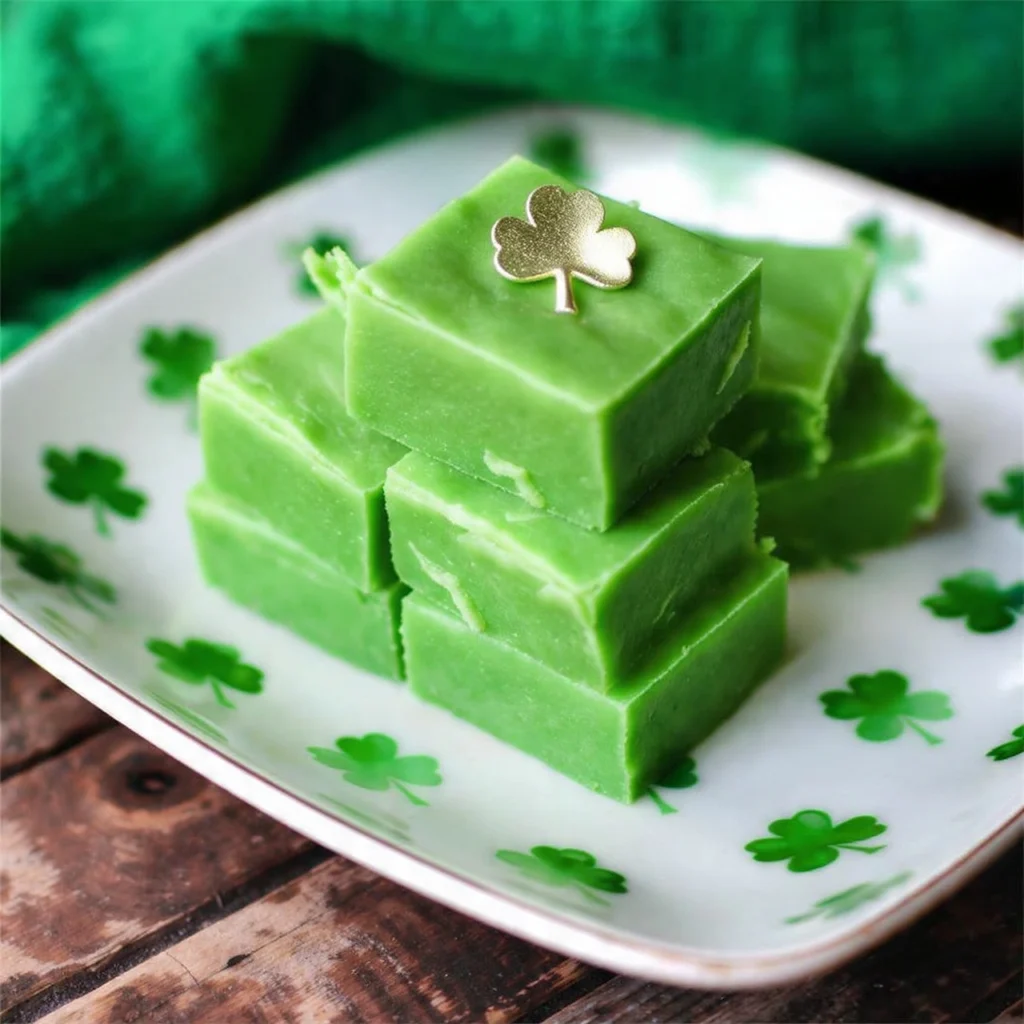
St. Patrick’s Day Fudge is the quintessential festive treat that combines the silky smoothness of traditional fudge with the vibrant green color and refreshing mint flavor that captures the spirit of Ireland in every bite. This foolproof recipe transforms just three simple ingredients into a luxurious confection that looks professionally made but requires absolutely no candy thermometer, no precise temperature monitoring, and no advanced candy-making skills whatsoever.
What makes this St. Patrick’s Day Fudge particularly remarkable is its stunning simplicity. While traditional fudge recipes can intimidate even experienced bakers with their temperamental nature and precise temperature requirements, this modern approach delivers consistent, creamy results every single time. You’ll have gorgeous, perfectly set fudge ready to serve in under 15 minutes of active work, with just a few hours of hands-off chilling time standing between you and confectionery perfection.
The beautiful emerald green color immediately announces its festive purpose, making it an instant centerpiece for St. Patrick’s Day celebrations. Whether you’re hosting a party, contributing to a dessert table, preparing treats for a classroom celebration, or simply indulging your sweet tooth with seasonal flair, this fudge delivers on every level. The smooth, melt-in-your-mouth texture rivals anything you’d find in a high-end candy shop, while the subtle mint flavor adds refreshing complexity without overwhelming the rich, creamy sweetness.
Beyond its delicious taste and stunning appearance, St. Patrick’s Day Fudge offers practical advantages that make it ideal for busy celebrators. It stores beautifully for up to two weeks, making it perfect for advance preparation. It travels well without melting or losing shape, ideal for potlucks and gift-giving. And it cuts into neat, professional-looking squares that photograph beautifully for social media sharing. This is the kind of recipe that makes you look like a kitchen wizard while requiring minimal effort—the best kind of recipe for any holiday.
Why This St. Patrick’s Day Fudge Recipe Stands Out
Before diving into the ingredients and method, let’s explore what makes this particular fudge recipe exceptional compared to the countless variations you might encounter.
Foolproof Formula: Traditional fudge requires precise temperature control and expert timing to achieve the perfect consistency. This recipe eliminates that challenge entirely, using a method that virtually guarantees success even for complete beginners.
Minimal Ingredients: With just three main ingredients, this recipe proves that less is often more. You don’t need a pantry full of specialty items or expensive ingredients to create something truly spectacular.
Quick Preparation: Active preparation time is under 10 minutes. No standing over a hot stove stirring constantly, no wrestling with candy thermometers, no stress. Just simple mixing and chilling.
Consistent Results: Every batch turns out smooth, creamy, and perfectly set. No grainy texture, no failed batches, no unpredictable outcomes that plague traditional fudge recipes.
Customizable: While the base recipe is perfection on its own, it welcomes endless variations. Adjust the mint intensity, change the color, add mix-ins, or layer multiple colors for stunning visual effects.
Make-Ahead Friendly: Prepare this fudge up to two weeks in advance without any loss of quality. It actually improves slightly after a day or two as flavors meld and develop.
Ingredients for St. Patrick’s Day Fudge
Essential Ingredients:
- 3 cups white chocolate chips (18 ounces)
- 1 can (14 ounces) sweetened condensed milk
- Green gel food coloring (or 2 tablespoons matcha powder for natural coloring)
- ½ teaspoon peppermint extract (adjust to taste)
- Pinch of salt
Optional Flavor Enhancers:
- 1 teaspoon vanilla extract
- ¼ teaspoon almond extract
- 1 tablespoon Irish cream liqueur (for adult versions)
Topping and Decoration Options:
- Green sprinkles or sanding sugar
- White chocolate chips
- Mini chocolate chips
- Crushed Andes mints
- Gold edible glitter
- Shamrock-shaped candies
- Chopped pistachios
- Shredded coconut (tinted green)
- White chocolate drizzle
Equipment Needed:
- 8×8-inch baking pan (or 9×9-inch for thinner fudge)
- Parchment paper or aluminum foil
- Medium saucepan
- Rubber spatula
- Mixing spoon

Step-by-Step Instructions for Perfect St. Patrick’s Day Fudge
Step 1: Prepare Your Pan (2 minutes)
Begin by preparing your baking pan, which is crucial for easy removal and clean cutting later. Line an 8×8-inch square baking pan with parchment paper, allowing the paper to hang over two opposite sides by about 2 inches. These overhanging “handles” will allow you to lift the entire fudge block out of the pan after it sets, making cutting into perfect squares incredibly easy.
Alternatively, you can use aluminum foil sprayed lightly with non-stick cooking spray. While parchment paper is my preferred method because nothing sticks to it and it’s easier to work with, foil works perfectly well if that’s what you have on hand.
For thinner fudge pieces, use a 9×9-inch pan instead. The recipe quantity stays the same, but the fudge will be slightly less thick. Some people prefer thinner pieces for more surface area to decorate or for creating layered fudge designs.
Step 2: Combine Chocolate and Condensed Milk (3 minutes)
Place the white chocolate chips in a medium saucepan. Pour the entire can of sweetened condensed milk over the chips. Add a small pinch of salt—this enhances the sweetness and balances the overall flavor profile.
Set your burner to low heat. This is critical: low heat prevents the chocolate from scorching and ensures smooth melting. Place the saucepan over the burner and let it sit for about one minute without stirring. This initial warming helps the chocolate begin melting gently.
After that first minute, begin stirring slowly and continuously with a rubber spatula or wooden spoon. Use gentle, sweeping motions, scraping the bottom and sides of the pan to ensure even heating and prevent any scorching. You’ll see the chocolate chips gradually soften and blend into the condensed milk.
Continue stirring for about 3-5 minutes total until the mixture is completely smooth and uniform, with no visible lumps of chocolate remaining. The mixture should be glossy, thick, and pourable—similar to the consistency of thick cake batter or softened peanut butter.
Step 3: Add Color and Flavor (1 minute)
Remove the saucepan from heat immediately once the chocolate is fully melted. Working quickly while the mixture is still very warm and fluid, add your coloring and flavoring.
For coloring, start with 3-4 drops of green gel food coloring if you’re using the concentrated gel variety, or about 8-10 drops if you’re using liquid food coloring. Stir vigorously to distribute the color evenly. Assess the shade—you want a vibrant emerald or Kelly green that screams St. Patrick’s Day. Add more coloring drop by drop until you achieve your desired intensity. Remember that the color will appear slightly lighter once the fudge sets, so aim for a shade slightly darker than your target.
For natural coloring, whisk in 2 tablespoons of matcha powder. This creates a beautiful, soft sage green while adding subtle earthy notes that many people find more sophisticated than artificial coloring. The matcha also contributes antioxidants and a unique flavor dimension.
Add the peppermint extract now, starting with ½ teaspoon. Stir thoroughly and taste (carefully—it’s hot!). Peppermint intensity is highly personal; some people love strong mint flavor while others prefer just a subtle hint. Add more extract in ¼ teaspoon increments if you want stronger mint presence. For a gentler mint flavor, reduce to ¼ teaspoon.
If using additional extracts like vanilla or almond, add them now as well. Vanilla rounds out the sweetness, while almond adds complex depth that complements the white chocolate beautifully.
Step 4: Pour and Spread (2 minutes)
Immediately pour the colored, flavored fudge mixture into your prepared pan. Work quickly because the fudge begins setting as soon as it starts cooling. Use your rubber spatula to scrape every bit of fudge from the saucepan—this stuff is too delicious to waste!
Once in the pan, use the spatula to spread the fudge into an even layer, pushing it into corners and smoothing the top surface. For perfectly smooth tops, wet your spatula slightly or spray it with non-stick cooking spray, which prevents the fudge from sticking to your smoothing tool.
If you’re planning to add toppings like sprinkles, chocolate chips, or crushed candies, add them immediately while the fudge is still warm and sticky. Press them gently into the surface so they adhere properly. If you wait until the fudge cools, toppings won’t stick and will just fall off when you cut and serve.
Step 5: Chill and Set (2-4 hours)
Place the pan in the refrigerator and let the fudge chill for at least 2 hours, though 4 hours is ideal for the firmest texture and cleanest cuts. The fudge needs this time to solidify from a thick liquid into that characteristic firm-yet-creamy fudge consistency.
Resist the temptation to check it constantly or move it around. Let it sit undisturbed so it sets evenly. You’ll know it’s ready when you can press the surface lightly with your finger and it feels firm rather than soft and sticky.
For faster setting, you can place the pan in the freezer for about 1 hour. However, freezing sometimes causes slight texture changes, so refrigeration is preferable if you have the time.
Step 6: Cut and Serve
Once fully set, remove the pan from the refrigerator. Lift the entire fudge block out using the parchment paper handles. Place it on a cutting board.
For the cleanest, most professional-looking cuts, use a large, sharp knife. Run the knife under hot water, dry it quickly, and then make your cut. The warmth of the blade slices through the fudge cleanly without dragging or creating ragged edges. Wipe the blade clean and reheat it between each cut.
Cut the fudge into squares—typically 1-inch squares yield about 64 pieces, perfect for parties where people want small bites. For larger servings, cut into 1.5-inch or 2-inch squares.
Arrange on a serving platter, in candy cups, or package into gift boxes or bags. Your St. Patrick’s Day Fudge is now ready to enjoy!
Pro Tips for the Best St. Patrick’s Day Fudge
Choosing Quality White Chocolate
Not all white chocolate is created equal. For the best flavor and texture, use real white chocolate chips rather than “white baking chips” or “vanilla candy melts.” Real white chocolate contains cocoa butter, which creates superior flavor and mouthfeel compared to products made with vegetable oils.
Check the ingredient list—cocoa butter should be one of the first ingredients. Quality brands include Ghirardelli, Guittard, and Lindt. While these cost slightly more than generic brands, the difference in final product quality is absolutely worth the extra dollar or two.
Mastering the Color
Achieving that perfect St. Patrick’s Day green requires the right food coloring choice. Gel food coloring provides the most vibrant, truest colors with minimal liquid addition, making it ideal for fudge. Liquid food coloring works too but requires more drops to achieve the same intensity, which can occasionally thin the fudge slightly.
For the most Instagram-worthy green, aim for Kelly green or emerald—bright and vibrant but not neon. If you accidentally add too much color and end up with something too intense, you can’t remove it, but you can embrace it as “extra festive” or add a white chocolate swirl to dilute the color artistically.
When using matcha for natural coloring, sift it first to prevent lumps. Matcha creates a more muted, sophisticated green that some people find more elegant than bright artificial coloring.
Preventing Graininess
While this recipe is largely foolproof, graininess can occasionally occur if the chocolate is overheated or if moisture is introduced. Always use low heat and stir constantly to prevent scorching. Remove from heat as soon as the chocolate is fully melted—residual heat will continue warming the mixture.
Ensure all your equipment is completely dry before starting. Even a drop of water can cause chocolate to seize (become grainy and clumpy), ruining the smooth texture.
If you do encounter slight graininess, add 1-2 tablespoons of additional condensed milk and stir vigorously. This extra liquid often smooths out the texture.
Creating Layered Fudge
For stunning visual impact, create layered St. Patrick’s Day Fudge. Divide your white chocolate mixture into two or three portions. Color one portion deep green, leave one white, and color another light green. Pour the first layer into your pan and refrigerate for 30 minutes until partially set. Then add the second layer and chill again before adding the final layer.
This technique creates beautiful striped fudge reminiscent of the Irish flag or simply provides visual interest that makes your fudge stand out on any dessert table.
Flavor Variations
While peppermint is classic, this fudge base welcomes numerous flavor variations:
Bailey’s Irish Cream Fudge: Replace the peppermint extract with 2 tablespoons of Bailey’s Irish Cream for sophisticated, boozy fudge perfect for adult celebrations.
Pistachio Fudge: Add ½ cup finely chopped pistachios for nutty crunch and authentic Irish green color.
Grasshopper Fudge: Increase the peppermint and add 2 tablespoons of cocoa powder for minty chocolate flavor.
Vanilla Mint: Use vanilla extract as the primary flavoring with just a hint of mint for subtler flavor.
Coconut Lime: Skip the mint and add lime zest with coconut extract for tropical Irish twist.
Making It Extra Special
Elevate your St. Patrick’s Day Fudge from simple to spectacular with these finishing touches:
- Drizzle melted dark or milk chocolate in zigzag patterns across the top
- Sprinkle with edible gold stars or gold dust for pot-of-gold effect
- Press shamrock-shaped candies into the top before setting
- Top with crushed Andes mints for intense mint flavor and pretty appearance
- Create a white chocolate ganache topping for two-toned elegance
- Add a layer of caramel between two layers of green fudge
Temperature Troubleshooting
If your kitchen is particularly warm, your fudge may take longer to set or may be slightly softer than ideal. For firmer fudge in hot weather, add an extra ½ cup of white chocolate chips to the recipe. The additional chocolate creates a firmer set that holds up better at room temperature.
Conversely, if your fudge seems too hard or difficult to bite through, you may have overcooked it slightly. Next time, remove it from heat sooner and stir in an extra tablespoon or two of condensed milk for creamier texture.

Common Mistakes to Avoid When Making St. Patrick’s Day Fudge
Using High Heat
The number one mistake people make with this simple fudge recipe is using too much heat. High heat causes white chocolate to scorch, seize, or develop grainy texture. Always use low heat and be patient. The chocolate will melt—it just takes a few minutes. Rushing this step ruins the smooth, creamy texture that makes fudge special.
If your chocolate does seize and become grainy, it’s almost always due to excessive heat or moisture contact. Prevention is much easier than trying to fix seized chocolate.
Not Stirring Constantly
While the chocolate melts, constant stirring is essential. Unstirred chocolate can scorch on the bottom of the pan even on low heat. Keep that spatula moving in slow, steady motions, scraping the bottom and sides to ensure even heating.
Those few minutes of stirring are the small price you pay for perfect, smooth fudge. Put your phone away, focus on the task, and enjoy the process.
Skipping the Pan Liner
Attempting to remove set fudge directly from an unlined pan is an exercise in frustration. Even non-stick pans don’t release fudge cleanly. Always line your pan with parchment paper or foil. This small step makes the difference between neat, clean squares and a crumbled mess.
The overhanging parchment “handles” allow you to lift the entire fudge block out in one piece, which makes cutting dramatically easier and more precise.
Adding Toppings Too Late
Sprinkles, chocolate chips, nuts, and other toppings only stick to warm, tacky fudge. Once the fudge cools and firms up, toppings just roll off. Add decorations immediately after spreading the fudge in the pan, pressing them gently into the surface.
If you forget and the fudge has already cooled, you can still decorate by drizzling melted chocolate over the top (which serves as “glue”) and then adding your toppings to the wet chocolate.
Cutting with a Cold Knife
Cutting fudge with a cold knife creates ragged edges and uneven squares because the knife drags through the fudge rather than slicing cleanly. Always use a hot, sharp knife—run it under hot water, wipe it dry, and then cut. Repeat this process between each cut.
This simple trick transforms amateur-looking fudge into professional-appearing confections worthy of a candy shop display.
Not Allowing Enough Setting Time
Impatience leads many people to cut their fudge before it’s fully set. While the top surface might feel firm after an hour, the center may still be soft. This results in fudge that squishes when cut, creating misshapen pieces with fingerprints pressed into them.
Wait the full 2-4 hours for complete setting. If you’re unsure whether it’s ready, give it an extra hour—you can’t over-set fudge, but you can definitely try to cut it too early.
Storing Improperly
Fudge exposed to air dries out, forming a hard, crusty exterior that ruins the creamy texture. Always store fudge in airtight containers with parchment or wax paper between layers to prevent sticking.
Storing fudge in the refrigerator without airtight protection causes it to absorb odors from other foods and develop condensation that makes it soggy. Proper storage is crucial for maintaining quality.
Storage and Serving Suggestions
Proper Storage Methods
St. Patrick’s Day Fudge stores beautifully for extended periods when handled correctly. For short-term storage (up to 5 days), keep the fudge in an airtight container at room temperature in a cool, dry place. Layer parchment paper between layers of fudge pieces to prevent them from sticking together.
For longer storage (up to 2 weeks), refrigerate in airtight containers. Remove fudge from the refrigerator about 20-30 minutes before serving to take the chill off—fudge tastes best at cool room temperature rather than ice cold.
For maximum longevity (up to 3 months), freeze fudge in freezer-safe containers or heavy-duty freezer bags with all air pressed out. Wrap individual pieces in wax paper before freezing for grab-and-go convenience. Thaw frozen fudge overnight in the refrigerator, then bring to room temperature before serving.
Storage Pro Tip: If stacking fudge pieces in containers, place parchment or wax paper between each layer. This prevents pieces from sticking together and makes serving much easier.
Creative Serving Ideas
Gift Boxes and Bags: Package fudge pieces in small gift boxes lined with tissue paper, tie with green ribbon, and attach tags with Irish blessings or St. Patrick’s Day messages. These make wonderful gifts for teachers, coworkers, neighbors, or anyone who deserves a sweet treat.
Candy Cups: Place individual fudge squares in decorative paper or foil candy cups and arrange on tiered serving platters for elegant party presentation.
Dessert Board: Create a St. Patrick’s Day dessert board featuring this fudge as the centerpiece, surrounded by other green treats like cookies, candies, and chocolate-covered pretzels.
Party Favors: Wrap two or three pieces of fudge in clear cellophane bags tied with green and gold ribbons. Set one at each place setting as a party favor guests can take home.
Ice Cream Topping: Chop fudge into small chunks and sprinkle over vanilla ice cream for an instant St. Patrick’s Day sundae.
Coffee Accompaniment: Serve small squares of fudge alongside Irish coffee or regular coffee as an after-dinner treat.
Fudge Board: Create a “fudge tasting board” with this St. Patrick’s Day Fudge alongside other fudge flavors in complementary colors for visual impact and flavor variety.
Pairing Suggestions
St. Patrick’s Day Fudge pairs wonderfully with various beverages and foods:
- Irish coffee or regular coffee (the bitterness balances the sweetness)
- Hot chocolate or Irish cream hot chocolate
- Vanilla or mint ice cream
- Fresh strawberries for color contrast
- Champagne or prosecco for celebrations
- Irish breakfast tea
- Baileys on ice for adults
Presentation Ideas for Parties
Transform your fudge from simple squares to stunning displays:
Shamrock Arrangement: Use a shamrock-shaped cookie cutter to cut fudge into shamrock shapes. This creates waste but makes impressive presentation for special occasions.
Tiered Display: Arrange fudge squares on a multi-tiered serving stand, alternating with other green treats for height and visual interest.
Labeled Display: Create small cards labeling the fudge flavor and listing any allergens. This thoughtful touch helps guests make informed choices.
Color Gradient: If making multiple fudge batches in varying shades of green, arrange them from light to dark for stunning ombré effect.
Frequently Asked Questions About St. Patrick’s Day Fudge
Can I make this fudge without peppermint extract?
Absolutely! While peppermint creates classic St. Patrick’s Day flavor, it’s entirely optional. Many people prefer vanilla-flavored fudge or even unflavored fudge where the white chocolate itself provides all the sweetness and flavor. Simply omit the peppermint extract and either leave the fudge plain or substitute with vanilla, almond, coconut, or Irish cream flavoring.
For kids who don’t enjoy mint, vanilla is usually the best alternative. For adults, Bailey’s Irish Cream creates sophisticated flavor that’s perfect for holiday celebrations while maintaining the Irish theme.
The beauty of this base recipe is its versatility—the fudge will set perfectly regardless of which flavoring you choose or whether you use any flavoring at all.
Why didn’t my fudge set properly?
Fudge that remains soft or doesn’t set typically results from one of three issues: insufficient chilling time, incorrect proportions, or the chocolate mixture not being melted completely before pouring.
First, ensure you’ve given the fudge at least 2-4 hours in the refrigerator. In warm climates or during summer, it may need even longer. If after 4 hours it’s still soft, place it in the freezer for 30-60 minutes.
Second, verify you used the correct measurements. This recipe requires 3 cups (18 ounces) of white chocolate chips to one 14-ounce can of sweetened condensed milk. If you eyeballed measurements or used less chocolate than specified, the fudge won’t set properly.
Third, make sure the chocolate was fully melted and smooth before removing from heat. Any unmelted lumps or insufficient heating can prevent proper setting.
If your fudge still won’t set after extended chilling, you can salvage it by using it as a delicious sauce over ice cream or stirring it into coffee—nothing is wasted!
Can I use milk chocolate or dark chocolate instead of white chocolate?
While you can certainly use milk or dark chocolate instead of white chocolate, the result won’t be St. Patrick’s Day Fudge in the traditional sense because the chocolate color will muddy your green coloring. Milk chocolate creates brownish-green, while dark chocolate turns the fudge an unappealing dark olive or brown.
However, if you’re interested in flavor experimentation and don’t mind sacrificing the bright green color, both milk and dark chocolate create delicious fudge using this same method. You might create two-toned or marbled fudge by swirling dark chocolate fudge with white chocolate green fudge for visual contrast.
For maintaining the vibrant green color essential to St. Patrick’s Day Fudge, stick with white chocolate.
How do I make natural green fudge without food coloring?
For natural green coloring, matcha powder is your best option. Add 2-3 tablespoons of high-quality culinary matcha to your melted chocolate mixture, whisking thoroughly to eliminate lumps. Matcha creates beautiful sage to bright green color depending on the amount used, plus it adds antioxidants and subtle earthy flavor that many people find more sophisticated than artificial mint flavoring.
Spirulina powder is another natural option, creating vibrant blue-green color with virtually no flavor. Use 1-2 tablespoons, starting with less and adding more until you achieve your desired shade.
Spinach powder also works, though it creates a more muted, olive-green color than matcha or spirulina.
For the brightest, most vibrant green using natural methods, matcha is definitely your best choice. Look for high-quality culinary grade matcha at specialty tea shops or online retailers.
Can I add mix-ins like nuts or chocolate chips?
Definitely! This fudge base welcomes all sorts of delicious additions. Popular mix-ins include:
- Chopped walnuts, pecans, or almonds (toast them first for enhanced flavor)
- Mini chocolate chips (white, milk, or dark)
- Chopped Andes mints for intense mint flavor
- Shredded coconut
- Dried cranberries or cherries
- Toffee bits
- Crushed cookies (Oreos, graham crackers, or shortbread)
- Pistachios (adds both flavor and authentic green color)
Fold mix-ins into the melted fudge just before pouring into the pan, or sprinkle them over the top after spreading. For mix-ins distributed throughout, fold them in; for mix-ins just on top, sprinkle after spreading.
Be mindful of allergies when serving fudge with nuts, and always label ingredients clearly so guests can make informed choices.
How far in advance can I make this fudge?
St. Patrick’s Day Fudge is an excellent make-ahead treat that actually improves after a day or two as flavors meld and develop. You can safely make it up to 2 weeks in advance when stored properly in the refrigerator in airtight containers.
For absolute best quality, make it 2-5 days before your event. This provides enough time for optimal flavor development while ensuring maximum freshness.
If you need even more advance preparation, freeze the fudge for up to 3 months. Wrap individual pieces in wax paper and store in freezer-safe containers or bags. Thaw overnight in the refrigerator, then bring to room temperature before serving.
The make-ahead friendliness makes this fudge perfect for busy holiday schedules when you want to spread out preparation rather than doing everything last-minute.
What’s the best way to transport this fudge?
Fudge travels remarkably well compared to many desserts, making it ideal for potlucks, parties, and gift-giving. For best results, keep fudge pieces in airtight containers with parchment paper between layers. Place the containers in insulated bags or coolers if traveling in hot weather—fudge can soften significantly in heat.
For gift-giving, wrap individual pieces in wax paper or cellophane before placing in gift boxes or bags. This prevents pieces from sticking together and makes presentation neater.
If you need to travel long distances, freeze the fudge beforehand. It will gradually thaw during transport while remaining at safe temperatures that prevent melting. By the time you arrive, it should be perfect serving temperature.
Avoid leaving fudge in hot cars for extended periods. While it won’t spoil, it will soften and possibly melt, ruining your careful presentation and making a mess.
Final Thoughts: Sweet Success for Your St. Patrick’s Day
St. Patrick’s Day Fudge represents the perfect intersection of simplicity and impressiveness—a recipe so easy that absolute beginners can master it, yet so delicious and beautiful that it looks and tastes like something from a professional confectionery. In a world of complicated recipes requiring obscure ingredients and advanced techniques, this fudge reminds us that sometimes the simplest approaches yield the most satisfying results.
Print
St. Patrick’s Day Fudge: A Creamy Green Treat That’s Pure Irish Magic
Celebrate St. Patrick’s Day with this incredibly easy three-ingredient fudge featuring creamy white chocolate, refreshing mint, and festive green color. No candy thermometer required—just simple melting, stirring, and chilling creates smooth, professional-quality fudge that stores for weeks and makes perfect gifts, party treats, or personal indulgence. Ready in just 10 minutes of active time!
- Total Time: 40 minutes
- Yield: 64 one-inch squares
Ingredients
Essential Ingredients:
- 3 cups (18 ounces) white chocolate chips
- 1 can (14 ounces) sweetened condensed milk
- ½ teaspoon peppermint extract
- Green gel food coloring (or 2 tablespoons matcha powder)
- Pinch of salt
Optional Additions:
- 1 teaspoon vanilla extract
- 2 tablespoons Bailey’s Irish Cream (adult version)
- ½ cup chopped pistachios or walnuts
- ½ cup mini chocolate chips
- ¼ cup crushed Andes mints
- Green sprinkles for topping
Instructions
- Prepare pan: Line an 8×8-inch baking pan with parchment paper, leaving 2-inch overhangs on two sides for easy removal.
- Melt chocolate: In a medium saucepan over low heat, combine white chocolate chips, sweetened condensed milk, and salt. Stir constantly for 3-5 minutes until chocolate is completely melted and mixture is smooth and glossy.
- Add color and flavor: Remove from heat immediately. Stir in green food coloring (3-4 drops gel or 8-10 drops liquid, adjusting to desired shade) and peppermint extract. Mix thoroughly until evenly colored.
- Pour and spread: Pour mixture into prepared pan, spreading into an even layer with a rubber spatula. Smooth the top surface.
- Add toppings: If using sprinkles, nuts, or other toppings, add them immediately while fudge is still warm. Press gently to adhere.
- Chill: Refrigerate for 2-4 hours until completely firm and set.
- Cut and serve: Lift fudge from pan using parchment handles. Place on cutting board. Using a hot knife (run under hot water, then wipe dry), cut into 1-inch squares. Clean and reheat knife between cuts for cleanest edges.
- Store: Keep in airtight containers with parchment between layers at room temperature (5 days), refrigerated (2 weeks), or frozen (3 months).
Notes
- White chocolate quality: Use real white chocolate containing cocoa butter for best flavor and texture, not white candy melts.
- Low heat essential: Never rush the melting process with high heat—low and slow prevents scorching and graininess.
- Color intensity: Start with less food coloring; you can always add more. Color lightens slightly as fudge sets.
- Natural coloring: Matcha powder creates beautiful natural green while adding subtle flavor and antioxidants.
- Mint adjustment: Peppermint strength is personal preference. Start with ½ teaspoon and adjust to taste.
- Thicker fudge: Use 8×8-inch pan. For thinner pieces, use 9×9-inch pan.
- Make-ahead: Fudge improves after 1-2 days as flavors develop. Make up to 2 weeks ahead.
- Hot knife trick: Running knife under hot water between cuts creates professional, clean edges.
- Prep Time: 5 minutes
- Cook Time: 35 minutes
- Category: Desserts
- Method: No-bake, Stovetop
- Cuisine: American
- Diet: Vegetarian


