

Mulligatawny Soup: A Complete Guide to Making This Aromatic Indian Classic at Home
Introduction
Mulligatawny Soup represents one of India’s most beloved culinary exports—a fascinating fusion dish with roots deep in Tamil Nadu’s Anglo-Indian heritage. If you’ve never made Mulligatawny Soup at home before, you’re missing out on a restaurant-quality experience that’s remarkably simple to recreate in your own kitchen. This aromatic, flavor-packed soup combines the warmth of Indian spices with the comforting texture of vegetables and protein, creating a dish that satisfies both body and soul.
The name itself—derived from “milagu” (pepper) and “tannir” (water) in Tamil—hints at the original simplicity of this dish. However, the Mulligatawny Soup we know today has evolved into something far more complex and delicious, featuring layers of cumin, coriander, turmeric, and other warm spices that dance together on the palate. Whether you’re seeking a quick weeknight dinner, an impressive meal for guests, or simply a bowl of comfort wrapped in flavors that transport you to bustling Indian markets, this guide will help you master the art of creating perfect Mulligatawny Soup from scratch.
The History and Cultural Significance of Mulligatawny Soup
Before diving into how to make Mulligatawny Soup, understanding its journey enriches the experience. This soup emerged during the British Raj when Indian cooks adapted their traditional cooking styles to suit European palates. The result was a brilliant marriage of Indian spice and Western cooking technique—a testament to culinary creativity born from cultural exchange.
Traditional Mulligatawny Soup appears on British and Indian restaurant menus alike, often served as a starter course. Its popularity transcends geographical boundaries, making it a staple in Indian restaurants worldwide. What makes Mulligatawny Soup special is its versatility; it welcomes variations based on regional preferences, ingredient availability, and personal taste preferences.
What Makes Mulligatawny Soup Unique
Mulligatawny Soup distinguishes itself from other curry-based soups through its balanced flavor profile. Unlike heavily cream-based soups, Mulligatawny Soup relies on the natural oils from spices and aromatics to create richness. The addition of lentils or rice provides substance without relying on dairy, making it naturally appealing to various dietary preferences.
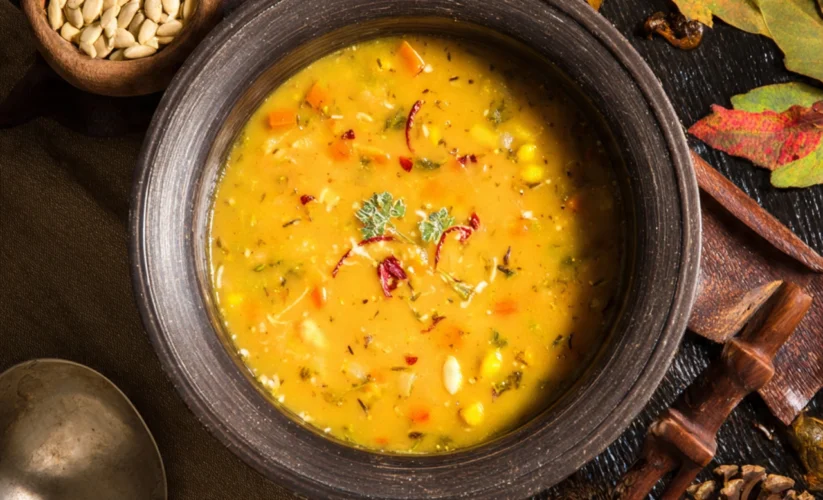
The beautiful golden color of well-made Mulligatawny Soup comes from turmeric, while the aromatic quality stems from a careful blend of cumin, coriander, and other warming spices. Each spoonful reveals different flavor dimensions—the initial warmth of turmeric, followed by the earthiness of cumin, finishing with subtle notes of garlic and ginger.

Ingredients for Authentic Mulligatawny Soup
The Spice Foundation
- 2 tablespoons ghee or vegetable oil
- 1 medium yellow onion, finely diced
- 3 cloves garlic, minced
- 1 tablespoon fresh ginger, minced
- 1 teaspoon ground turmeric
- 1 teaspoon ground cumin
- 1 teaspoon ground coriander
- 1/2 teaspoon cayenne pepper (adjust to taste)
- 1/4 teaspoon black pepper
- 1/2 teaspoon ground cinnamon
- 1/4 teaspoon cardamom (ground or seeds)
Vegetables and Protein
- 2 medium carrots, diced
- 2 celery stalks, diced
- 1 red or yellow bell pepper, diced
- 1 medium potato, diced
- 1/2 cup red lentils (or yellow lentils)
- 4 cups vegetable or chicken broth
- 1 can (14 oz) diced tomatoes
- 1 cup coconut milk (full-fat recommended)
Flavor Enhancers and Finishing Touches
- 1 teaspoon cumin seeds (for tempering)
- 2 dried bay leaves
- 1/2 cup frozen peas
- Salt and pepper to taste
- Fresh cilantro for garnish
- Juice of 1/2 lime
- Optional: 1 cup cooked chicken, lamb, or paneer for added protein
Step-by-Step Instructions for Making Mulligatawny Soup
Step 1: Prepare Your Spices
Begin by gathering all your spices in small bowls. This practice, known as mise en place, ensures you’re never caught unprepared during cooking. Having your spices measured and ready makes the cooking process smoother and allows the aromatic spices to release their full potential at the right moments.
Step 2: Heat Your Oil and Temper the Spices
Pour ghee or vegetable oil into a large, heavy-bottomed pot over medium heat. Once the oil shimmers—typically after 30 seconds to 1 minute—add the cumin seeds. Listen for them to begin popping and crackling; this auditory cue indicates they’re releasing their essential oils and aromatic compounds. The entire process takes only 20-30 seconds, so watch carefully to avoid burning the seeds.
Step 3: Build Your Aromatic Base
Add the diced onion to your tempering oil and cumin seeds. Stir frequently for 3-4 minutes until the onion turns translucent and softens. This step is crucial for developing the foundation of your Mulligatawny Soup’s flavor profile. Next, introduce your minced garlic and ginger, stirring constantly for 60-90 seconds. You’ll notice an intense fragrance developing—this means the aromatic compounds are activating.
Step 4: Bloom Your Ground Spices
Add your ground turmeric, cumin, coriander, cayenne, black pepper, cinnamon, and cardamom to the onion mixture. Stir for 1-2 minutes, ensuring every spice particle contacts the hot oil. This process, called blooming, intensifies the spices’ flavors exponentially. You should see a darkening of the mixture and notice a rich, warm aroma filling your kitchen.
Step 5: Introduce the Vegetables
Add your diced carrots, celery, and bell pepper to the spiced base. Stir well, coating each vegetable piece with the spiced oil. Cook for 3 minutes, stirring occasionally. The vegetables will soften slightly and absorb the spice flavors. Add the diced potato and continue cooking for another 2 minutes.
Step 6: Add the Lentils and Broth
Pour in your red lentils, stirring to distribute them evenly throughout the mixture. Add the bay leaves, then carefully pour in your vegetable or chicken broth. Increase the heat to high and bring the mixture to a rolling boil. Once boiling, reduce the heat to medium-low and let it simmer gently.
Step 7: Simmer and Develop Flavors
Allow your Mulligatawny Soup to simmer for 15-20 minutes, until the lentils have completely broken down and softened, and the vegetables are tender. The lentils will gradually lose their individual shape and contribute to the soup’s body and richness. Stir occasionally to prevent sticking on the bottom of the pot.
Step 8: Add the Tomatoes and Continue Simmering
Once the lentils have softened, pour in your can of diced tomatoes with their juices. Stir well and let the soup continue simmering for another 5 minutes. The tomatoes add acidity, which brightens the overall flavor and balances the richness of the spices.
Step 9: Incorporate Creaminess
Slowly pour in your coconut milk while stirring constantly. This step introduces a luxurious texture to your Mulligatawny Soup while keeping it light and not overly heavy. The coconut milk’s natural sweetness also balances the heat from the cayenne pepper. Let the soup simmer for an additional 2-3 minutes, allowing the flavors to meld.
Step 10: Final Adjustments and Finishing
Add the frozen peas and cook for 2 minutes until they’re heated through. Taste your soup and adjust seasonings with salt and pepper. Finish with fresh lime juice, which brightens the overall flavor profile. If using optional protein, stir it in now and allow it to warm through for 1-2 minutes.
Step 11: Serve and Garnish
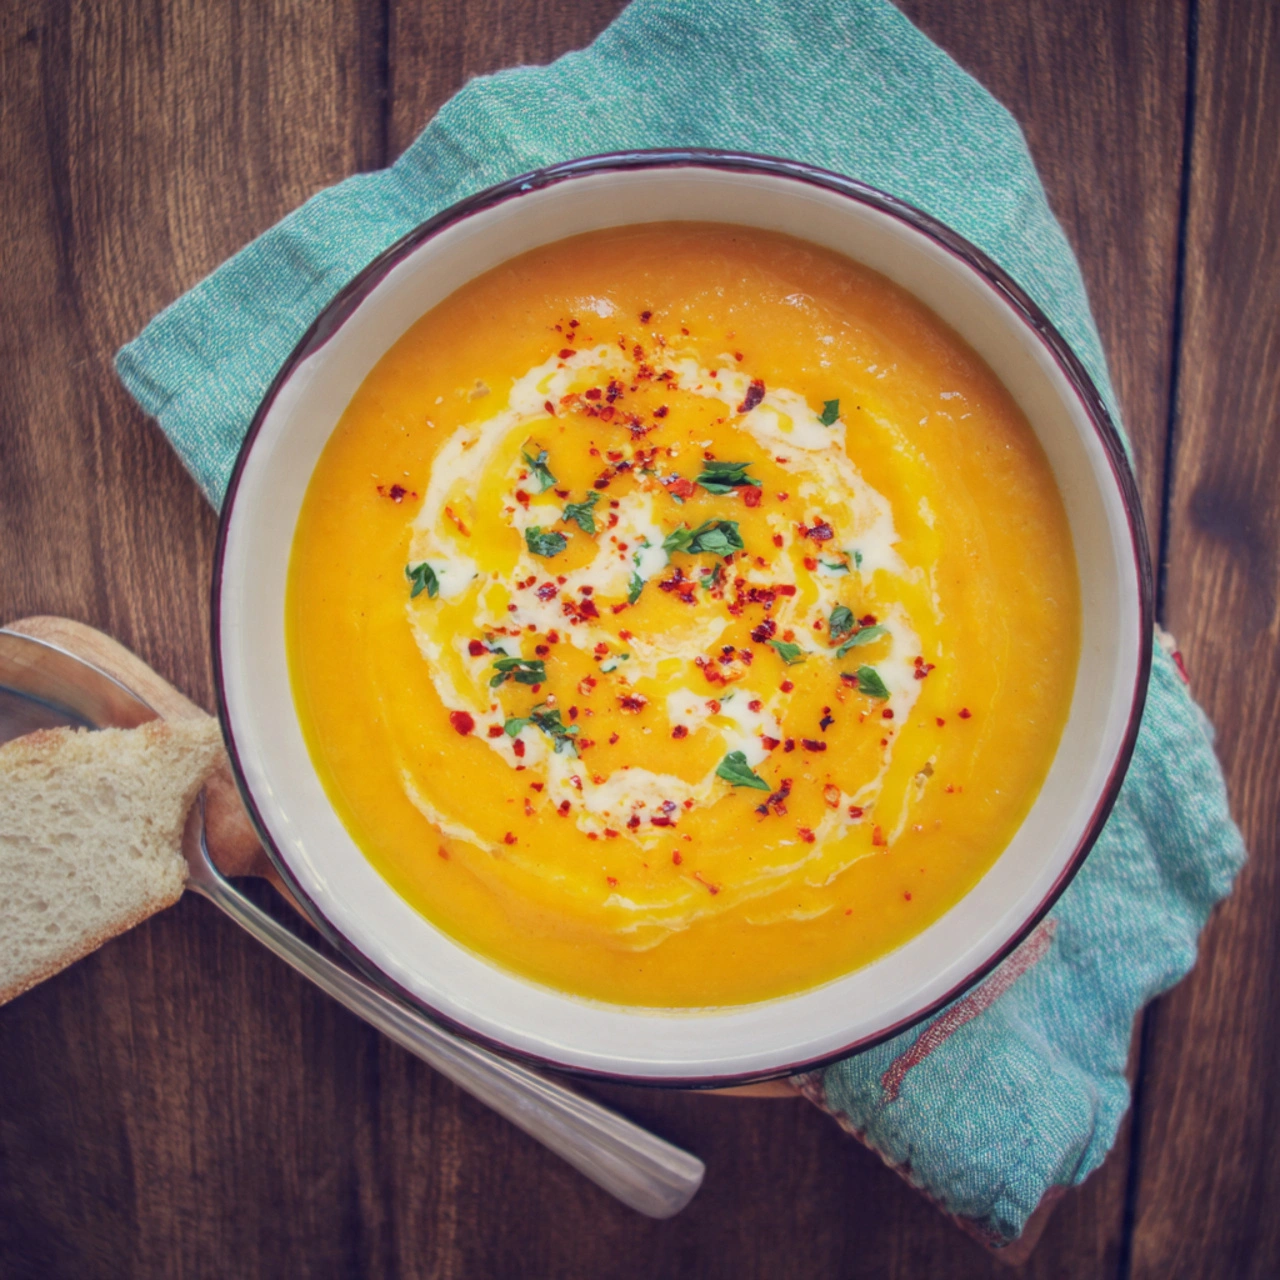
Ladle your Mulligatawny Soup into serving bowls. Top with fresh cilantro, a dollop of plain yogurt if desired, and perhaps a few crusty bread crumbs or croutons for texture. Serve immediately while hot.

Pro Tips for Making Perfect Mulligatawny Soup
Use Whole Spices When Possible: If you have access to whole cumin seeds, coriander seeds, and cardamom pods, toasting them yourself before grinding creates a more vibrant, aromatic spice blend. Whole spices retain their volatile oils longer than pre-ground versions, significantly impacting the final flavor of your Mulligatawny Soup.
Don’t Rush the Onion Stage: The initial onion cooking stage might seem simple, but it’s foundational. Taking your time to properly soften the onion and then bloom your spices creates a deeper, more nuanced base that elevates your entire Mulligatawny Soup.
Adjust Spice Levels to Your Preference: Mulligatawny Soup should warm you from the inside, but not necessarily burn. If you prefer milder heat, reduce the cayenne to 1/4 teaspoon and add more if needed. If you love heat, start with the suggested amount and increase by small increments.
Quality of Coconut Milk Matters: Full-fat coconut milk creates the best texture and mouthfeel in Mulligatawny Soup. Lite versions lack the richness that balances the spices. Don’t shake the can before opening—use the thick cream that rises to the top for even richer results.
Taste as You Cook: Mulligatawny Soup flavors develop and change as it cooks. Tasting at different stages allows you to make informed adjustments before serving rather than trying to fix it at the end.
Consider Cooking Time: If you’re using yellow lentils instead of red lentils, add an extra 5-10 minutes to the simmering time, as they take longer to break down.
Blend for Creamier Texture: If you prefer a smoother, creamier Mulligatawny Soup, use an immersion blender after cooking to puree a portion of the soup while leaving some texture. This creates a more elegant restaurant-style presentation.
Common Mistakes to Avoid When Making Mulligatawny Soup
Burning the Spices: Adding spices to cold oil or leaving them in the pot too long without fat can cause burning. Always ensure your oil is hot and your spices are added to fat, not dry heat.
Using Low-Quality or Stale Spices: Spices that have been sitting in your cabinet for over a year lose potency. Mulligatawny Soup relies heavily on spices for its character, so ensure yours are relatively fresh.
Adding Salt Too Early: Salt drawn out moisture from vegetables and lentils if added at the beginning. Season toward the end of cooking for better results.
Overcooking the Lentils: Red lentils break down quickly—usually within 15-20 minutes. Cooking them longer results in an overly thick, paste-like consistency rather than the desired slightly chunky texture.
Skipping the Lime Juice: This simple addition is crucial. The acidity from lime juice brightens the entire dish and prevents it from tasting one-dimensional or flat.
Using Thin Coconut Milk: Light or reduced-fat coconut milk lacks the richness needed to balance Mulligatawny Soup’s bold flavors. Invest in full-fat versions for superior results.
Not Tasting for Seasoning: Every stovetop heats differently, every brand of spices varies slightly, and every palate is unique. Always taste and adjust before serving.
Storage and Serving Suggestions for Mulligatawny Soup
Refrigerator Storage
Mulligatawny Soup stores beautifully in airtight containers in the refrigerator for up to 4-5 days. The flavors actually improve slightly as the spices continue to meld overnight. When reheating, add a splash of water or broth if the soup has thickened, and reheat gently over medium-low heat, stirring occasionally to prevent sticking.
Freezer Storage
This soup freezes exceptionally well for up to 3 months. Freeze in individual portions using silicone molds or ice cube trays for easy reheating, or use larger containers if you prefer. Thaw overnight in the refrigerator and reheat as described above.
Serving Suggestions
Serve Mulligatawny Soup as a sophisticated first course in small cups with a piece of crusty bread. Present it as a light main course with basmati rice and naan bread for a complete meal. Create a soup bar by setting out toppings including plain yogurt, cilantro, lime wedges, crispy onions, and croutons, allowing guests to customize their bowls.
Pairing Ideas
Mulligatawny Soup pairs beautifully with Indian breads like naan, roti, or paratha. Serve alongside a crisp green salad dressed with lime vinaigrette for a lighter meal. Rice dishes like fragrant jasmine rice or turmeric rice complement the soup’s warming spices.

Frequently Asked Questions About Mulligatawny Soup
Q: Can I make Mulligatawny Soup vegetarian or vegan?
A: Absolutely! Mulligatawny Soup is naturally vegetarian when made with vegetable broth instead of chicken broth. To make it vegan, use vegetable oil instead of ghee and omit the optional yogurt garnish. The soup loses nothing in flavor—the spices and vegetables create an incredibly satisfying, deeply flavored dish on their own.
Q: What can I substitute for red lentils in Mulligatawny Soup?
A: Yellow lentils, green lentils, or even split peas work well in Mulligatawny Soup. Keep in mind that green lentils maintain their shape better and require slightly longer cooking time (25-30 minutes). Split peas create an even creamier texture. Adjust cooking times accordingly based on your chosen legume.
Q: Is Mulligatawny Soup supposed to be spicy?
A: Mulligatawny Soup should have warmth and character from spices, but it doesn’t need to be fiery. The cayenne pepper provides heat, while other spices contribute warmth and depth. Feel free to reduce or increase the cayenne based on your heat tolerance. Start with the recommended amount and adjust upward if you prefer more spice.
Q: Can I use canned coconut milk or must it be fresh?
A: Canned coconut milk works perfectly in Mulligatawny Soup and is actually more convenient for most home cooks. Full-fat canned versions provide the best results. If using fresh coconut milk, note that it’s less shelf-stable and you’ll need to adjust quantities as fresh versions vary in thickness.
Q: How can I make Mulligatawny Soup less creamy?
A: If you prefer a brothier Mulligatawny Soup, reduce the coconut milk to 1/2 cup or even 1/4 cup, and increase the vegetable broth instead. You can also omit the coconut milk entirely for a lighter version, though the resulting soup will lack some of the complexity that coconut brings.
Q: Can I add meat to Mulligatawny Soup?
A: Yes! Cooked chicken, lamb, or even shrimp integrate beautifully into Mulligatawny Soup. Add about 1 cup of cooked, diced meat during the final 2 minutes of cooking. Some recipes call for cooking meat in the initial oil stage, browning it before adding vegetables. Both methods work well.
Q: What’s the difference between Mulligatawny Soup and other Indian soups?
A: Mulligatawny Soup is unique in its British-Indian heritage and its use of lentils combined with specific spice proportions. Other Indian soups might emphasize different spices or ingredients. Mulligatawny’s defining characteristics are its balanced spice blend, the inclusion of lentils for body, and its creamy yet light texture from coconut milk.
Q: How far in advance can I prepare ingredients for Mulligatawny Soup?
A: You can prep all vegetables up to 24 hours in advance, storing them in airtight containers in the refrigerator. Measure out your spices the morning of cooking. The actual cooking process takes only about 45 minutes once you begin, making it perfect for weeknight dinners.
Q: Why does my Mulligatawny Soup separate or look curdled?
A: If your soup has separated, it’s likely due to high heat when adding the coconut milk. Always add coconut milk slowly while stirring, and keep the heat at medium or lower. If this happens, blend the soup briefly with an immersion blender to re-incorporate the ingredients.
Conclusion
Learning how to make Mulligatawny Soup opens doors to a world of flavor that extends far beyond this single recipe. The techniques you’ve learned—blooming spices, building aromatic bases, balancing heat with creaminess—apply to countless other dishes in Indian and global cuisine. Mulligatawny Soup represents the beautiful intersection of culinary traditions, the warmth of comfort food, and the sophistication of properly balanced spices.
Whether you’re cooking for yourself on a quiet weeknight or impressing guests with a restaurant-quality first course, Mulligatawny Soup delivers every single time. The recipe is forgiving enough for beginners yet sophisticated enough to satisfy experienced home cooks. Start with the base recipe, then experiment with variations—adding different proteins, adjusting spice levels, or incorporating your favorite vegetables.
Your kitchen will fill with aromas that transport you to bustling Indian markets, your taste buds will experience layers of flavor that evolve with each spoonful, and everyone who tries your homemade Mulligatawny Soup will wonder why they haven’t been making it all along. This is the magic of understanding not just how to follow a recipe, but why each step matters. Now that you possess that knowledge, go forth and create Mulligatawny Soup that’s authentically, deliciously yours.
Print
Mulligatawny Soup: A Complete Guide to Making This Aromatic Indian Classic at Home
This aromatic Indian curry soup features warm spices, tender vegetables, and creamy coconut milk for a comforting dish that’s both sophisticated and approachable. Perfect as a starter or light main course, Mulligatawny Soup brings restaurant-quality flavor to your home kitchen.
- Total Time: 55-60 minutes
- Yield: 4-6 servings
Ingredients
For the Spice Base:
- 2 tablespoons ghee or vegetable oil
- 1 medium yellow onion, finely diced
- 3 cloves garlic, minced
- 1 tablespoon fresh ginger, minced
- 1 teaspoon ground turmeric
- 1 teaspoon ground cumin
- 1 teaspoon ground coriander
- 1/2 teaspoon cayenne pepper
- 1/4 teaspoon black pepper
- 1/2 teaspoon ground cinnamon
- 1/4 teaspoon cardamom (ground)
- 1 teaspoon cumin seeds (for tempering)
For the Soup Base:
- 2 medium carrots, diced
- 2 celery stalks, diced
- 1 red or yellow bell pepper, diced
- 1 medium potato, diced
- 1/2 cup red lentils
- 4 cups vegetable or chicken broth
- 1 can (14 oz) diced tomatoes
- 1 cup full-fat coconut milk
- 2 dried bay leaves
- 1/2 cup frozen peas
- Salt and pepper to taste
- Juice of 1/2 lime
- Fresh cilantro for garnish
Instructions
- Heat ghee or oil in a large pot over medium heat until shimmering (about 30 seconds)
- Add cumin seeds and listen for them to pop (20-30 seconds)
- Add diced onion and cook for 3-4 minutes until translucent
- Stir in minced garlic and ginger, cooking for 60-90 seconds until fragrant
- Add all ground spices (turmeric, cumin, coriander, cayenne, black pepper, cinnamon, cardamom) and stir for 1-2 minutes to bloom
- Add carrots, celery, and bell pepper; cook for 3 minutes
- Add potato and cook for 2 minutes more
- Stir in red lentils and bay leaves
- Pour in vegetable or chicken broth and bring to a boil over high heat
- Reduce heat to medium-low and simmer for 15-20 minutes until lentils break down and vegetables are tender
- Add canned diced tomatoes and simmer for 5 minutes
- Slowly pour in coconut milk while stirring constantly
- Simmer for 2-3 minutes to allow flavors to meld
- Add frozen peas and cook for 2 minutes until heated through
- Stir in optional protein if using
- Taste and adjust seasoning with salt and pepper
- Finish with lime juice
- Ladle into bowls and garnish with fresh cilantro, yogurt, or croutons
Notes
- For a spicier soup, increase cayenne to 3/4 teaspoon
- For a milder version, reduce cayenne to 1/4 teaspoon
- For creamier texture, blend a portion of the soup with an immersion blender
- For brothier soup, reduce coconut milk to 1/2 cup and increase broth to 4.5 cups
- Soup can be made vegetarian by using vegetable broth and omitting optional meat
- Soup can be made vegan by using vegetable oil instead of ghee and omitting yogurt
- Prep Time: 15 minutes
- Cook Time: 40-45 minutes
- Category: Soups
- Method: Stovetop
- Cuisine: Indian, Anglo-Indian, British-Indian
- Diet: Vegetarian


1 Comment
[…] by the ingredient list or uncertain about technique. Yet chicken enchilada soup is genuinely one of the most forgiving, adaptable, and rewarding dishes you can make at […]
Comments are closed.