

Maine’s Oat Molasses Bread: The Ultimate Guide to New England’s Most Beloved Loaf

Introduction: The Story Behind Maine’s Oat Molasses Bread
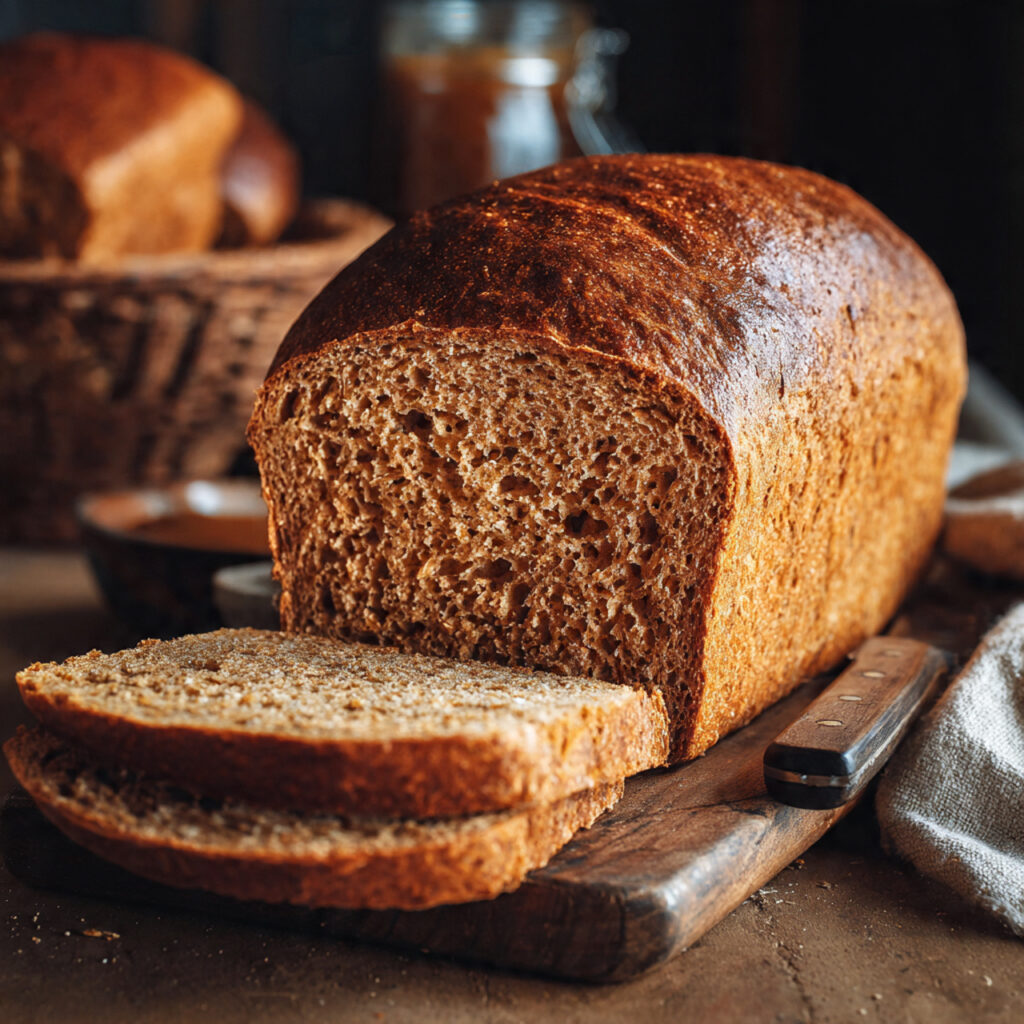
Maine’s Oat Molasses Bread is one of those rare recipes that carries an entire region’s history, culture, and culinary soul in every single slice. This deeply nourishing, robustly flavored bread has been a staple of New England kitchens for generations, its rich molasses sweetness and hearty oat texture telling the story of a people shaped by hard winters, maritime traditions, and an appreciation for honest, wholesome food. If you’ve ever visited coastal Maine, you’ve likely encountered this bread at a local bakery, bed and breakfast, or farmhouse table, and you’ve probably never forgotten it.
What makes Maine’s Oat Molasses Bread unlike any other bread you’ll bake is the extraordinary depth of flavor that comes from the marriage of blackstrap or dark molasses with rolled oats. Molasses—a byproduct of sugar refining that was once more common in New England kitchens than refined sugar itself—brings a complex, bittersweet richness that no other sweetener can replicate. Combined with rolled oats that soften and swell during rising to create an incredibly tender, moist crumb, the result is a bread that’s simultaneously rustic and refined, hearty and delicate.
The history of this bread is deeply intertwined with New England’s connection to the molasses trade. During the colonial era and well into the 19th century, molasses was the primary sweetener in American kitchens, particularly in the Northeast where trade routes from the Caribbean brought barrels of it to port cities up and down the coast. Maine’s proximity to these ports meant that molasses was abundant and affordable, finding its way into everything from baked beans to brown bread to this oat-enriched loaf that became a regional signature.
Today, Maine’s Oat Molasses Bread enjoys renewed appreciation among artisan bread bakers, food historians, and anyone seeking a connection to authentic American culinary traditions. This isn’t a quick-fix recipe or a trendy new creation—it’s a time-honored loaf that rewards patience and attention with extraordinary results. The long rise time develops complex flavors, the oats provide nutritional substance, and the molasses creates that characteristic dark, glossy crust that makes this bread instantly recognizable.
In this comprehensive guide, I’ll walk you through every aspect of baking Maine’s Oat Molasses Bread successfully. From selecting the right type of molasses to understanding how oats affect the dough’s hydration, from shaping your loaves to achieving that perfect crust, you’ll find everything you need to create an authentic, beautiful loaf that honors this remarkable New England tradition.
Understanding the Key Ingredients in Maine’s Oat Molasses Bread
Before we get into the recipe itself, let’s explore what makes the ingredients in Maine’s Oat Molasses Bread so special and why each one matters.
Molasses: The Heart and Soul
Not all molasses is created equal, and your choice will significantly impact the final flavor of your bread. Blackstrap molasses is the most intensely flavored variety—dark, slightly bitter, and deeply complex. It’s what traditional Maine bakers would have used historically and produces the most authentic-tasting bread. However, its intensity can be overwhelming for some palates.
Dark molasses (also called robust or full-flavored molasses) strikes an ideal balance for most bakers. It has substantial depth and that characteristic slightly bitter sweetness without being as intense as blackstrap. This is what I recommend for this recipe. Unsulfured molasses is preferred over sulfured, as the sulfur compounds in sulfured molasses can produce a harsh, chemical off-flavor in baked goods.
Light or mild molasses will produce a noticeably less flavorful bread—technically acceptable but lacking the character that makes Maine’s Oat Molasses Bread truly distinctive. Avoid it for this recipe.
Rolled Oats: Texture and Nutrition
Old-fashioned rolled oats are the right choice for this bread. When soaked in the hot liquid component of the recipe, they soften and swell, eventually becoming almost undetectable as distinct oat pieces while contributing remarkable moisture and a subtle nuttiness to the crumb. Quick oats work in a pinch but become too mushy. Steel-cut oats require too long to soften and will remain unpleasantly chewy.
The oats also contribute to the bread’s keeping qualities—the moisture they retain during baking means this loaf stays fresh and soft longer than plain white bread.
Flour Selection
Traditional Maine’s Oat Molasses Bread uses a combination of bread flour and whole wheat flour. Bread flour provides the gluten structure needed to support a proper rise, while whole wheat flour contributes flavor complexity, nutritional value, and that slightly coarser texture that makes the bread feel substantive and rustic. The ratio of bread flour to whole wheat can be adjusted based on preference—more whole wheat creates a denser, more complex loaf, while more bread flour produces lighter texture.
Yeast
Active dry yeast is traditionally used in this recipe and works beautifully. Instant yeast can be substituted and doesn’t require proofing, but active dry yeast gives you the opportunity to verify it’s alive before committing to a several-hour project—a practical advantage.
Ingredients: Everything You Need for Maine’s Oat Molasses Bread
This recipe makes two standard loaves, ideal for sharing or for keeping one and gifting the other. The yield can be halved for a single loaf.
For the Oat Soaker
- 1½ cups old-fashioned rolled oats — The backbone of the bread’s distinctive texture
- 2 cups boiling water — Softens the oats and activates the molasses flavor
- ½ cup dark molasses — Use unsulfured for best flavor
- 2 tablespoons unsalted butter — Adds richness and helps create a tender crumb
- 1½ teaspoons salt — Essential for flavor balance
For the Yeast Mixture
- 2¼ teaspoons active dry yeast (one standard packet) — The leavening agent
- ½ cup warm water (105-110°F) — Activates the yeast; too hot kills it, too cool won’t wake it up
- 1 teaspoon granulated sugar — Feeds the yeast during proofing
For the Dough
- 3 cups bread flour — Provides structure and chew
- 1½ cups whole wheat flour — Adds flavor, nutrition, and texture
- Additional bread flour as needed — For adjusting consistency during kneading (up to ½ cup)
Optional Add-ins for Extra Character
- ½ cup sunflower seeds — Adds crunch and nutty flavor
- ¼ cup flaxseed — Boosts nutritional profile
- 2 tablespoons honey — Adds floral sweetness alongside the molasses
- 1 tablespoon caraway seeds — Traditional New England addition
For the Crust
- 1 egg beaten with 1 tablespoon water — Creates a glossy, dark crust when brushed on before baking
- 2 tablespoons rolled oats — For sprinkling on top before baking
- Flaky sea salt — Optional finishing touch
Step-by-Step Instructions: Baking Maine’s Oat Molasses Bread
Creating Maine’s Oat Molasses Bread is a deeply satisfying process that unfolds over several hours. While it requires patience, each stage is simple and the hands-on time is relatively brief. Here’s the complete process:
Step 1: Create the Oat Soaker
Begin by combining the rolled oats, dark molasses, butter, and salt in a large mixing bowl—the same bowl you’ll use for the dough. Pour the boiling water over these ingredients and stir well until the butter melts completely and everything is evenly combined.
This soaking step is crucial for Maine’s Oat Molasses Bread. The hot water softens the oats, hydrating them so they won’t steal moisture from the dough during rising and baking. The heat also helps the molasses bloom and distribute evenly, while the melted butter coats the oats and contributes richness.
Allow this mixture to cool until it reaches between 100-110°F—warm but not hot enough to kill yeast. This will take approximately 30-45 minutes. You can speed this up by spreading the mixture thinner in a larger bowl or by stirring frequently. Don’t rush this step by adding the yeast mixture too early, as temperatures above 115°F will kill the yeast.
Step 2: Proof the Yeast
While your oat mixture cools, proof the yeast. In a small bowl, combine the warm water (105-110°F), sugar, and active dry yeast. Stir gently and let it sit for 5-10 minutes. You’re looking for the yeast to become foamy and fragrant—a sign that it’s alive and active.
If your yeast doesn’t foam after 10 minutes, it may be old or dead. Don’t proceed with dead yeast or you’ll end up with dense, flat loaves after several hours of effort. Start with fresh yeast and try again.
Step 3: Combine Wet Ingredients
Once your oat mixture has cooled to the appropriate temperature, add the foamy yeast mixture to it. Stir gently to combine. The mixture will look thick and dark, with the characteristic deep brown color that molasses creates—this is exactly what you want.
Step 4: Add Flour and Mix
Begin adding flour to the oat-yeast mixture. Start with the whole wheat flour, adding it all at once and stirring vigorously with a wooden spoon or dough whisk until incorporated. Then begin adding the bread flour, one cup at a time, stirring well between additions.
At first the dough will look shaggy and rough—almost impossibly sticky and unworkable. Continue adding flour and mixing. By the time you’ve added about 2 cups of bread flour, the dough should start coming together into a recognizable mass that pulls away from the sides of the bowl.
Add bread flour conservatively. It’s much easier to add more flour during kneading than to compensate for overly dense dough from too much flour. The oats in the dough retain a lot of moisture, so this dough should remain somewhat tacky even when properly hydrated.
Step 5: Knead the Dough
Turn the dough out onto a lightly floured surface and begin kneading. Bread bakers use different techniques, but the basic method works well here: push the dough away from you with the heel of your hand, fold it back over itself, rotate a quarter turn, and repeat.
Knead for 8-10 minutes, adding small amounts of flour as needed when the dough becomes too sticky to work. Maine’s Oat Molasses Bread dough should remain slightly tacky throughout kneading—if it becomes completely non-sticky, you’ve likely added too much flour and the bread will be dense.
The dough is ready when it passes the windowpane test: take a small piece and gently stretch it between your fingers. If you can stretch it thin enough to see light through without tearing, the gluten is sufficiently developed. The dough should also feel smooth, elastic, and spring back when you poke it.
If using a stand mixer, knead with the dough hook on medium speed for 6-8 minutes, adding flour gradually until the dough clears the sides of the bowl but still sticks slightly to the bottom.
Step 6: First Rise
Shape the kneaded dough into a smooth ball. Place it in a lightly oiled large bowl, turning to coat the surface with oil (this prevents drying and sticking). Cover the bowl with plastic wrap or a clean kitchen towel.
Let the dough rise in a warm place (75-80°F is ideal) until it has doubled in size, approximately 1 to 1½ hours. The timing varies based on room temperature, yeast activity, and the specific flour you used. Don’t rush this rise—it develops the flavor complexity that makes Maine’s Oat Molasses Bread so distinctive.
Good rising environments include inside an oven with just the light on (no heat), on top of the refrigerator where ambient warmth collects, or in a spot near (but not directly on) a heating vent.
Step 7: Punch Down and Shape
Once doubled, punch the dough down gently to release the gas bubbles. Turn it out onto a lightly floured surface. Divide the dough into two equal portions using a bench scraper or knife. Each portion will become one loaf.
To shape each portion, flatten it gently into a rough rectangle approximately as wide as your loaf pan. Fold the sides toward the center, then roll the dough toward you, pinching the seam closed. The shaped dough should be roughly the same length as your loaf pan.
Place each shaped loaf seam-side down in a greased 9×5 inch loaf pan. The dough should fill about half to two-thirds of the pan.
Step 8: Second Rise
Cover the shaped loaves loosely with plastic wrap or a clean towel. Let them rise again in a warm place until the dough crowns about 1 inch above the rim of the loaf pans, approximately 45 minutes to 1 hour.
This second rise is shorter than the first but equally important. It creates the final structure and gives the loaves their characteristic crowned shape. Don’t let them over-rise at this stage or the gluten structure can weaken and the loaves may collapse during baking.
Step 9: Preheat and Prepare for Baking
While the loaves complete their second rise, preheat your oven to 375°F (190°C). Position the oven rack in the lower third of the oven—this positioning helps ensure the bottoms of the loaves cook through without the tops getting too dark too quickly.
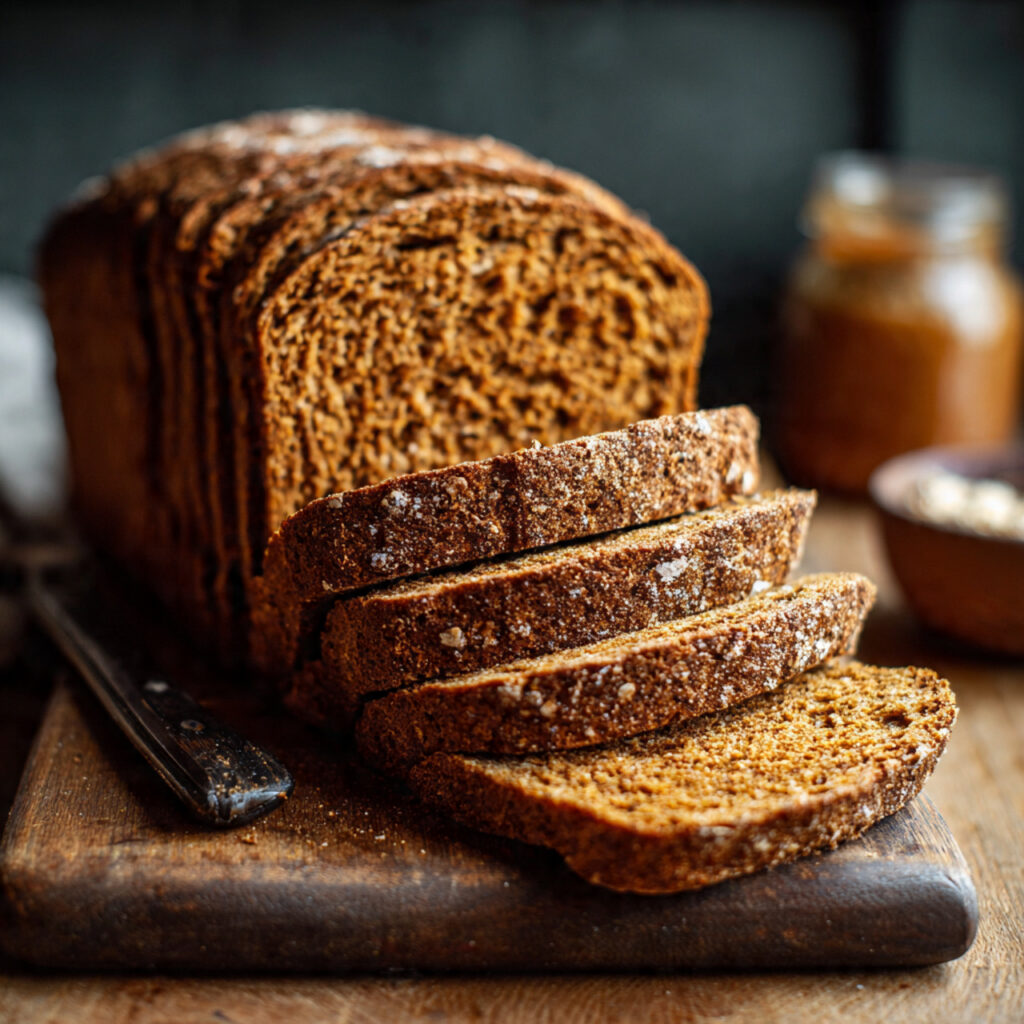
When the loaves have properly risen, brush them gently with the egg wash (beaten egg and water). This creates that beautiful glossy, dark mahogany crust that makes Maine’s Oat Molasses Bread so visually distinctive. Sprinkle the top of each loaf with rolled oats and a pinch of flaky sea salt if desired.
Step 10: Bake to Perfection
Bake the loaves at 375°F for 35-40 minutes. At the 20-minute mark, check the color. If the tops are browning too quickly, tent loosely with aluminum foil for the remainder of the baking time.
The bread is done when the internal temperature reaches 190-200°F on an instant-read thermometer, or when you tap the bottom of a loaf and hear a hollow sound. The crust should be deep brown—darker than you might expect from most white breads, but that’s the characteristic color that molasses creates.
Step 11: Cool Before Slicing
Remove the loaves from their pans immediately after baking to prevent the bottoms from steaming and becoming soggy. Transfer to a wire rack and—here’s the hard part—let them cool completely before slicing.
I know the aroma of freshly baked Maine’s Oat Molasses Bread is almost impossibly tempting. But slicing too early releases steam, collapses the crumb structure, and results in a gummy interior texture. Allow at least 1 hour of cooling time, though 2 hours is better. The bread continues to set up during this cooling period and the crumb becomes properly tender and sliceable.

Pro Tips for Maine’s Oat Molasses Bread
After baking countless loaves of this magnificent bread and troubleshooting every possible issue, these expert insights will help you achieve perfection consistently:
Choose Your Molasses Thoughtfully
The single biggest flavor decision you’ll make in this recipe is which molasses to use. Blackstrap produces the most assertive, complex, slightly bitter flavor—closest to historical Maine bread. Dark or robust molasses (brands like Grandma’s Robust or Brer Rabbit Full Flavor) creates a more approachable, deeply flavored bread that appeals to wider audiences. For your first bake, try dark molasses. Once you’re comfortable with the recipe, experiment with blackstrap for a more intense, traditional result.
Don’t Skip the Oat Soaking Step
The soaker is not optional in Maine’s Oat Molasses Bread. If you try to add dry oats directly to the dough, they’ll absorb moisture during rising and baking, resulting in a dry, crumbly loaf with unpleasantly chewy oat pieces. The soaker hydrates the oats to saturation before they enter the dough, ensuring they contribute moisture rather than stealing it.
Master the Right Dough Consistency
This dough should feel tacky but workable—stickier than standard white bread dough. Many first-time bakers add too much flour trying to achieve a non-sticky dough, resulting in dense, dry bread. When in doubt, add less flour. You can always dust your hands and work surface to handle sticky dough; you can’t remove excess flour once it’s been incorporated.
Develop Flavor with a Slow Cold Rise
For truly exceptional depth of flavor, after shaping the loaves and placing them in pans, cover them tightly with plastic wrap and refrigerate overnight (8-12 hours) rather than doing the second rise at room temperature. Remove from the refrigerator and let them warm up and finish rising at room temperature for 45-60 minutes before baking. This extended cold fermentation develops remarkable complexity that makes the bread taste as if it came from a professional artisan bakery.
Check Oven Temperature Accuracy
Home ovens often run hotter or cooler than their dials indicate. Invest in an inexpensive oven thermometer to verify your oven’s actual temperature. An oven that runs 25°F too hot will over-brown the molasses-rich crust before the interior cooks through. An oven running 25°F too cool will produce pale bread that takes too long to bake, potentially drying out the crumb.
Use a Thermometer for Doneness
The tap-test (tapping the bottom for a hollow sound) is useful but not foolproof, especially for beginners. An instant-read thermometer inserted into the center of the loaf takes the guesswork out of doneness. Maine’s Oat Molasses Bread is fully baked when the internal temperature reads 190-200°F.
Toast the Oats for Extra Depth
For additional nutty complexity in your Maine’s Oat Molasses Bread, spread the rolled oats on a baking sheet and toast at 350°F for 8-10 minutes until lightly golden and fragrant before using them in the soaker. Toasted oats contribute a deeper, nuttier flavor that complements the molasses beautifully.
Add Steam for a Better Crust
For a more substantial, bakery-quality crust, create steam in your oven during the first 10 minutes of baking. Place an empty metal pan on the bottom rack while the oven preheats. Just before placing your bread in the oven, carefully pour one cup of hot water into the empty pan and quickly close the oven door. The steam prevents the crust from setting too quickly, allowing maximum oven spring before the exterior hardens.
Common Mistakes to Avoid with Maine’s Oat Molasses Bread
Even experienced bread bakers can encounter challenges with this recipe. Avoid these common pitfalls:
Adding Yeast to Hot Oat Mixture
The oat soaker must cool sufficiently before adding the yeast mixture. Adding yeast to a mixture that’s above 115°F kills the yeast cells, resulting in bread that never rises. Always check the temperature with a thermometer or your wrist—the mixture should feel comfortably warm, like bathwater, not hot.
Using the Wrong Type of Oats
Steel-cut oats won’t soften adequately even with soaking, leaving unpleasant chewy chunks in your finished bread. Instant oats become paste-like and don’t contribute the desired texture. Use old-fashioned rolled oats exclusively for authentic results.
Measuring Flour Incorrectly
The most common cause of dense, dry bread is too much flour. Scooping measuring cups directly into the flour bag compacts the flour and can give you 20-30% more than intended. Instead, spoon flour into the measuring cup and level it off with a knife. Better yet, use a kitchen scale—this recipe works best with 420g bread flour and 210g whole wheat flour as a starting point.
Skipping the Windowpane Test
Insufficient kneading produces bread that doesn’t rise properly and has a coarse, uneven crumb. Don’t rely on time alone—some doughs need more kneading than others depending on technique. Always perform the windowpane test to verify gluten development before moving to the first rise.
Rushing the Rise
Impatience is the enemy of great bread. Cutting the first or second rise short because the dough seems close to doubled produces bread with less flavor complexity and a denser crumb. Wait for the dough to truly double in size during the first rise, and wait for it to crown one inch above the pan rim during the second rise.
Slicing While Warm
Cutting into hot or even warm bread is incredibly tempting given the aroma, but it ruins the crumb. The interior of a freshly baked loaf is still setting up—it’s essentially in a semi-molten state. Slicing too early releases steam, collapses the structure, and creates a gummy, sticky crumb that appears underbaked even when properly cooked. Wait at least one hour, ideally two.
Under-Baking
The dark color of molasses bread can fool bakers into thinking the bread is more done than it actually is—the deep brown crust looks fully baked even when the interior is still raw. Always verify doneness with an internal temperature reading rather than relying on visual cues alone.
Storing in Plastic While Warm
Never seal warm bread in plastic bags or airtight containers. The trapped steam creates a wet environment that makes the crust soggy and can promote mold. Allow bread to cool completely on a wire rack before storing.
Storage and Serving Suggestions for Maine’s Oat Molasses Bread
This extraordinary bread deserves to be stored and served in ways that preserve and celebrate its remarkable character.
Storing at Room Temperature
Once completely cooled, Maine’s Oat Molasses Bread stores beautifully at room temperature. The high moisture content from the oats and molasses helps it stay fresh longer than many other breads. Wrap the loaf in a clean kitchen towel or place it cut-side down on a cutting board covered with a towel. Alternatively, store in a paper bag or a bread box. Avoid plastic bags for the first day—they trap moisture and make the crust soft and chewy.
After the first day, if you need to keep the loaf longer, wrapping in plastic is fine. Properly stored, Maine’s Oat Molasses Bread stays fresh at room temperature for 3-4 days.
Freezing for Long-Term Storage
Maine’s Oat Molasses Bread freezes exceptionally well, making it practical to bake two loaves and freeze one. Cool the loaf completely, then wrap it tightly in two layers of plastic wrap followed by aluminum foil or a freezer bag. Freeze for up to 3 months.
Thaw frozen bread overnight at room temperature (still wrapped) or for several hours on the counter. You can also thaw individual slices by placing them directly in a toaster. For a freshly-baked quality from frozen, unwrap the thawed loaf and warm it in a 350°F oven for 10-12 minutes.
Pre-Slicing for Convenience
If you bake this bread regularly, consider slicing the entire loaf before freezing. Lay slices in a single layer on a baking sheet and freeze until solid (about 2 hours), then transfer to a freezer bag. This allows you to remove exactly the number of slices you need without thawing the entire loaf.
Classic Serving Suggestions
Warm with Butter: There is simply nothing better than a thick slice of freshly baked Maine’s Oat Molasses Bread, still slightly warm, spread with good quality unsalted butter. The butter melts into the crumb while the crust stays firm. Perfection.
With Maine Baked Beans: This pairing is historically traditional and absolutely delicious. The bread’s molasses flavor echoes the sweetness in New England baked beans, creating a harmonious combination that has satisfied Maine families for generations.
Open-Faced with Smoked Salmon: Maine is famous for its seafood, and smoked salmon on a slice of oat molasses bread with cream cheese, capers, and thinly sliced red onion makes an elegant appetizer or light meal.
As Toast: Toasted Maine’s Oat Molasses Bread is absolutely extraordinary. The heat caramelizes the molasses in the crust and warms the oats, intensifying all the flavors. Top with almond butter and sliced bananas, or with good jam for a simple breakfast.
For Sandwiches: The bread’s substantial texture holds up beautifully to hearty fillings. A classic New England lobster roll, a sharp cheddar and apple sandwich, or a simple turkey and cranberry combination all work wonderfully.
With Chowder: Another traditional Maine pairing, thick slices of oat molasses bread alongside clam chowder or seafood bisque is a deeply satisfying cold-weather meal.
French Toast: Day-old Maine’s Oat Molasses Bread makes phenomenal French toast. The molasses and oat flavors transform the classic dish into something extraordinary. Serve with maple syrup (ideally Maine maple syrup) for a full New England experience.
Frequently Asked Questions About Maine’s Oat Molasses Bread
Can I make Maine’s Oat Molasses Bread without a stand mixer?
Absolutely. This bread was made by hand for centuries before electric mixers existed, and hand kneading works beautifully. The process simply requires 8-10 minutes of physical effort rather than letting a machine do the work. The oat-enriched dough is actually easier to hand knead than some very sticky doughs because the oats give it body. Use a bench scraper to help manage the dough during kneading and don’t be tempted to add excessive flour just to reduce stickiness.
Can I use all-purpose flour instead of bread flour?
You can, but the result will be slightly different. Bread flour has higher protein content (12-14%) than all-purpose flour (10-12%), which means more gluten development and better structure for yeast breads. Maine’s Oat Molasses Bread made with all-purpose flour will be slightly less chewy with a somewhat denser, softer crumb. If you only have all-purpose flour, use it—the bread will still be delicious. You might also try adding 1 tablespoon of vital wheat gluten per cup of all-purpose flour to boost the protein content closer to bread flour levels.
What’s the difference between using blackstrap versus regular molasses?
The differences are significant enough to noticeably affect your finished bread. Blackstrap molasses is the third and final extraction of sugar from sugar cane—it’s darkest, most bitter, and most intensely flavored, with the highest mineral content (iron, calcium, magnesium). Regular dark molasses is the second extraction—still robust and flavorful but with more sweetness and less bitterness. For traditional Maine’s Oat Molasses Bread, blackstrap produces the most historically authentic flavor. If you’re new to molasses bread or prefer less intensity, dark molasses is the better starting point.
Why did my bread come out dense and heavy?
Dense bread typically results from one of several causes: insufficient kneading (gluten not properly developed), adding too much flour (dough too stiff to rise properly), yeast that was old or killed by too-hot liquid, rushing the rise times, or over-proofing (letting the dough rise too long, exhausting the yeast). The most common culprit is too much flour—this dough should remain slightly tacky throughout. If your bread consistently comes out dense, try reducing the flour by ¼ cup and see if that improves results.
Can I make this bread whole wheat only, without bread flour?
You can make a 100% whole wheat version, but it will be noticeably denser and more compact than the mixed-flour version. Whole wheat flour produces less gluten than bread flour, and its bran particles cut gluten strands during kneading, reducing rise capacity. If you want a fully whole wheat bread, add 1 tablespoon of vital wheat gluten per cup of whole wheat flour, increase the yeast slightly, and expect a shorter rise time. The flavor will be even more robust and nutty—delicious but very different from the standard recipe.
How do I know when the dough has risen enough?
For the first rise, the dough should roughly double in size. A reliable way to gauge this is the “poke test”—gently poke the dough with a floured finger. If the indentation springs back slowly and partially fills in, it’s ready. If it springs back immediately, it needs more time. If the indentation stays completely without springing back, the dough may be slightly over-proofed—proceed quickly to shaping.
For the second rise in the pans, look for the dough to crown about 1 inch above the pan rim. The poke test applies here too—a slow, partial spring-back indicates readiness.
Can I add other grains or seeds to this bread?
Absolutely, and many traditional versions do. Sunflower seeds, pumpkin seeds, flaxseeds, sesame seeds, or millet can be added to the dough or sprinkled on top. Add seeds during the kneading stage, not at the beginning when the dough is still coming together. Keep total additions to about ½ cup to avoid weighing down the dough. For seeds on top, brush with egg wash, sprinkle seeds, and press gently so they adhere during baking.
My bread is baked but the top is very dark—did I burn it?
Molasses bread is naturally much darker than standard white bread due to the high sugar content in molasses caramelizing during baking. A very deep brown crust is normal and desirable for Maine’s Oat Molasses Bread—this is not a pale, golden bread. However, if the top is genuinely black or bitter-smelling, it may have been slightly overbaked or your oven runs hot. For your next bake, tent the loaves with aluminum foil after 20 minutes if browning seems excessive. Verify your oven temperature with an oven thermometer.
Conclusion: Baking a Piece of New England History
Baking Maine’s Oat Molasses Bread is more than following a recipe—it’s participating in a culinary tradition that stretches back centuries, connecting you to the generations of Maine families who relied on this nourishing loaf through harsh winters and busy harvest seasons. Every time you pull these deep brown, oat-flecked loaves from the oven, you’re carrying forward a piece of genuine American food heritage that deserves to be preserved and celebrated.
The techniques and insights I’ve shared here come from extensive baking experience and deep respect for this remarkable regional bread. By following these guidelines—soaking your oats properly, managing dough hydration carefully, respecting the rise times, and verifying doneness with a thermometer—you’ll achieve results that honor the tradition while satisfying modern tastes.
What makes Maine’s Oat Molasses Bread so enduring is its perfect balance of rusticity and refinement. It’s hearty enough to fuel a day of hard physical work, yet flavorful and nuanced enough to serve at an elegant dinner. It’s simple enough that any baker can make it successfully, yet complex enough that even experienced bakers find it rewarding and interesting.
As you become comfortable with this recipe, explore the variations—try blackstrap molasses for more intensity, experiment with seed additions, or attempt the slow cold fermentation method for extraordinary flavor complexity. This bread welcomes exploration and personal expression while maintaining its essential New England character.
Whether you first encountered Maine’s Oat Molasses Bread on a trip to the coast, at a bed and breakfast overlooking Penobscot Bay, or simply through a love of regional American baking traditions, I hope this recipe brings that taste of Maine to your own kitchen. There is something profoundly satisfying about drawing warm, fragrant loaves from the oven and knowing that you’ve created something truly connected to place, history, and culture.
Now fire up that oven, soak those oats, and let your kitchen fill with one of the most magnificent aromas in all of bread baking. Maine’s Oat Molasses Bread awaits—and every slice is worth every minute of the journey.
Print
Maine’s Oat Molasses Bread: The Ultimate Guide to New England’s Most Beloved Loaf
This authentic New England staple combines the deep, complex sweetness of dark molasses with hearty rolled oats to create a deeply flavorful, tender-crumbed bread that’s been warming Maine kitchens for generations. Rich, satisfying, and absolutely magnificent toasted with butter, this bread is a true taste of American culinary heritage.
- Total Time: 3 hours 10 minutes (including rising)
- Yield: 2 loaves (approximately 16 slices each)
Ingredients
Oat Soaker:
- 1½ cups old-fashioned rolled oats
- 2 cups boiling water
- ½ cup dark molasses (unsulfured)
- 2 tablespoons unsalted butter
- 1½ teaspoons salt
Yeast Mixture:
- ½ cup warm water (105-110°F)
- 2¼ teaspoons active dry yeast (1 packet)
- 1 teaspoon granulated sugar
Dough:
- 3 cups bread flour (plus up to ½ cup more as needed)
- 1½ cups whole wheat flour
For the Crust:
- 1 egg beaten with 1 tablespoon water (egg wash)
- 2 tablespoons rolled oats (for topping)
- Flaky sea salt (optional)
Instructions
- Make the soaker: In a large bowl, combine oats, molasses, butter, and salt. Pour boiling water over and stir until butter melts. Cool to 100-110°F, about 30-45 minutes.
- Proof yeast: Combine warm water, sugar, and yeast in a small bowl. Let sit 5-10 minutes until foamy and fragrant.
- Combine: Add foamy yeast mixture to cooled oat mixture. Stir gently to combine.
- Add flour: Stir in whole wheat flour until incorporated. Add bread flour one cup at a time, mixing between additions, until a rough dough forms.
- Knead: Turn dough onto lightly floured surface. Knead 8-10 minutes until smooth, elastic, and passing the windowpane test. Dough should remain slightly tacky.
- First rise: Shape into a ball, place in oiled bowl, turning to coat. Cover and let rise in a warm place until doubled, 1 to 1½ hours.
- Shape: Punch down dough, divide in half. Shape each into a loaf and place seam-side down in greased 9×5 inch loaf pans.
- Second rise: Cover loosely and let rise until dough crowns 1 inch above pan rim, 45 minutes to 1 hour.
- Preheat oven: Heat oven to 375°F with rack in lower third position.
- Prepare for baking: Brush loaves with egg wash. Sprinkle with rolled oats and sea salt if using.
- Bake: Bake 35-40 minutes until deep brown and internal temperature reaches 190-200°F. Tent with foil if browning too quickly.
- Cool: Remove from pans immediately and cool on wire racks for at least 1 hour before slicing.
Notes
- Dark molasses creates the most balanced flavor; blackstrap produces more intense, traditional results.
- Do not use quick oats or steel-cut oats—old-fashioned rolled oats only.
- Dough should remain slightly tacky; resist adding too much flour.
- For enhanced flavor, refrigerate shaped loaves overnight for a slow cold rise, then let warm and finish rising at room
- Verify doneness with an internal thermometer—dark crust color can be misleading.
- Cool completely before slicing for proper crumb texture.
- Freeze one loaf wrapped tightly for up to 3 months.
- Toast day-old slices for the most extraordinary flavor experience.
- Prep Time: 30 minutes
- Cook Time: 40 minutes
- Category: Desserts
- Method: Baking
- Cuisine: American
- Diet: Vegetarian


