

Focaccia Bread: 9 Professional Secrets for Bakery-Quality Results at Home
Introduction
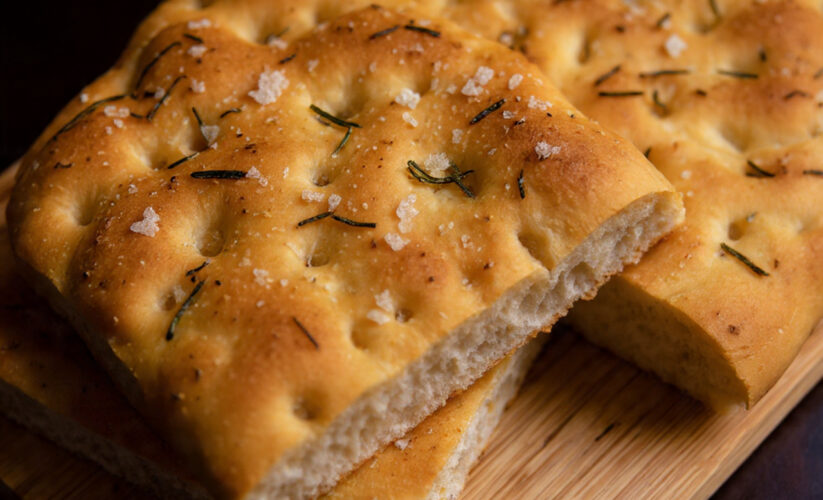
Focaccia bread is the crown jewel of Italian baking—a pillowy, olive oil-soaked flatbread with a golden, dimpled crust that’s both crispy and tender. When you tear into a piece of properly made focaccia, you should hear that satisfying crackle of the crust, followed by the soft, airy pull of the interior, all perfumed with fruity olive oil, fragrant herbs, and flaky sea salt. It’s simple peasant food elevated to an art form, and once you master it, you’ll never want to buy store-bought focaccia again.
I’ve been baking focaccia bread for over two decades, and I can tell you that this recipe is the result of countless experiments, bakery visits in Italy, and conversations with professional bakers who’ve shared their closely guarded secrets. What makes this focaccia special isn’t just one thing—it’s the combination of proper hydration, adequate fermentation time, the right olive oil technique, and understanding how to develop those characteristic holes and texture.
The beauty of focaccia bread is its versatility. It works as an appetizer drizzled with balsamic vinegar, as sandwich bread for panini, alongside soups and salads, or simply torn apart and enjoyed on its own. You can keep it simple with just rosemary and sea salt, or get creative with toppings like cherry tomatoes, olives, caramelized onions, or even grapes and honey for a sweet-savory combination.
What surprises most home bakers is how forgiving focaccia actually is. Unlike finicky French baguettes or temperamental sourdough, focaccia is almost impossible to mess up once you understand a few key principles. The high hydration dough practically kneads itself, the long fermentation does most of the work while you sleep or go about your day, and the generous amount of olive oil covers a multitude of sins.
In this comprehensive guide, I’ll walk you through every step of creating authentic focaccia bread that rivals anything you’d find in an Italian bakery. You’ll learn the science behind the technique, professional tips that make all the difference, and how to troubleshoot common issues. Whether you’re a complete beginner or an experienced baker looking to perfect your focaccia game, this recipe will become your go-to.
Why This Focaccia Bread Recipe Works
Before we dive into the recipe, let’s talk about what makes this focaccia bread recipe different from the countless others you’ll find online. First, we’re using a high-hydration dough (around 75-80% hydration), which creates those beautiful large air pockets and tender crumb. Many recipes use too little water, resulting in dense, cake-like focaccia that’s nothing like the real thing.
Second, we’re employing a long, cold fermentation period. This isn’t just about convenience—it’s about flavor development. During that overnight rest in the refrigerator, enzymes break down complex carbohydrates into simpler sugars, creating depth and a subtle sweetness you simply cannot achieve with a quick rise. The cold temperature also strengthens the gluten network, giving you better structure and those impressive holes.
Third, we’re not skimping on the olive oil. Authentic Italian focaccia is practically swimming in high-quality extra virgin olive oil, and that’s not excess—it’s essential. The oil creates that signature crispy bottom crust, keeps the interior moist and tender, and infuses every bite with rich flavor. We’re using oil three times in this recipe: in the dough, to coat the pan, and poured generously over the top before baking.
Finally, we’re using proper technique for those characteristic dimples. The way you press your fingers into the dough isn’t just decorative—it creates pockets that trap olive oil and seasonings, and it helps the dough expand properly during baking. Many beginners are too timid with their dimpling, resulting in flat, boring focaccia.

Essential Ingredients for Perfect Focaccia Bread
For the Dough:
- 4 cups (500g) bread flour (all-purpose works but bread flour gives better structure)
- 2 teaspoons (8g) instant yeast (not active dry)
- 2 teaspoons (12g) fine sea salt
- 2 teaspoons (8g) granulated sugar (feeds the yeast and aids browning)
- 1¾ cups (400ml) lukewarm water (90-95°F)
- ¼ cup (60ml) extra virgin olive oil (plus more for coating)
For the Pan and Topping:
- 4 tablespoons extra virgin olive oil (for the pan)
- 3-4 tablespoons extra virgin olive oil (for topping)
- Flaky sea salt (Maldon or fleur de sel)
- 2-3 sprigs fresh rosemary (leaves stripped and roughly chopped)
- Freshly cracked black pepper (optional)
Optional Toppings and Variations:
- Cherry tomatoes, halved
- Pitted olives (Kalamata or Castelvetrano)
- Thinly sliced red onion
- Fresh thyme or oregano
- Grated Parmesan cheese
- Roasted garlic cloves
- Caramelized onions
- Sun-dried tomatoes
Step-by-Step Instructions for Bakery-Quality Focaccia Bread
Step 1: Mix the Dough (5 minutes)
In a large mixing bowl, whisk together the bread flour, instant yeast, salt, and sugar. Make sure the salt and yeast don’t touch directly when you add them—salt can inhibit yeast activity if they’re in direct contact before being mixed with liquid.
Pour in the lukewarm water and ¼ cup olive oil. Using a sturdy wooden spoon or a Danish dough whisk, stir everything together until no dry flour remains. The dough will look shaggy, wet, and quite sticky—this is exactly what you want. Don’t be tempted to add more flour. High-hydration doughs always feel too wet at first, but they come together beautifully with time.
Continue stirring vigorously for about 2-3 minutes. You’ll notice the dough starting to come together and develop some elasticity. You’re not kneading here—just mixing until everything is well incorporated and the dough starts to look slightly smooth.
Step 2: First Rise at Room Temperature (30-45 minutes)
Drizzle about 1 tablespoon of olive oil over the dough and use your hands to turn it in the bowl, coating all surfaces. This prevents the dough from drying out and makes it easier to handle later. Cover the bowl tightly with plastic wrap or a damp kitchen towel.
Let the dough rest at room temperature for 30-45 minutes. You’re not looking for the dough to double here—you just want it to relax and start its fermentation process. During this time, the flour will fully hydrate and the gluten will begin developing without any kneading required. This is the magic of high-hydration, no-knead doughs.
Step 3: First Fold (30 seconds)
After the initial rest, you’re going to perform a series of folds. This technique develops gluten structure without traditional kneading, and it’s much gentler on the dough. Wet your hands to prevent sticking, then reach under one side of the dough, stretch it up, and fold it over toward the center. Rotate the bowl 90 degrees and repeat. Continue until you’ve folded all four “sides” of the dough toward the center.
You’ll immediately feel the dough become stronger and more cohesive. Cover the bowl again and let it rest for another 30 minutes.
Step 4: Second and Third Folds (1 minute total)
Repeat the folding process two more times, with 30-minute rest periods between each fold. After the third fold, the dough should feel noticeably stronger, smoother, and more elastic. It will still be quite sticky and soft, but it should hold together and have visible structure.
These folds are crucial for developing the gluten network that will trap all those beautiful gas bubbles created during fermentation. Without proper gluten development, your focaccia bread will be dense and flat rather than airy and open-crumbed.
Step 5: Cold Fermentation Overnight (8-72 hours)
Cover your bowl tightly with plastic wrap and refrigerate for at least 8 hours, or up to 3 days. I usually mix my dough in the evening and bake it the next afternoon or evening, giving it about 18-24 hours of cold fermentation. This is where the magic happens.
During this extended cold fermentation, several things occur: the yeast slowly produces carbon dioxide, creating those signature holes; enzymes break down proteins and starches, developing complex flavors; and the gluten network strengthens, giving you better structure. The longer fermentation (up to 72 hours) produces more tangy, complex flavors, similar to sourdough.
Don’t worry if the dough doesn’t look dramatically different after refrigeration—it’s working on the inside, developing flavor and structure.
Step 6: Prepare the Pan (5 minutes)
When you’re ready to bake (the next day or up to 3 days later), remove the dough from the refrigerator and let it sit at room temperature while you prepare your pan. This 30-minute warm-up is important—cold dough won’t stretch or rise properly.
Pour 4 tablespoons of olive oil into a 9×13-inch baking pan or rimmed baking sheet. Use your hands to spread it evenly across the bottom and up the sides. Don’t be shy with the oil—this creates that incredible crispy bottom crust that’s the hallmark of great focaccia.
Step 7: Transfer and Rest (30 minutes)
Using oiled hands or a bowl scraper, gently coax the dough out of the bowl and into the prepared pan. Don’t worry if it doesn’t fill the pan initially—it will spread during the next rest period. Flip the dough over so both sides are coated in oil.
Gently stretch the dough toward the corners of the pan, but don’t force it. If it resists, that’s fine—let it rest. Cover the pan with plastic wrap or a kitchen towel and let it rest at room temperature for 30 minutes. During this time, the dough will relax and naturally spread to fill more of the pan.
Step 8: Second Stretch and Final Rise (45-60 minutes)
After the 30-minute rest, the dough will be much more pliable. Using oiled fingers, gently stretch it toward the corners of the pan. If it still doesn’t quite reach the corners, that’s okay—it will during the final rise. Don’t tear the dough; if you feel significant resistance, let it rest another 10 minutes and try again.
Cover the pan again and let the dough rise at warm room temperature (ideally 75-80°F) for 45-60 minutes, until it’s puffy, increased in volume by about 50%, and jiggles when you gently shake the pan. If your kitchen is cool, this might take up to 90 minutes.
Step 9: Dimple and Top (5 minutes)
Preheat your oven to 425°F (220°C) during the last 15 minutes of the final rise. Place a rack in the lower third of the oven for the best bottom crust.
When the dough is properly risen, drizzle 3-4 tablespoons of olive oil evenly over the surface. Now comes the fun part: using your fingertips, press straight down into the dough, all the way to the bottom of the pan, creating deep dimples across the entire surface. Be confident and aggressive—you want to see the olive oil pool in these dimples.
The dimpling serves multiple purposes: it prevents large air bubbles from forming on the surface, creates pockets for olive oil and toppings, and helps the dough expand evenly during baking. Space your dimples about 1-2 inches apart across the entire surface.
Scatter your fresh rosemary leaves over the surface, pressing them lightly into the dimples. Sprinkle generously with flaky sea salt—don’t be timid here; focaccia should be well-seasoned. Add a few cracks of black pepper if using.
Step 10: Bake to Golden Perfection (20-28 minutes)
Immediately transfer the pan to your preheated oven. Bake for 20-28 minutes, until the focaccia is deeply golden brown on top and the edges are crispy. The exact time depends on your oven and pan—a darker pan will bake faster than a light-colored one.
You’re looking for a deep golden color, not pale yellow. Properly baked focaccia bread should have a crispy, crackling crust and an internal temperature of about 205-210°F if you want to check with a thermometer.
For an extra-crispy bottom, you can transfer the focaccia directly to the oven rack for the last 5 minutes of baking, though this isn’t necessary.
Step 11: Cool and Serve (10 minutes)
Remove the focaccia from the oven and immediately drizzle with another tablespoon or two of olive oil if you want extra richness. Let it cool in the pan for 5 minutes, then use a spatula to transfer it to a wire cooling rack. This prevents the bottom from steaming and becoming soggy.
Let the focaccia cool for at least 10 minutes before cutting—the interior needs time to set. Focaccia is best served warm or at room temperature on the day it’s baked.

Pro Tips for Perfect Focaccia Bread Every Time
Tip 1: Don’t Skip the Cold Fermentation
I know it’s tempting to rush the process, but that overnight cold fermentation is non-negotiable for authentic flavor and texture. If you absolutely must make same-day focaccia, give it at least 8 hours in the refrigerator. The flavor won’t be as complex, but the texture will still be good.
Tip 2: Use High-Quality Olive Oil
Focaccia is a vehicle for olive oil, so use the best you can afford. The oil’s flavor comes through loud and clear. A fruity, peppery extra virgin olive oil from Italy, Greece, or California will make your focaccia sing.
Tip 3: Water Temperature Matters
Lukewarm water (90-95°F) is ideal for activating yeast without killing it. Too cold and fermentation will be sluggish; too hot (above 120°F) and you’ll kill the yeast. Test with your finger—it should feel warm but not hot.
Tip 4: Humidity Helps
If your kitchen is very dry, the dough’s surface can form a skin during rising, which inhibits expansion. Keep it covered with plastic wrap or a damp towel to maintain humidity around the dough.
Tip 5: Adjust Hydration for Your Climate
If you live in a humid climate, you might need slightly less water (reduce by 2 tablespoons). In dry climates, you might need slightly more. The dough should be very sticky but still hold together after the folds.
Tip 6: Don’t Fear Overproofing
Focaccia is very forgiving. It’s actually quite difficult to overproof it due to the high hydration and strong gluten structure. If your focaccia has been rising longer than expected, don’t panic—it will likely still bake up beautifully.
Tip 7: Invest in a Digital Scale
Baking by weight rather than volume gives you consistent results every time. Flour measurements can vary wildly depending on how you scoop. A kitchen scale eliminates this variable and is essential for serious baking.
Tip 8: Parchment Paper Shortcut
If you’re nervous about the focaccia sticking, line your oiled pan with parchment paper before adding the dough. You’ll still get a crispy bottom, and removal is foolproof.
Tip 9: Season Liberally
Focaccia should be generously seasoned. It can handle much more salt than you think, especially if you’re using flaky sea salt. The large flakes provide bursts of salty crunch rather than uniform saltiness.
Common Mistakes to Avoid When Making Focaccia Bread
Mistake 1: Using Too Little Water
Many beginners reduce the water because the dough feels too sticky. Resist this urge! High-hydration dough is supposed to be sticky. If you add more flour, you’ll end up with dense, cake-like focaccia instead of light and airy bread.
Mistake 2: Skipping the Folds
Those folds during the first rise aren’t optional—they develop the gluten structure that traps gas and creates the open crumb. Without them, your focaccia will be flat and dense.
Mistake 3: Inadequate Dimpling
Timid dimpling won’t create those characteristic pockets and can result in large air bubbles forming on the surface during baking. Press your fingers all the way to the bottom of the pan with confidence.
Mistake 4: Baking Too Soon
If you pull the focaccia out of the refrigerator and immediately try to stretch and bake it, the cold dough will be tight and resist expansion. Always let it come to room temperature for at least 30 minutes before the final stretch.
Mistake 5: Insufficient Olive Oil
Focaccia needs a generous amount of oil—in the dough, coating the pan, and drizzled on top. The oil isn’t just for richness; it’s essential for texture and that crispy crust. Don’t be stingy.
Mistake 6: Overbaking or Underbaking
Pale, blonde focaccia means it’s underbaked—it needs that deep golden color for proper flavor and texture. Conversely, if it’s dark brown or black, you’ve gone too far. Aim for a rich, even golden brown.
Mistake 7: Cutting Too Soon
If you cut into focaccia immediately out of the oven, steam escapes and the interior will be gummy. Let it rest at least 10 minutes so the crumb can set properly.

Storage and Serving Suggestions for Focaccia Bread
How to Serve Focaccia
Focaccia bread is incredibly versatile. Serve it warm or at room temperature as:
- An appetizer with olive oil and balsamic vinegar for dipping
- Alongside soups, stews, or salads
- Sliced horizontally for sandwiches and panini
- Cut into squares or wedges as a side dish
- Torn into pieces for a bread basket
For entertaining, I love serving focaccia on a large wooden board, torn into rustic pieces, with small bowls of flavored oils, tapenades, or soft cheeses scattered around.
Same-Day Storage
Focaccia bread is at its absolute best within 4-6 hours of baking. As it sits, the crust softens slightly, but it’s still delicious. Store at room temperature, loosely covered with aluminum foil or in a paper bag. Don’t use plastic wrap or an airtight container, as this will make the crust soggy.
If you want to refresh day-old focaccia, warm it in a 350°F oven for 5-7 minutes. This revives the crust and warms the interior beautifully.
Refrigerator Storage
Refrigerate leftover focaccia wrapped in foil for up to 3 days. The cold temperature will firm up the bread, but you can easily refresh it. Warm wrapped focaccia in a 325°F oven for 10-12 minutes, then unwrap and bake for 2-3 more minutes to crisp the crust.
Freezer Storage
Focaccia bread freezes beautifully for up to 3 months. Let it cool completely, then wrap tightly in plastic wrap followed by aluminum foil, or place in a freezer-safe bag with all air removed. Label with the date.
To use frozen focaccia, thaw at room temperature for 2-3 hours (or overnight in the refrigerator), then refresh in a 350°F oven for 8-10 minutes. The texture will be nearly as good as fresh.
Make-Ahead Strategy
The beauty of this recipe is built-in make-ahead convenience:
- Up to 3 days ahead: Mix dough and refrigerate
- Up to 1 day ahead: Transfer to pan, dimple, and top, then cover and refrigerate; bring to room temperature for 1 hour before baking
- Make and freeze: Bake completely, cool, and freeze for future use
This flexibility makes focaccia bread perfect for entertaining—do the work when it’s convenient, then bake fresh or reheat just before serving.
Creative Variations and Flavor Combinations
Classic Rosemary and Sea Salt
The traditional preparation is hard to beat—fresh rosemary, flaky sea salt, and generous olive oil create perfection in its simplest form.
Cherry Tomato and Basil
Press halved cherry tomatoes into the dimples before baking, then scatter torn fresh basil leaves over the hot focaccia when it comes out of the oven.
Caramelized Onion and Thyme
Top your dimpled focaccia with caramelized onions and fresh thyme leaves. The sweet onions contrast beautifully with the salty bread.
Olive and Oregano
Press pitted olives (Kalamata, Castelvetrano, or a mix) into the dimples along with fresh or dried oregano for a Mediterranean flavor bomb.
Potato and Rosemary
Thinly slice Yukon gold potatoes (use a mandoline for paper-thin slices) and arrange them over the dimpled dough, overlapping slightly. Brush with olive oil and season with rosemary and sea salt.
Grape and Rosemary
For a sweet-savory combination that’s traditional in Tuscany, press halved red grapes into the dimples along with rosemary. Drizzle with honey after baking.
Garlic and Parmesan
Mix minced garlic into your topping oil, drizzle over the dimpled dough, and sprinkle with grated Parmesan before baking. This creates an addictive garlic bread experience.
Everything Bagel Focaccia
Skip the rosemary and instead sprinkle the dimpled, oiled surface with everything bagel seasoning before baking.

Frequently Asked Questions About Focaccia Bread
Can I make focaccia without a stand mixer?
Absolutely! This recipe is designed to be made by hand with no kneading required. The folding technique develops gluten naturally over time. A stand mixer isn’t necessary and can actually overwork this high-hydration dough.
What’s the difference between focaccia and regular bread?
Focaccia bread has much higher hydration (more water relative to flour), which creates a more open, airy crumb with larger holes. It also uses significantly more olive oil—incorporated into the dough, coating the pan, and drizzled on top. The dimpling technique is unique to focaccia and creates its characteristic texture and appearance. Finally, focaccia typically uses a lower baking temperature and longer bake time than standard bread.
Can I use all-purpose flour instead of bread flour?
Yes, though bread flour is preferred because its higher protein content (12-14%) develops more gluten, giving you better structure and chew. If using all-purpose flour (10-12% protein), your focaccia will be slightly more tender and less chewy, but still delicious. Don’t use cake or pastry flour—the protein content is too low.
Why is my focaccia dense instead of light and airy?
Dense focaccia usually results from insufficient hydration (not enough water), skipping the folds that develop gluten, or underdeveloped fermentation. Make sure you’re using the full amount of water even though the dough feels wet, perform all three sets of folds, and give the dough adequate time to ferment—at least 8 hours in the refrigerator.
Can I bake focaccia on a pizza stone or baking steel?
You can, but it’s not ideal. Focaccia is traditionally baked in a pan so the olive oil can pool around the edges, creating that crispy, fried bottom crust. On a stone or steel, the oil runs off and you lose that characteristic texture. If you want to try it, use parchment paper and build up edges with the dough to contain the oil.
How do I know when focaccia is fully baked?
The top should be deeply golden brown, not pale yellow. The edges should look crispy and pull away slightly from the pan. When you tap the surface, it should sound hollow. If you have a thermometer, the internal temperature should read 205-210°F. Underbaked focaccia will be gummy inside; properly baked focaccia has a light, airy interior.
Can I make gluten-free focaccia?
While challenging, you can make gluten-free focaccia using a high-quality gluten-free flour blend designed for bread (like King Arthur Measure for Measure or Bob’s Red Mill 1-to-1). You’ll need to add xanthan gum if your blend doesn’t include it, and the texture won’t be identical to traditional focaccia—it will be more tender and less chewy. Skip the folding steps, as there’s no gluten to develop.
Why does my focaccia stick to the pan?
This shouldn’t happen if you’re using enough oil. Make sure you’re coating the pan with at least 4 tablespoons of olive oil, spreading it generously up the sides. If you’re still having issues, line your oiled pan with parchment paper as insurance.
Can I use active dry yeast instead of instant yeast?
Yes, but you’ll need to activate it first. Dissolve the active dry yeast in the lukewarm water with the sugar and let it sit for 5-10 minutes until foamy before mixing it with the flour. You’ll also need slightly more—use 2½ teaspoons of active dry yeast to replace 2 teaspoons of instant yeast.
Final Thoughts
Making authentic focaccia bread at home is one of the most rewarding baking projects you can undertake. The process is forgiving, the ingredients are simple and affordable, and the results are absolutely spectacular. There’s something deeply satisfying about pulling a golden, fragrant focaccia from your oven, hearing that crackle as you tear into it, and experiencing the perfect combination of crispy crust and tender, olive oil-drenched interior.
What I love most about this focaccia bread recipe is how it fits into real life. The long fermentation happens while you sleep or work, requiring no attention. When you’re ready to bake, the active work takes maybe 15 minutes total, spread across a few hours. It’s the kind of recipe that makes you look like a baking genius while actually being quite approachable.
Over the years, I’ve made hundreds of focaccias—for family dinners, dinner parties, holidays, and just because. I’ve experimented with countless toppings, from traditional to wildly creative, and I keep coming back to simple rosemary and sea salt because it lets the quality of the bread and olive oil shine through. That said, focaccia is incredibly versatile,and I encourage you to experiment once you’ve mastered the basic technique.
The key takeaways: embrace the high hydration and sticky dough, give it adequate fermentation time, don’t skimp on the olive oil, and dimple with confidence. Follow these principles, and you’ll produce focaccia bread that rivals anything from an Italian bakery. Your kitchen will smell like a Ligurian seaside town, and your family and friends will be incredibly impressed.
So roll up your sleeves, get that dough mixed tonight, and tomorrow you’ll be rewarded with arguably the world’s most perfect bread. Once you’ve experienced homemade focaccia, there’s no going back to store-bought. Buon appetito!
Print
Focaccia Bread: 9 Professional Secrets for Bakery-Quality Results at Home
Authentic Italian focaccia with a golden, crispy crust, tender and airy interior, and generous olive oil throughout. This bakery-quality flatbread uses a high-hydration, no-knead dough with overnight cold fermentation for complex flavor.
- Total Time: 8 hours 45 minutes (minimum)
- Yield: 12 servings (one 9×13-inch focaccia)
Ingredients
For the Dough:
- 4 cups (500g) bread flour
- 2 teaspoons instant yeast
- 2 teaspoons fine sea salt
- 2 teaspoons granulated sugar
- 1¾ cups (400ml) lukewarm water (90-95°F)
- ¼ cup (60ml) extra virgin olive oil, plus more for coating
For the Pan and Topping:
- 4 tablespoons extra virgin olive oil (for pan)
- 3-4 tablespoons extra virgin olive oil (for topping)
- Flaky sea salt
- 2-3 sprigs fresh rosemary, leaves stripped
- Freshly cracked black pepper (optional)
Instructions
- Mix dough: In a large bowl, whisk together flour, yeast, salt, and sugar. Add water and ¼ cup olive oil. Stir vigorously until no dry flour remains and dough becomes slightly elastic, about 3 minutes.
- First rise: Coat dough with 1 tablespoon olive oil, cover bowl, and let rest at room temperature for 30-45 minutes.
- Fold: Wet your hands and perform a series of folds: reach under the dough, stretch up, and fold toward center. Rotate bowl and repeat until you’ve folded all sides. Cover and rest 30 minutes. Repeat this process two more times (3 folds total, with 30-minute rests between).
- Cold fermentation: Cover bowl tightly and refrigerate for 8-72 hours (18-24 hours is ideal).
- Prepare pan: Remove dough from refrigerator. Pour 4 tablespoons olive oil into a 9×13-inch pan, spreading evenly. Let dough rest at room temperature for 30 minutes.
- Transfer: Gently transfer dough to oiled pan, flip to coat both sides with oil. Gently stretch toward corners without forcing. Cover and rest 30 minutes.
- Stretch and rise: Stretch dough to fill pan corners using oiled fingers. Cover and let rise at room temperature for 45-60 minutes until puffy.
- Preheat: Heat oven to 425°F during the last 15 minutes of rising.
- Dimple and top: Drizzle 3-4 tablespoons olive oil over dough. Press fingertips straight down to pan bottom across entire surface, creating deep dimples. Scatter rosemary over surface, sprinkle generously with flaky salt and pepper.
- Bake: Bake 20-28 minutes until deep golden brown. Cool in pan 5 minutes, then transfer to a wire rack. Let rest at least 10 minutes before cutting.
Notes
- Dough will be very sticky—this is correct for focaccia
- Don’t skip the cold fermentation; it’s essential for flavor and texture
- Use high-quality extra virgin olive oil for best flavor
- Dimple confidently all the way to the pan bottom
- Focaccia is best served the day it’s baked
- Can be frozen for up to 3 months
- Prep Time: 20 minutes (plus 8-72 hours fermentation)
- Cook Time: 25 minutes
- Category: Breakfasts
- Method: No-Knead, Cold Fermentation, Baking
- Cuisine: Italian
- Diet: Vegetarian


1 Comment
[…] 10-12 leaves) OR Dried Peppermint Leaves (1-2 teaspoons): Fresh peppermint produces a brighter, more vibrant flavor with grassy, green notes alongside the mint. Dried peppermint offers more […]
Comments are closed.