

Strawberry Chocolate Chip Cookie Pizza: The Ultimate Dessert That Everyone Will Love

Introduction: The Dessert That Steals the Show
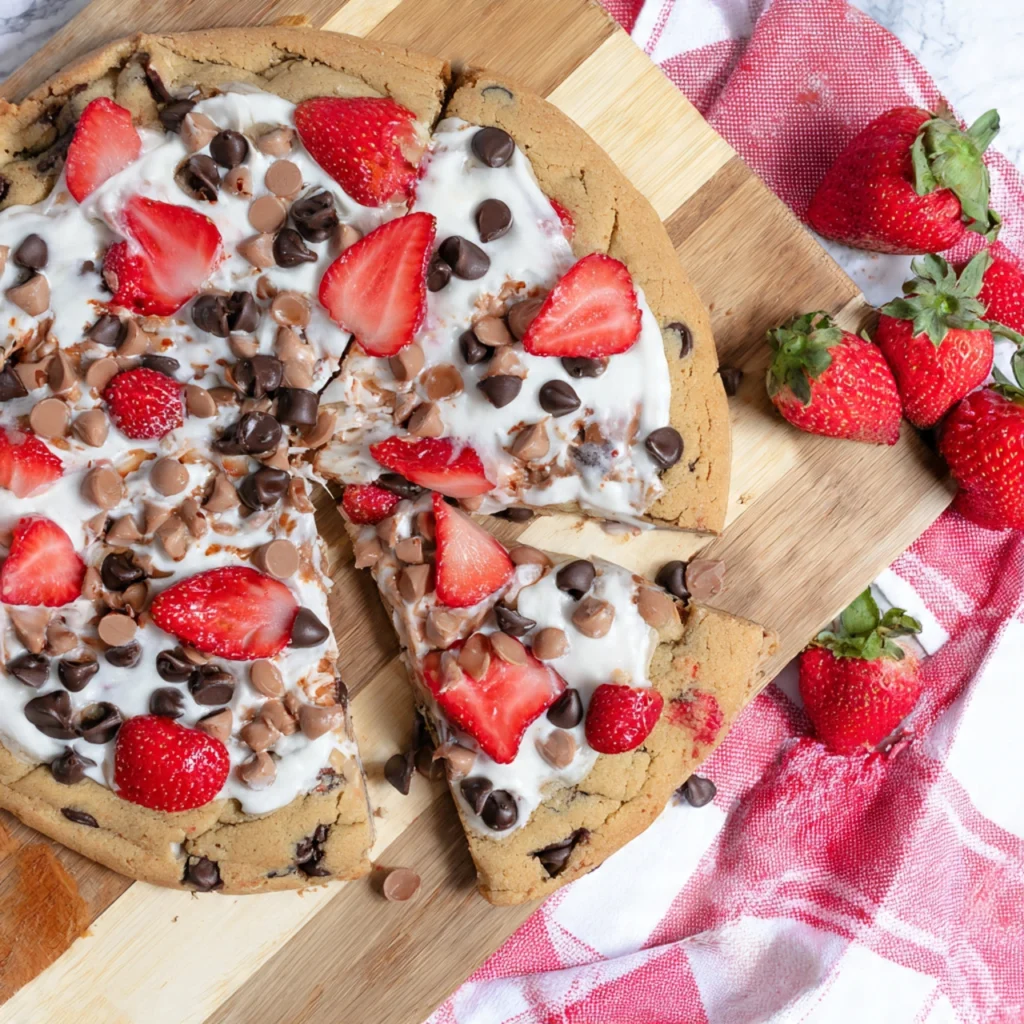
A strawberry chocolate chip cookie pizza is the show-stopping dessert that combines everything we love about cookies, pizza, and fresh fruit into one spectacular treat. This isn’t your average cookie—it’s a giant, shareable dessert that features a soft and chewy chocolate chip cookie base topped with sweet cream cheese frosting and crowned with fresh, juicy strawberries. The result is a dessert that looks as impressive as it tastes, perfect for birthday parties, summer gatherings, potlucks, or any time you want to create something memorable that feeds a crowd.
What makes this strawberry chocolate chip cookie pizza truly special is how it balances textures and flavors so beautifully. The cookie base stays wonderfully soft in the center with slightly crispy edges, providing the perfect foundation for the tangy-sweet cream cheese frosting that acts like sauce on a traditional pizza. The fresh strawberries add bright flavor, natural sweetness, and a pop of color that makes this dessert as visually stunning as it is delicious. Chocolate chips throughout the cookie base provide pockets of melty chocolate goodness that complement the strawberries perfectly.
The genius of cookie pizza is that it takes the beloved chocolate chip cookie and transforms it into something shareable and celebratory. Instead of baking individual cookies, you press the dough into a pizza pan or baking sheet, creating one large cookie that slices like an actual pizza. This makes serving a breeze—no plating individual desserts or worrying about portion sizes. Just slice and serve, watching faces light up as they realize they’re about to enjoy cookie pizza.
Throughout my years of baking and entertaining, this strawberry chocolate chip cookie pizza has become my secret weapon for impressing guests with minimal effort. It looks like you spent hours creating an elaborate dessert, when in reality, it comes together in less than an hour from start to finish. The technique is simple enough for beginner bakers, yet the results are impressive enough to satisfy even the most discerning dessert lovers.
In this comprehensive guide, you’ll learn everything you need to know to create the perfect strawberry chocolate chip cookie pizza—from achieving that ideal soft-yet-structured cookie base to selecting the best strawberries to assembling your dessert pizza for maximum visual impact. Whether you’re a experienced baker or just starting your culinary journey, you’ll find the detailed instructions, pro tips, and troubleshooting advice you need for guaranteed success.
Why Cookie Pizza Is the Perfect Party Dessert
Before diving into the recipe, let’s explore why cookie pizza has become such a popular choice for celebrations and gatherings.
Easy to Serve and Share
Unlike traditional cakes that require special serving utensils and careful slicing, cookie pizza can be cut with a simple pizza cutter and eaten by hand like regular pizza. This casual, fun serving style makes it perfect for informal gatherings, children’s parties, and outdoor events where you want something special but not fussy.
Customizable for Any Occasion
The basic chocolate chip cookie pizza base is incredibly versatile. While we’re focusing on strawberries here, you can easily adapt the toppings to suit seasons, preferences, or themes. Use raspberries for Valentine’s Day, blueberries for Fourth of July, or a mix of berries for summer celebrations. You can even arrange fruit in patterns, write messages with icing, or add other toppings like crushed cookies or candy.
Appeals to All Ages
Everyone loves chocolate chip cookies, and presenting them in pizza form adds an element of fun and novelty that appeals to both children and adults. Kids love the playful pizza concept, while adults appreciate the sophisticated combination of cookie, cream cheese frosting, and fresh fruit.
Make-Ahead Friendly
The cookie base can be baked in advance and stored, making party preparation easier. You can bake the cookie pizza a day ahead, then add frosting and fruit just before serving. This flexibility is invaluable when planning menus for events.

Ingredients: Building Your Strawberry Chocolate Chip Cookie Pizza
This recipe creates one large cookie pizza (approximately 12-14 inches) that serves 12-16 people depending on slice size. Each component plays a specific role in creating the perfect balance of flavors and textures.
For the Cookie Base
Dry Ingredients:
- 2¼ cups all-purpose flour – The foundation that gives structure to your cookie pizza
- 1 teaspoon baking soda – Provides lift and helps create that soft, chewy texture
- 1 teaspoon salt – Enhances all the flavors and balances the sweetness
- ½ teaspoon baking powder – Additional leavening for a slightly thicker, cake-like cookie
Wet Ingredients:
- 1 cup (2 sticks) unsalted butter, softened – Creates richness and tender texture
- ¾ cup granulated sugar – Adds sweetness and helps with spread and browning
- ¾ cup packed light brown sugar – Contributes moisture, chewiness, and deeper flavor
- 2 large eggs – Binds ingredients and adds structure
- 2 teaspoons pure vanilla extract – Enhances all the flavors
Mix-ins:
- 2 cups semi-sweet chocolate chips – The chocolate component that makes this irresistible
- Optional: ½ cup mini chocolate chips – For extra chocolate throughout
For the Cream Cheese Frosting
- 8 ounces cream cheese, softened – The base of your “pizza sauce”
- ¼ cup (½ stick) unsalted butter, softened – Adds richness and smooth texture
- 2 cups powdered sugar – Sweetens and thickens the frosting
- 1 teaspoon pure vanilla extract – Adds flavor depth
- Pinch of salt – Balances the sweetness
For the Topping
- 1 pound fresh strawberries – Hulled and sliced (about 3 cups sliced)
- Optional: 2 tablespoons strawberry jam – Heated and brushed on berries for shine
- Optional: Fresh mint leaves – For garnish and color contrast
- Optional: Additional chocolate chips – For sprinkling on top
Optional Enhancements
- ½ cup chopped pecans or walnuts – Folded into cookie dough for crunch
- 1 teaspoon almond extract – In frosting to complement strawberries
- White chocolate chips – As alternative or in addition to semi-sweet
- Graham cracker crumbs – Sprinkled over frosting before adding strawberries
Step-by-Step Instructions: Creating Your Cookie Pizza Masterpiece
Follow these detailed steps carefully for a perfect strawberry chocolate chip cookie pizza every time.
Step 1: Prepare Your Baking Pan
Preheat your oven to 350°F (175°C). Select a 12-14 inch pizza pan, large round baking pan, or rimmed baking sheet. For best results, use a light-colored pan, as dark pans can cause the bottom to brown too quickly.
Grease your pan generously with butter or non-stick cooking spray, or line it with parchment paper. Parchment paper is ideal because it allows you to easily transfer the finished cookie pizza to a serving platter. If using parchment, cut it to fit your pan with a little overhang for easy removal.
Step 2: Mix the Dry Ingredients
In a medium bowl, whisk together the flour, baking soda, baking powder, and salt. Whisk thoroughly for at least 30 seconds to ensure the leavening agents are evenly distributed throughout the flour. This prevents pockets of baking soda or baking powder that can create uneven rising or bitter spots. Set this bowl aside.
Step 3: Cream the Butter and Sugars
In a large mixing bowl or the bowl of a stand mixer, combine the softened butter, granulated sugar, and brown sugar. Beat on medium speed for 3-4 minutes until the mixture is light, fluffy, and pale in color. This creaming process incorporates air into the dough, which contributes to texture.
The butter must be properly softened (not melted or too cold) for this step to work correctly. It should be cool to the touch but easily indent when pressed with a finger. If it’s too hard, the sugars won’t incorporate properly. If it’s too soft or melted, you won’t get the proper air incorporation.
Scrape down the sides of the bowl with a rubber spatula to ensure everything is evenly mixed.
Step 4: Add Eggs and Vanilla
Add the eggs one at a time, beating well after each addition until fully incorporated. The mixture might look slightly curdled after adding the first egg—this is normal and will smooth out as you continue mixing. Add the vanilla extract and beat until the mixture is smooth and uniform.
Step 5: Incorporate Dry Ingredients
With your mixer on low speed (or stirring by hand with a wooden spoon), gradually add the flour mixture to the wet ingredients. Mix only until you no longer see streaks of flour. Do not overmix—this is crucial. Overmixing develops gluten and will make your cookie pizza tough and cake-like rather than soft and chewy.
The dough should be thick, slightly sticky, and cohesive. If it seems too dry or crumbly, you may have measured too much flour. If it’s very wet and loose, you may not have measured enough.
Step 6: Fold in Chocolate Chips
Add the chocolate chips to your dough and fold them in using a rubber spatula or wooden spoon with just a few strokes. You want them evenly distributed but don’t want to overmix the dough. Reserve a handful of chocolate chips if you want to press some into the top of the dough before baking for visual appeal.
Step 7: Press Dough Into Pan
Transfer the cookie dough to your prepared pan. Using your hands (lightly greased or dampened to prevent sticking), press the dough out evenly toward the edges of the pan. Aim for relatively even thickness throughout—about ½ inch thick is ideal. The dough will spread slightly during baking, so you don’t need to reach all the way to the edges.
For a perfectly round cookie pizza, you can use the bottom of a measuring cup or glass to press and smooth the dough, working from the center outward. If you reserved chocolate chips, press a few onto the surface of the dough now for extra visual appeal.
The edges can be slightly thicker than the center if you prefer a softer, chewier edge with a slightly crisper middle, or make it completely uniform for consistent texture throughout.
Step 8: Bake the Cookie Pizza
Bake in your preheated 350°F oven for 20-25 minutes. The exact time depends on your oven and how thick you made the cookie pizza. You’re looking for edges that are golden brown and set, while the center should still look slightly underdone and soft.
The cookie will continue cooking from residual heat after you remove it from the oven, so slight underbaking is better than overbaking. If you bake until the entire surface looks completely done, the cookie will be hard and crunchy rather than soft and chewy once it cools.
A good visual cue: the edges should be pulling away from the pan slightly and be golden brown, while the center should look barely set but no longer wet or glossy with raw dough.
Step 9: Cool Completely
Remove the cookie pizza from the oven and let it cool in the pan on a wire rack for at least 10 minutes. During this time, it will firm up and finish cooking through from residual heat. After 10 minutes, you can carefully transfer it (using the parchment paper if you lined your pan) to a wire rack to cool completely, or simply let it cool completely in the pan.
Do not attempt to frost the cookie while it’s warm—the cream cheese frosting will melt into an unappetizing mess. The cookie must be completely cool, which takes about 45 minutes to an hour.
Step 10: Prepare the Cream Cheese Frosting
While the cookie cools, make your frosting. In a medium bowl or stand mixer, beat the softened cream cheese and butter together until smooth and creamy, about 2 minutes. Scrape down the bowl.
Add the powdered sugar, vanilla extract, and pinch of salt. Beat on low speed initially to prevent a powdered sugar cloud, then increase to medium-high and beat for 2-3 minutes until the frosting is light, fluffy, and smooth.
If your frosting seems too thick to spread, add a tablespoon of milk or cream to loosen it. If it’s too thin, add more powdered sugar. The ideal consistency is spreadable but holds its shape—like thick sour cream.
Step 11: Prepare the Strawberries
While everything cools, hull your strawberries by removing the green leafy tops and pale core beneath with a paring knife or strawberry huller. Slice them into ¼-inch thick slices. You can slice them lengthwise or crosswise depending on your preference for presentation.
Pat the sliced strawberries gently with paper towels to remove excess moisture. This prevents them from making the frosting watery or causing it to slide off the cookie.
Step 12: Assemble Your Cookie Pizza
Once your cookie base is completely cool, it’s time to assemble. If you baked the cookie in the pan and want to transfer it to a serving platter, do so now (the parchment paper makes this easy—just slide the whole thing onto your platter).
Spread the cream cheese frosting evenly over the entire surface of the cookie using an offset spatula or the back of a spoon. Leave a small border around the edge (like pizza crust) or spread it all the way to the edges—your choice. Aim for a layer about ¼ to ⅓ inch thick.
Arrange the sliced strawberries on top of the frosting in whatever pattern appeals to you. You can create concentric circles starting from the outside and working in, arrange them in rows, create a spiral pattern, or simply scatter them casually. Pack them relatively close together for maximum fruit flavor and visual impact.
For a professional finishing touch, warm 2 tablespoons of strawberry jam in the microwave for 15-20 seconds until it’s liquid and pourable. Brush this glaze lightly over the strawberries using a pastry brush—it gives them a beautiful shine and helps preserve them.
Step 13: Final Touches and Serve
If desired, sprinkle a few extra chocolate chips over the strawberries, tuck fresh mint leaves between berries for color, or dust the edges with powdered sugar. Slice with a pizza cutter or large chef’s knife and serve immediately, or refrigerate until ready to serve.
Pro Tips for the Best Strawberry Chocolate Chip Cookie Pizza
After making dozens of cookie pizzas and perfecting the technique, these expert tips ensure your success:
Don’t Overbake the Cookie Base
The single most important factor in cookie pizza success is proper baking. Because you’re making one large cookie rather than small individual ones, the edges cook faster than the center. Remove the cookie when the edges are golden and set but the center still looks slightly underdone. It will finish cooking as it cools and remain soft and chewy rather than hard and crunchy.
Room Temperature Ingredients Matter
For both the cookie dough and the frosting, room temperature butter, eggs, and cream cheese make a significant difference. Cold ingredients don’t cream or blend properly, resulting in dense cookies and lumpy frosting. Take these ingredients out of the refrigerator 30-60 minutes before you start baking.
Use Parchment Paper
Lining your baking pan with parchment paper serves two purposes: it prevents sticking and makes transferring the finished cookie pizza to a serving platter incredibly easy. You simply lift the entire parchment with the cookie on it and slide it wherever you want.
Choose Strawberries Wisely
For the best flavor and appearance, select strawberries that are bright red all the way through, firm, and fragrant. Avoid berries with white shoulders (they were picked too early) or soft spots. Smaller to medium strawberries often have better flavor than giant ones. Slice them relatively thin (¼ inch) so they sit nicely on the frosting without rolling off.
Make It Ahead Strategically
You can bake the cookie base up to 24 hours in advance. Store it wrapped tightly at room temperature. Make the frosting up to 2 days ahead and refrigerate it in an airtight container, then let it come to room temperature and re-whip before using. However, don’t assemble the complete cookie pizza more than 4-6 hours before serving, as the strawberries will begin releasing moisture and make everything soggy.
Try the Two-Temperature Method
For an even better texture, some bakers use a two-temperature method: start baking at 375°F for 10 minutes to set the edges, then reduce to 350°F for the remaining 10-15 minutes. This creates beautifully crispy edges with an extra-soft center.
Customize Your Chocolate Chips
While semi-sweet chocolate chips are classic, don’t be afraid to experiment. Use a combination of semi-sweet and white chocolate chips, try dark chocolate for deeper flavor, or use mini chocolate chips for more even distribution throughout the cookie.
Add Texture Contrast
For extra interest, consider folding ½ cup of chopped pecans or walnuts into the cookie dough, or sprinkling crushed graham crackers over the frosting before adding strawberries. These additions provide textural contrast that makes each bite more interesting.
Create Visual Appeal
Arrange your strawberries thoughtfully for maximum visual impact. Concentric circles create an impressive, purposeful look. Overlapping slices in a spiral pattern is elegant. Even simple rows look intentional and appealing. Whatever pattern you choose, pack the strawberries close together—sparse topping looks sad and unfinished.
Serve at the Right Temperature
Cookie pizza is delicious at room temperature, but many people prefer it slightly chilled, especially in warm weather. The cold cream cheese frosting and cool strawberries provide refreshing contrast to the soft cookie. Refrigerate for 30 minutes before serving if you prefer this style.
Common Mistakes to Avoid with Cookie Pizza
Even experienced bakers can run into issues with cookie pizza. Avoid these pitfalls for perfect results:
Overbaking the Cookie
This is the most common mistake. Because the cookie is large, the edges brown and set long before the center is done. Many bakers make the error of baking until the entire surface looks cooked, which results in a hard, dry, crunchy cookie instead of a soft, chewy one. Remember: slightly underbaked is better than overbaked for cookie pizza.
Using Cold Cream Cheese for Frosting
Cold cream cheese doesn’t blend smoothly and creates lumpy frosting no matter how much you beat it. Always let cream cheese sit at room temperature for at least an hour before making frosting. If you forget, cut it into small cubes to speed up the warming process, but don’t microwave it—that makes it too soft and runny.
Adding Fruit to Warm Cookie
The temptation to frost and decorate immediately is strong, but adding cold frosting to a warm cookie causes the frosting to melt and slide off. Adding strawberries to warm frosting causes them to bleed moisture and turn the frosting pink and watery. Patience is essential—let everything cool completely.
Making the Cookie Too Thin
When pressing dough into the pan, some bakers spread it too thin trying to reach the edges. A cookie layer that’s too thin (less than ⅓ inch) becomes crispy like a giant cookie crisp rather than maintaining that soft, chewy texture we want. Aim for ½ inch thickness throughout.
Not Drying the Strawberries
Strawberries contain a lot of moisture. If you slice them and immediately place them on the frosting without patting them dry, they’ll release moisture that makes the frosting watery and causes the berries to slide around. Always pat sliced strawberries dry with paper towels before arranging them on your cookie pizza.
Overmixing the Dough
Once you add the flour to the wet ingredients, mix only until you no longer see flour streaks. Overmixing develops gluten, which makes cookies tough and cake-like. The dough should still look a bit rough and shaggy when you stop mixing—this is correct.
Using a Dark Pan
Dark-colored baking pans absorb more heat and can cause the bottom of your cookie pizza to burn before the top is done. Use light-colored pans for even baking, or reduce oven temperature by 25°F if you must use a dark pan.
Forgetting to Grease the Pan
Even non-stick pans benefit from greasing or parchment paper lining. A stuck cookie pizza that breaks when you try to remove it is heartbreaking after all that work. Take the 30 seconds to properly prepare your pan.
Assembling Too Far in Advance
While the cookie and frosting can be made ahead, the assembled cookie pizza doesn’t hold well for extended periods. The moisture from the strawberries gradually seeps into the frosting and cookie, making everything soggy. Assemble no more than 4-6 hours before serving, ideally just 1-2 hours ahead.
Storage and Serving Suggestions
Properly storing your strawberry chocolate chip cookie pizza ensures it stays delicious, while creative serving ideas make it even more special.
Storing the Components
Cookie Base: Store the cooled, unfrosted cookie wrapped tightly in plastic wrap or aluminum foil at room temperature for up to 2 days, or freeze for up to 2 months. Thaw overnight in the refrigerator before frosting.
Cream Cheese Frosting: Refrigerate in an airtight container for up to 5 days. Let it come to room temperature and re-whip before spreading on cookie.
Assembled Cookie Pizza: Once assembled with frosting and strawberries, store loosely covered in the refrigerator for up to 24 hours, though it’s best within 4-6 hours of assembly. The strawberries will begin releasing moisture over time.
Serving Suggestions
Classic Slices: Cut into wedges like traditional pizza using a pizza cutter or sharp chef’s knife. Serve on small plates with forks.
Bite-Sized Pieces: For parties, cut into small squares instead of wedges. These are easier to eat as finger food at casual gatherings.
With Ice Cream: Serve warm cookie wedges (reheat gently if needed) topped with vanilla ice cream, fresh strawberries, and cream cheese frosting on the side. This transforms it into a plated dessert.
Breakfast Treat: Believe it or not, cookie pizza makes an indulgent breakfast or brunch item. The cream cheese and fruit almost justify it!
Seasonal Variations: Swap strawberries for other berries or fruit based on season—raspberries, blueberries, sliced peaches, kiwi, or mandarin oranges all work beautifully.
Presentation Ideas
Dessert Pizza Party: Set up a cookie pizza bar with the plain frosted cookie and bowls of different fruits, candies, nuts, and sauces. Let guests customize their own slices.
Individual Cookie Pizzas: Use the same dough to make personal-sized cookie pizzas in smaller pans (6-inch cake pans work great). Everyone gets their own to customize.
Cookie Pizza Cake: Stack two or three cookie pizza layers with frosting and fruit between them to create a multi-layer cookie cake.
Holiday Themes: Arrange strawberries in holiday patterns—a flag for July 4th, a heart for Valentine’s Day, or a Christmas tree shape for the holidays.
Reheating Notes
While this dessert is typically served at room temperature or chilled, if you prefer warm cookie with cold toppings, here’s what to do: wrap individual slices (with frosting and fruit removed) in foil and warm in a 300°F oven for 5-7 minutes. Top with cold frosting and fresh strawberries just before serving.

Frequently Asked Questions About Strawberry Chocolate Chip Cookie Pizza
Can I use frozen strawberries instead of fresh?
Fresh strawberries are strongly recommended for cookie pizza because frozen berries release far too much moisture when thawed, which will make your frosting watery and soggy. If you absolutely must use frozen berries, thaw them completely, drain them thoroughly, and pat them very dry with paper towels. Expect the results to be somewhat compromised compared to using fresh berries. For best results during off-season, consider using other fresh fruits like bananas or kiwi instead.
How do I prevent the cookie from spreading too much?
Excessive spreading typically occurs when the dough is too warm or contains too much fat relative to flour. To prevent this, make sure your butter isn’t too soft (it should be cool and just barely spreadable), chill the pressed dough in the refrigerator for 15-20 minutes before baking, and ensure you’re measuring flour correctly by spooning it into the measuring cup and leveling off rather than scooping directly from the bag, which compacts it and gives you less flour than needed.
Can I make this gluten-free?
Yes, with some modifications. Replace the all-purpose flour with a 1-to-1 gluten-free baking flour blend that contains xanthan gum. The texture will be slightly different—often a bit more crumbly or delicate—but still delicious. Make sure all other ingredients (especially chocolate chips and vanilla extract) are certified gluten-free if you’re making this for someone with celiac disease.
Why is my cookie pizza hard and crunchy instead of soft?
This almost always means it was overbaked. Large cookies can be tricky because the edges cook faster than the center. Remove the cookie from the oven when the edges are golden and set but the center still looks slightly underdone and soft. It will firm up as it cools. Also check that your oven temperature is accurate—an oven that runs hot will cause overbaking even if you follow the time guidelines.
Can I use store-bought cookie dough?
Yes, absolutely! This is a great shortcut. Use two packages (16-18 ounces each) of refrigerated chocolate chip cookie dough. Press it into your prepared pan and bake according to the package directions, watching carefully to avoid overbaking. This makes cookie pizza even easier and faster, though homemade dough does taste superior.
How far in advance can I make this?
You can bake the cookie base up to 2 days ahead and store it wrapped at room temperature, or freeze it for up to 2 months. The frosting can be made up to 3 days ahead and refrigerated. However, don’t assemble the complete cookie pizza more than 4-6 hours before serving, as the berries release moisture that makes everything soggy. For best results, frost and top with strawberries 1-2 hours before serving.
What other toppings work well on cookie pizza?
The possibilities are endless! Try bananas and caramel sauce, mixed berries, Nutella instead of cream cheese frosting with hazelnuts, peanut butter and jelly for a PB&J version, crushed Oreos and vanilla frosting, M&Ms and rainbow sprinkles for kid-friendly fun, or mini marshmallows and chocolate drizzle for s’mores-style. Any combination of frosting, fruit, candy, or sauce that you enjoy can work.
Can I make this dairy-free?
Yes, with appropriate substitutions. Use vegan butter in the cookie dough and choose dairy-free chocolate chips. For the frosting, use dairy-free cream cheese (Kite Hill and Daiya make good versions) and vegan butter. The texture might be slightly different but will still be delicious. Make sure to check that all ingredients are labeled dairy-free if making this for someone with allergies.
Why did my cookie pizza crack when I transferred it?
Large cookies can be fragile while warm. Always let the cookie cool in the pan for at least 10 minutes before attempting to move it—during this time it firms up significantly. Use parchment paper to line the pan, which allows you to slide the entire cookie off easily without breaking. If transferring from pan to serving platter, use two large spatulas to support the cookie from underneath, working quickly and confidently.
Conclusion: Your New Favorite Dessert Awaits
Creating a strawberry chocolate chip cookie pizza is one of those special baking projects that delivers maximum impact with surprisingly minimal effort. This dessert has everything going for it—it’s visually impressive, absolutely delicious, feeds a crowd, and comes together more easily than most layer cakes or elaborate desserts. The combination of soft, chewy chocolate chip cookie, tangy-sweet cream cheese frosting, and fresh strawberries creates a flavor experience that appeals to virtually everyone.
The techniques and insights I’ve shared here come from years of making cookie pizzas for everything from casual family gatherings to formal celebrations. By following these guidelines—properly creaming your butter and sugar, not overbaking the cookie base, letting everything cool completely before assembling, and choosing the best fresh strawberries—you’ll achieve professional results that make people think you bought it from a high-end bakery.
Remember that cookie pizza is wonderfully forgiving and adaptable. Once you’re comfortable with the basic technique, feel free to experiment with different toppings, try flavor variations like adding almond extract to the frosting, or create themed cookie pizzas for holidays and special occasions. The foundation provided here is solid and tested—the perfect starting point for your own creativity.
Whether this becomes your signature party dessert, your go-to birthday treat, your contribution to potlucks, or simply a special weekend indulgence, I hope this strawberry chocolate chip cookie pizza brings as much joy to your table as it has to mine. There’s something magical about slicing into a giant cookie covered with cream cheese frosting and fresh berries, watching everyone’s eyes light up with excitement.
Print
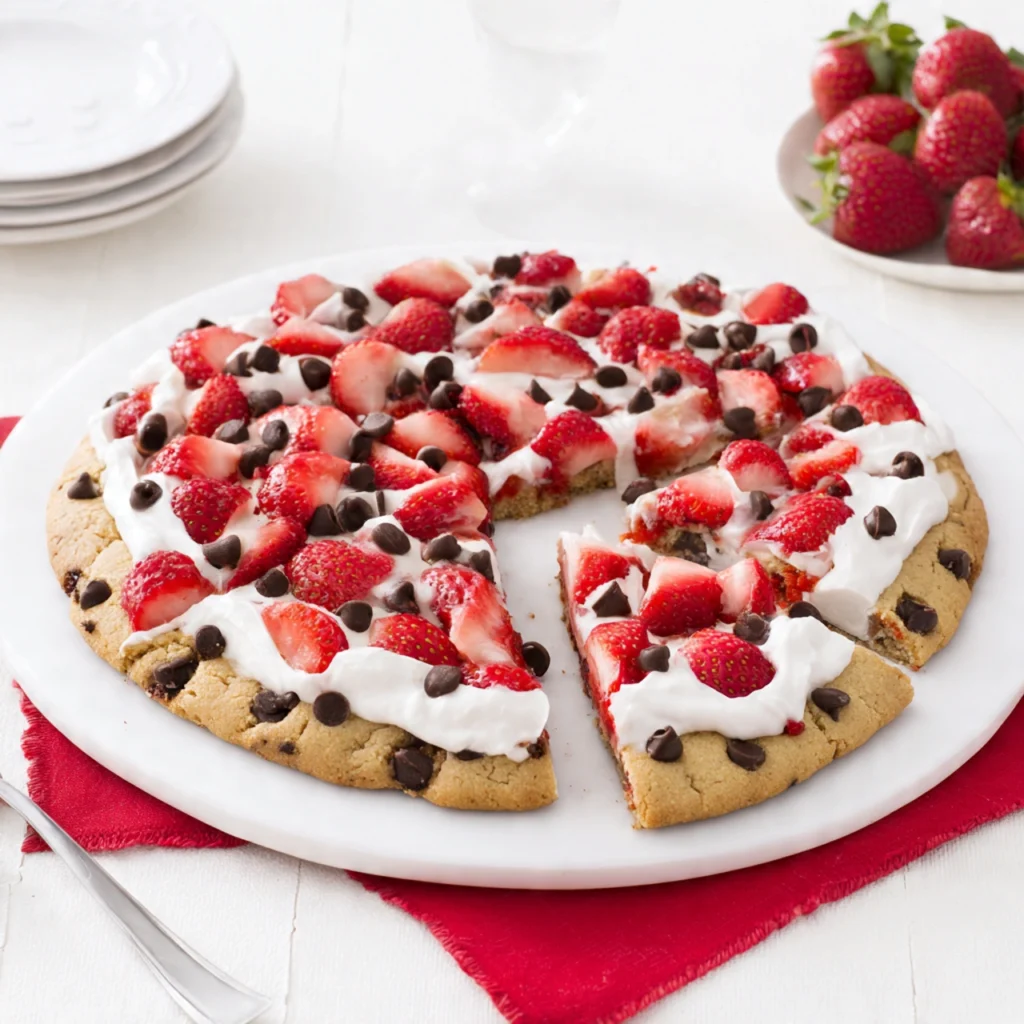
Strawberry Chocolate Chip Cookie Pizza: The Ultimate Dessert That Everyone Will Love
This impressive dessert features a giant soft and chewy chocolate chip cookie base topped with sweet cream cheese frosting and fresh strawberries. It’s perfect for parties, celebrations, or any time you want a show-stopping treat that feeds a crowd with minimal effort.
- Total Time: 45 minutes
- Yield: 12-16 servings
Ingredients
Cookie Base:
- 2¼ cups all-purpose flour
- 1 teaspoon baking soda
- ½ teaspoon baking powder
- 1 teaspoon salt
- 1 cup (2 sticks) unsalted butter, softened
- ¾ cup granulated sugar
- ¾ cup packed light brown sugar
- 2 large eggs
- 2 teaspoons pure vanilla extract
- 2 cups semi-sweet chocolate chips
Cream Cheese Frosting:
- 8 ounces cream cheese, softened
- ¼ cup (½ stick) unsalted butter, softened
- 2 cups powdered sugar
- 1 teaspoon pure vanilla extract
- Pinch of salt
Topping:
- 1 pound fresh strawberries, hulled and sliced (about 3 cups)
- Optional: 2 tablespoons strawberry jam for glaze
- Optional: fresh mint leaves for garnish
Instructions
- Preheat and prepare: Preheat oven to 350°F (175°C). Grease a 12-14 inch pizza pan or line with parchment paper.
- Mix dry ingredients: In a medium bowl, whisk together flour, baking soda, baking powder, and salt. Set aside.
- Cream butter and sugars: In a large bowl or stand mixer, beat butter, granulated sugar, and brown sugar on medium speed for 3-4 minutes until light and fluffy.
- Add eggs and vanilla: Beat in eggs one at a time, then add vanilla extract. Mix until smooth.
- Incorporate flour: Add flour mixture and mix on low speed just until no flour streaks remain. Do not overmix.
- Add chocolate chips: Fold in chocolate chips with a spatula.
- Press into pan: Transfer dough to prepared pan. Press evenly into pan to about ½ inch thickness.
- Bake: Bake for 20-25 minutes until edges are golden brown and set but center still looks slightly underdone. Do not overbake.
- Cool completely: Let cool in pan for 10 minutes, then transfer to wire rack to cool completely (about 45 minutes to 1 hour).
- Make frosting: Beat cream cheese and butter until smooth. Add powdered sugar, vanilla, and salt. Beat for 2-3 minutes until light and fluffy.
- Assemble: Spread frosting evenly over cooled cookie base. Arrange strawberry slices on top.
- Optional glaze: Warm strawberry jam until liquid and brush over berries for shine.
- Serve: Slice with pizza cutter and serve immediately, or refrigerate until ready to serve.
Notes
- Cookie must be completely cool before frosting or the frosting will melt.
- Pat strawberries dry with paper towels before arranging to prevent excess moisture.
- Cookie base can be made 1-2 days ahead and stored wrapped at room temperature.
- Assemble no more than 4-6 hours before serving for best texture.
- For extra-soft cookie, remove from oven when center still looks slightly underdone—it will finish cooking as it cools.
- Substitute other berries or fruits based on preference or season.
- For individual cookie pizzas, divide dough among smaller 6-inch pans and adjust baking time to 15-18 minutes.
- Refrigerated cookie dough can be substituted—use 2 packages (16-18 oz each).
- Prep Time: 20 minutes
- Cook Time: 25 minutes
- Category: Desserts
- Method: Baking
- Cuisine: American
- Diet: Vegetarian


3 Comments
[…] Marshmallow Pops are the perfect combination of adorable, delicious, and ridiculously simple to make. These delightful treats transform ordinary marshmallows into […]
[…] Patrick’s Day Lucky Pancakes are the ultimate way to start your Irish celebration with a stack of fluffy, vibrant green pancakes that’ll bring smiles to everyone at your breakfast […]
[…] Patrick’s Day Popcorn is the ultimate crowd-pleasing snack that transforms ordinary popcorn into a dazzling green treat perfect for parties, classroom celebrations, or movie nights […]
Comments are closed.