Chocolate Pancakes: The Ultimate Guide to Fluffy, Decadent Breakfast Heaven
Introduction: Why Chocolate Pancakes Are the Ultimate Breakfast Treat
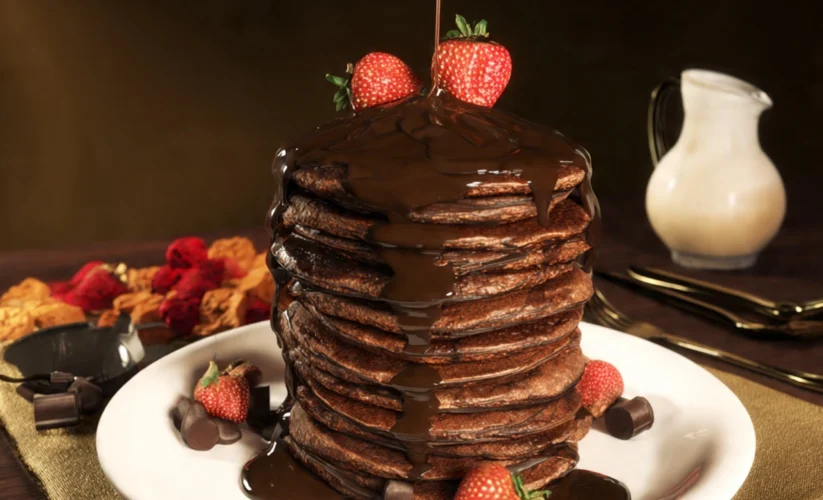
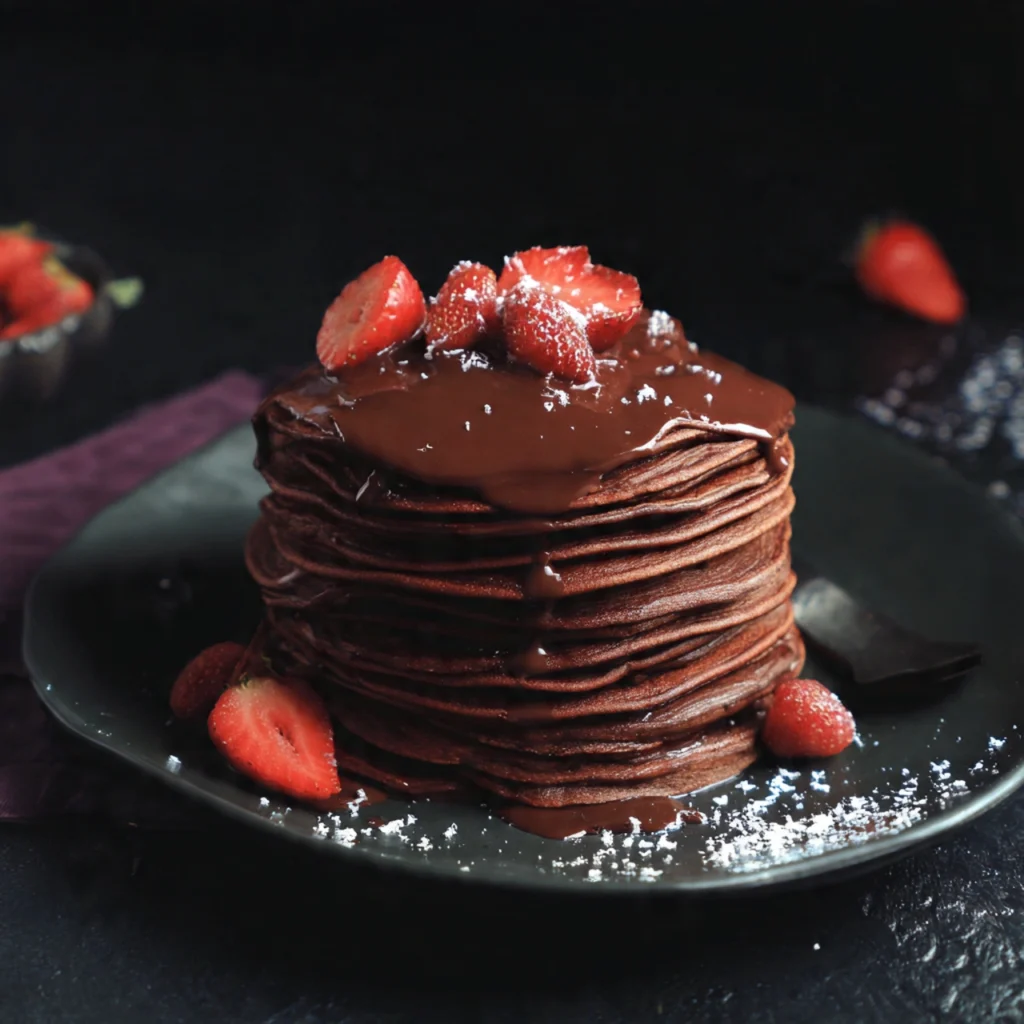
Chocolate pancakes are the breakfast indulgence that transforms an ordinary morning into something extraordinary. These fluffy, cocoa-rich discs of pure delight combine the comforting familiarity of traditional pancakes with the irresistible allure of chocolate, creating a breakfast experience that appeals to both children and adults alike. Whether you’re celebrating a special occasion, making weekend mornings more memorable, or simply craving something decadent to start your day, chocolate pancakes deliver satisfaction in every bite.
What makes these chocolate pancakes truly special is their perfect balance of rich chocolate flavor without being overly sweet, combined with that signature light and airy texture that makes every forkful melt in your mouth. Unlike regular pancakes with chocolate chips scattered throughout, these incorporate cocoa powder directly into the batter, ensuring every single bite carries that beautiful chocolate essence from edge to center.
The beauty of this recipe lies in its simplicity and reliability. You don’t need fancy equipment, hard-to-find ingredients, or professional culinary skills to create restaurant-quality chocolate pancakes in your own kitchen. With just a handful of pantry staples and about twenty minutes from start to finish, you’ll be serving up a stack of golden-brown pancakes with that telltale chocolate aroma wafting through your home.
Throughout my years of recipe development and testing, I’ve refined this chocolate pancake recipe to absolute perfection. I’ve experimented with different ratios of cocoa powder, tested various mixing techniques, and discovered the secrets that separate mediocre chocolate pancakes from truly exceptional ones. This guide will walk you through every detail you need to know, from selecting the right cocoa powder to achieving that ideal fluffy texture that makes each pancake feel like a cloud on your plate.
Understanding the Magic Behind Perfect Chocolate Pancakes
Before we dive into the recipe itself, it’s worth understanding what makes chocolate pancakes work so beautifully. The addition of cocoa powder to traditional pancake batter does more than just add flavor—it actually affects the chemistry of your pancakes in fascinating ways.
The Role of Cocoa Powder
Cocoa powder is naturally acidic and somewhat absorbent, which means it interacts with the leavening agents in your batter differently than regular flour alone would. This is why the ratio of baking powder to baking soda matters tremendously in chocolate pancake recipes. The combination creates the perfect rise and that characteristic fluffy texture we all crave.
When selecting cocoa powder for your chocolate pancakes, you have two main options: natural cocoa powder and Dutch-processed cocoa powder. Natural cocoa powder is lighter in color and more acidic, while Dutch-processed has been treated to neutralize its acidity and carries a deeper, mellower chocolate flavor. For this recipe, I recommend using natural cocoa powder because it works harmoniously with the baking soda to create optimal lift and fluffiness.
The Importance of Buttermilk
You’ll notice that buttermilk plays a starring role in this chocolate pancake recipe, and for good reason. The acidity in buttermilk not only adds a subtle tanginess that complements the chocolate beautifully, but it also reacts with the baking soda to create those wonderful air bubbles that make your pancakes light and tender. Additionally, buttermilk helps tenderize the gluten structure in the flour, preventing your pancakes from becoming tough or rubbery.
If you don’t have buttermilk on hand, you can easily make a substitute by adding one tablespoon of white vinegar or lemon juice to a cup of regular milk and letting it sit for five minutes. While store-bought buttermilk produces slightly better results, this substitute works remarkably well in a pinch.
Ingredients: Building Blocks of Chocolate Pancake Perfection
The ingredient list for these chocolate pancakes is refreshingly straightforward, yet each component plays a crucial role in the final result. Here’s what you’ll need to create approximately twelve medium-sized pancakes:
Dry Ingredients
- 1½ cups all-purpose flour – The foundation of your pancake structure. All-purpose flour provides just the right amount of protein for tender yet sturdy pancakes.
- ⅓ cup unsweetened cocoa powder – This is where the chocolate magic happens. Make sure to use good quality cocoa powder for the best flavor.
- ¼ cup granulated sugar – Adds sweetness and helps with browning. You can adjust this slightly based on your preference.
- 2 teaspoons baking powder – One of the key leavening agents that helps your pancakes rise and become fluffy.
- ½ teaspoon baking soda – Works in tandem with the buttermilk to create lift and tenderness.
- ½ teaspoon salt – Essential for balancing flavors and enhancing the chocolate taste.
Wet Ingredients
- 2 large eggs – Provides structure, richness, and helps bind everything together.
- 1¼ cups buttermilk – Creates tender, fluffy pancakes with its acidity and adds moisture.
- 3 tablespoons melted butter – Adds richness and flavor while keeping pancakes moist.
- 1 teaspoon pure vanilla extract – Enhances the chocolate flavor and adds aromatic depth.
For Cooking
- Butter or neutral oil – For greasing the griddle or pan between batches.
Optional Additions and Toppings
- Mini chocolate chips – Fold ½ cup into the batter for extra chocolate intensity.
- Fresh berries – Strawberries, raspberries, or blueberries provide a beautiful contrast.
- Whipped cream – Adds luxurious creaminess.
- Maple syrup or chocolate syrup – Classic pancake accompaniments.
- Powdered sugar – For an elegant dusting.
- Sliced bananas – Chocolate and banana is a match made in heaven.
- Chopped nuts – Pecans or walnuts add delightful crunch.
Step-by-Step Instructions: Crafting Your Chocolate Pancakes
Creating perfect chocolate pancakes is as much about technique as it is about ingredients. Follow these detailed steps for guaranteed success every single time.
Step 1: Prepare Your Workspace and Ingredients
Begin by gathering all your ingredients and measuring them accurately. Baking is a science, and precise measurements make a significant difference in the final outcome of your chocolate pancakes. Take your eggs and buttermilk out of the refrigerator about fifteen minutes before you begin to bring them closer to room temperature—this helps them incorporate more smoothly into the batter.
Melt your butter and set it aside to cool slightly. You want it to be liquid but not piping hot, as adding butter that’s too hot can scramble the eggs in your batter.
Step 2: Mix the Dry Ingredients
In a large mixing bowl, combine the flour, cocoa powder, sugar, baking powder, baking soda, and salt. Use a whisk to thoroughly blend these dry ingredients together for at least thirty seconds. This step is crucial for several reasons: it breaks up any lumps in the cocoa powder, ensures even distribution of leavening agents throughout the flour, and prevents pockets of unmixed cocoa or baking powder in your finished pancakes.
I recommend sifting the cocoa powder if it appears particularly lumpy, as cocoa powder has a tendency to clump when stored. Sifting creates a smoother batter and more uniform chocolate flavor throughout your pancakes.
Step 3: Combine the Wet Ingredients
In a separate medium bowl, whisk together the eggs until they’re well beaten and slightly frothy. Add the buttermilk, melted butter, and vanilla extract, whisking until everything is thoroughly combined and the mixture is uniform in color and consistency.
The reason we mix wet ingredients separately from dry ingredients is to ensure even distribution before combining them, which minimizes the amount of stirring needed once they’re together. Less stirring means less gluten development, which translates to more tender chocolate pancakes.
Step 4: Combine Wet and Dry Ingredients
Here’s where many home cooks go wrong with pancake recipes, so pay close attention. Pour the wet ingredients into the bowl with the dry ingredients all at once. Using a rubber spatula or wooden spoon (not a whisk at this stage), gently fold the ingredients together with broad, sweeping strokes.
Stir only until you no longer see dry flour. Your batter should look somewhat lumpy—and that’s exactly what you want. Those lumps will dissolve during cooking, but overmixing at this stage develops too much gluten, resulting in tough, rubbery chocolate pancakes instead of fluffy ones. If you see a few small streaks of flour or a handful of small lumps, that’s perfectly fine. Resist the urge to keep stirring.
The batter will be thicker than regular pancake batter due to the cocoa powder, which absorbs liquid. If your batter seems extremely thick (it should be pourable but substantial), you can add one or two tablespoons of additional buttermilk.
Step 5: Rest the Batter
This is a step that many recipes skip, but it makes a noticeable difference. Let your chocolate pancake batter rest for five to ten minutes at room temperature. During this time, the flour fully hydrates, the baking powder begins its leavening action, and any gluten that did develop has time to relax. You’ll notice the batter thickens slightly during this rest period—this is normal and desirable.
Step 6: Preheat Your Cooking Surface
While your batter rests, preheat your griddle or large non-stick skillet over medium heat. Getting the temperature right is absolutely critical for chocolate pancakes. Because of the cocoa powder and sugar content, these pancakes can burn more easily than regular pancakes, so medium heat (not medium-high) is your target.
To test if your cooking surface is ready, sprinkle a few drops of water onto it. If the water sizzles and evaporates within a couple of seconds, your pan is at the right temperature. If the water just sits there, your pan needs more time to heat. If it evaporates almost instantly, your pan is too hot—turn down the heat and wait a minute before testing again.
Step 7: Cook the Pancakes
Lightly grease your cooking surface with butter or a neutral oil using a paper towel or pastry brush. You want just a thin coating—too much fat will cause your pancakes to fry rather than gently cook, and they’ll become greasy.
Using a ¼-cup measuring cup or ladle, pour the batter onto the griddle. Pour from a low height and let the batter spread naturally into circles about four inches in diameter. Don’t spread the batter with your ladle or the back of a spoon, as this deflates the air bubbles you’ve worked so hard to create.
Cook the first side for approximately two to three minutes. You’ll know it’s time to flip when you see bubbles forming all across the surface of the pancake and the edges appear set and slightly dry. For chocolate pancakes, the visual cues are a bit different than with regular pancakes because of the dark color—focus on the bubble formation and edge appearance rather than color change.
Here’s a crucial tip: flip only once. Resist the temptation to peek under the pancake or flip it multiple times. When you do flip, do so with confidence using a wide spatula. The pancake should release easily from the pan if it’s ready. If it sticks, give it another thirty seconds before trying again.
Cook the second side for approximately one and a half to two minutes, until the pancake feels set when you gently press the center with your finger. The second side always cooks faster than the first because the pan is hotter and the pancake is already partially cooked.
Step 8: Keep Pancakes Warm While Cooking Batches
Transfer cooked chocolate pancakes to a plate in a warm oven (set to 200°F) while you cook the remaining batches. This keeps your pancakes warm without drying them out or continuing to cook them significantly. Arrange them in a single layer if possible, or stack them with parchment paper between layers to prevent them from steaming and becoming soggy.
Continue cooking pancakes, re-greasing the pan lightly between batches as needed, until you’ve used all the batter.
Pro Tips for Perfect Chocolate Pancakes Every Single Time
After making hundreds of batches of chocolate pancakes over the years, I’ve learned these expert tips that elevate good pancakes to absolutely phenomenal ones:
Temperature Control is Everything
The single most common mistake people make with chocolate pancakes is cooking them at too high a temperature. Because of the cocoa powder and sugar, these pancakes are more prone to burning on the outside while remaining raw in the center. Medium heat might feel painfully slow, especially when you’re hungry, but it produces far superior results. If your first pancake comes out too dark, reduce your heat and let the pan cool slightly before continuing.
Don’t Skip the Resting Time
Those five to ten minutes of rest time allow the flour to fully absorb the liquid ingredients, resulting in more tender pancakes with better texture. The batter will also thicken slightly during this time, which is exactly what you want. Rested batter produces noticeably better chocolate pancakes than batter cooked immediately after mixing.
Use Fresh Leavening Agents
Baking powder and baking soda lose their potency over time. If your chocolate pancakes aren’t rising as much as you’d like, your leavening agents might be past their prime. To test baking powder, drop a spoonful into hot water—it should fizz vigorously. To test baking soda, drop a spoonful into vinegar—it should bubble enthusiastically. If not, replace them.
Create Steam Pockets for Extra Fluffiness
When you pour the batter onto the griddle, don’t spread it out. Let it spread naturally. This preserves the air bubbles in the batter that create those lovely steam pockets, resulting in lighter, fluffier chocolate pancakes.
Adjust Consistency as Needed
Pancake batter thickens as it sits due to the flour absorbing liquid. If you notice your batter becoming too thick between batches, simply stir in a tablespoon or two of additional buttermilk until it returns to the proper consistency. It should pour easily but not be runny like crepe batter.
Make Them Extra Chocolatey
For chocolate lovers who want even more intense chocolate flavor, try these modifications: increase the cocoa powder to ½ cup, fold in ½ cup of mini chocolate chips just before cooking, or drizzle the finished pancakes with chocolate sauce instead of maple syrup.
Size Matters
Smaller pancakes (using about 3 tablespoons of batter each) are easier to flip and less likely to be undercooked in the center. Larger pancakes look impressive but require more skill to execute perfectly. I find that ¼-cup portions create the ideal size for chocolate pancakes—substantial enough to be satisfying but manageable to cook through properly.
Common Mistakes to Avoid When Making Chocolate Pancakes
Even experienced cooks can stumble with chocolate pancakes if they’re not aware of these common pitfalls:
Overmixing the Batter
I cannot stress this enough: lumpy batter makes fluffy pancakes. When you overmix pancake batter, you develop the gluten in the flour, which creates tough, chewy, dense pancakes instead of light and fluffy ones. Mix only until the dry ingredients disappear into the wet ingredients. Stop immediately when you no longer see dry flour, even if there are small lumps remaining.
Using Low-Quality Cocoa Powder
Not all cocoa powder is created equal. The quality of your cocoa powder directly impacts the flavor of your chocolate pancakes. Avoid those dusty, flavorless cocoa powders that have been sitting in the back of your pantry for years. Invest in good quality cocoa powder from a reputable brand—you’ll taste the difference in every bite.
Cooking at the Wrong Temperature
Too hot, and your chocolate pancakes will burn on the outside before cooking through. Too cool, and they’ll be pale, tough, and take forever to cook. Medium heat is your sweet spot. Remember that your pan gets hotter as you cook multiple batches, so you may need to adjust your heat down slightly as you progress.
Flipping Too Early or Too Often
Each time you flip a pancake, you deflate some of those precious air bubbles and risk breaking the pancake apart. Wait patiently for those bubbles to appear across the entire surface and for the edges to look set before flipping. Then flip only once. I know it’s tempting to peek, but resist.
Not Measuring Accurately
Baking and pancake making require precision. Too much flour makes dense, dry pancakes. Too much liquid makes thin, crepe-like pancakes. Too much cocoa powder creates bitter pancakes. Measure carefully, leveling off your measuring cups with a knife for dry ingredients and using liquid measuring cups for wet ingredients.
Forgetting to Grease Between Batches
Even with non-stick pans, a light coating of butter or oil between batches prevents sticking and promotes even browning. Don’t skip this step, but also don’t overdo it—excess grease makes pancakes heavy and greasy rather than light and fluffy.
Using Old or Cold Ingredients
Baking powder loses potency over time, so check those expiration dates. Cold eggs and buttermilk don’t incorporate as smoothly into the batter—let them come closer to room temperature before mixing. Melted butter that’s too hot can cook the eggs prematurely, so let it cool slightly after melting.
Storage and Serving Suggestions for Chocolate Pancakes
One of the beautiful things about chocolate pancakes is their versatility. They work beautifully for immediate serving but also store remarkably well for make-ahead meals.
Serving Your Chocolate Pancakes Fresh
For the absolute best experience, serve your chocolate pancakes immediately after cooking while they’re still warm and fluffy. Stack them high on plates, dust with powdered sugar, and add your favorite toppings. The classic combination of maple syrup and butter never fails, but don’t be afraid to get creative.
Some of my favorite serving suggestions include:
The Classic: Warm chocolate pancakes with butter and maple syrup, topped with fresh whipped cream and a dusting of powdered sugar.
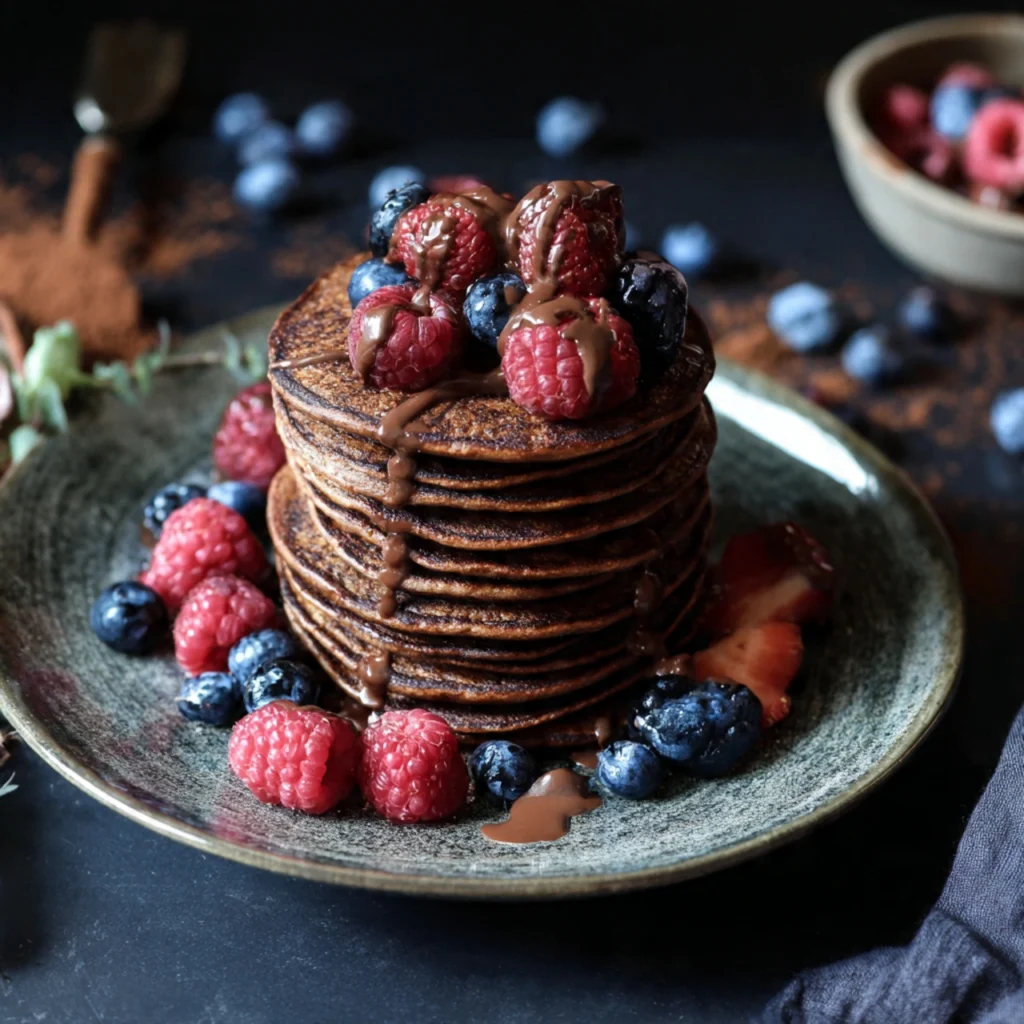
Berry Bliss: Stack pancakes with layers of fresh strawberries, blueberries, and raspberries between each layer, then top with vanilla yogurt and honey.
Banana Foster Style: Top with caramelized bananas, chopped pecans, and a drizzle of caramel sauce.
Ultimate Chocolate: Spread Nutella between layers, top with chocolate sauce, chocolate chips, and whipped cream for a truly decadent experience.
Peanut Butter Paradise: Spread peanut butter between warm pancakes, top with sliced bananas and honey.
Coffee House Style: Serve with coffee-flavored whipped cream and chocolate shavings.
Storing Leftover Chocolate Pancakes
Chocolate pancakes store exceptionally well, making them perfect for meal prep or ensuring you have quick breakfasts on hand throughout the week.
Refrigerator Storage: Allow pancakes to cool completely to room temperature, then stack them with small pieces of parchment or wax paper between each pancake to prevent sticking. Place the stack in an airtight container or resealable plastic bag and refrigerate for up to five days. The parchment paper makes it easy to remove individual pancakes without them all sticking together.
Freezer Storage: For longer storage, chocolate pancakes freeze beautifully for up to three months. Use the same stacking method with parchment paper, then place the stack in a freezer-safe container or heavy-duty freezer bag, pressing out as much air as possible before sealing. Frozen pancakes are incredibly convenient for busy mornings—simply reheat and enjoy.
Reheating Chocolate Pancakes
The reheating method you choose makes a significant difference in texture:
Microwave Method: Place one or two pancakes on a microwave-safe plate and heat on high for 20-30 seconds, or until warmed through. This is the fastest method but can sometimes make pancakes slightly rubbery if overheated.
Oven Method: Preheat your oven to 350°F, arrange pancakes in a single layer on a baking sheet, cover loosely with foil, and warm for about 10 minutes. This method best preserves the original texture.
Toaster Method: For pancakes that are already separated with parchment paper, you can actually pop them in the toaster on a medium-low setting. This creates slightly crispy edges while keeping the interior soft—surprisingly delicious.
Skillet Method: Heat a lightly greased skillet over medium-low heat and warm each pancake for about one minute per side. This method works beautifully for recrisping the exterior while heating the interior.
Making Pancake Batter Ahead
While I recommend cooking chocolate pancakes fresh for the best texture, you can prepare the dry ingredients mixture ahead of time. Combine all the dry ingredients in an airtight container and store at room temperature for up to one month. When you’re ready to make pancakes, simply prepare the wet ingredients and proceed with the recipe. However, I don’t recommend storing mixed batter, as the leavening agents begin working as soon as liquid is added, and you’ll lose that beautiful rise if the batter sits for hours.
Frequently Asked Questions About Chocolate Pancakes
Can I make chocolate pancakes without buttermilk?
Yes, absolutely. While buttermilk produces the most tender, fluffy chocolate pancakes, you can substitute it successfully. Create a buttermilk substitute by adding one tablespoon of white vinegar or lemon juice to 1¼ cups of regular milk and letting it sit for five minutes. Alternatively, you can use plain yogurt thinned with a little milk to reach pourable consistency, or use kefir as a one-to-one substitute. Each option will work, though the texture and tang might be slightly different.
How can I make chocolate pancakes without eggs?
For egg-free chocolate pancakes, you have several substitution options. Replace each egg with one of the following: one “flax egg” (1 tablespoon ground flaxseed mixed with 3 tablespoons water, left to sit for 5 minutes), ¼ cup unsweetened applesauce, ¼ cup mashed banana, or 3 tablespoons aquafaba (the liquid from canned chickpeas). Each substitution slightly alters the texture and flavor, but all produce acceptable results. The flax egg option works particularly well in chocolate pancakes because the slight nuttiness complements the chocolate flavor.
Why are my chocolate pancakes not fluffy?
Several factors can result in dense chocolate pancakes. The most common culprits are overmixing the batter (which develops gluten and deflates air bubbles), using old baking powder or baking soda that has lost its leavening power, or substituting ingredients without adjusting ratios. Make sure you’re mixing just until ingredients are combined, using fresh leavening agents, and measuring accurately. Also, ensure your cooking surface isn’t too hot, as this can cause pancakes to set too quickly before they have time to rise properly.
Can I make these chocolate pancakes vegan?
Yes, with a few simple substitutions. Replace the buttermilk with a plant-based milk (almond, soy, or oat work well) with one tablespoon of apple cider vinegar or lemon juice added. Replace the eggs using the egg substitution options mentioned above—flax eggs work particularly well in vegan baking. Use vegan butter or coconut oil instead of regular butter. The resulting vegan chocolate pancakes will be slightly different in texture but still delicious and satisfying.
Can I use whole wheat flour instead of all-purpose flour?
You can, but the results will be different. Whole wheat flour produces denser, heartier pancakes with a nuttier flavor. For the best results with whole wheat flour, I recommend using white whole wheat flour (which is lighter than regular whole wheat) and replacing only half of the all-purpose flour with whole wheat flour. You may also need to add an extra tablespoon or two of liquid, as whole wheat flour absorbs more moisture than all-purpose flour.
How do I prevent my chocolate pancakes from burning?
The key is temperature control. Chocolate pancakes burn more easily than regular pancakes because of the cocoa powder and sugar content. Always cook over medium heat, not medium-high. Test your pan temperature with water droplets before adding batter, and reduce heat if the first pancake gets too dark. Make sure you’re using enough fat to grease the pan between batches, as this promotes even browning rather than burning. If you notice burning even with proper temperature, your pan may have hot spots—try using a different pan or griddle.
Can I add chocolate chips to these chocolate pancakes?
Absolutely! Fold about ½ cup of mini chocolate chips into the batter just before cooking for extra chocolate intensity. I recommend mini chocolate chips rather than regular-sized ones because they distribute more evenly throughout the pancakes and are less likely to burn. Add them as the very last step after resting the batter, folding them in gently to avoid overmixing. You can use semi-sweet, milk chocolate, or dark chocolate chips depending on your preference.
Why did my chocolate pancakes turn out dry?
Dry pancakes typically result from one of three issues: too much flour (often from scooping the measuring cup directly into the flour bag, which compacts it), cooking at too high a temperature, or overcooking. Always measure flour by spooning it into the measuring cup and leveling it off. Cook over medium heat only, and remove pancakes from the heat as soon as they’re just cooked through—they’ll continue cooking slightly from residual heat. Adding an extra tablespoon of melted butter to the batter can also help if you find your pancakes consistently turn out dry.
Conclusion: Your Journey to Chocolate Pancake Mastery
Mastering the art of chocolate pancakes opens up a world of breakfast possibilities that extend far beyond ordinary morning routines. These fluffy, chocolatey delights prove that you don’t need to sacrifice quality or flavor for convenience—with just twenty-five minutes and a handful of simple ingredients, you can create a breakfast experience that rivals any upscale brunch spot.
The beauty of this chocolate pancake recipe lies not just in its delicious results but in its versatility and reliability. Whether you’re cooking for picky children who suddenly become enthusiastic eaters when chocolate is involved, impressing weekend brunch guests, celebrating special occasions, or simply treating yourself to something extraordinary on an ordinary Tuesday morning, these pancakes deliver consistent excellence every single time.
Remember that the key to perfect chocolate pancakes comes down to a few essential principles: don’t overmix the batter, cook at medium heat with patience, use fresh ingredients and measure accurately, and trust the process even when your batter looks lumpy. These simple rules, combined with the detailed instructions and tips in this guide, ensure your success from the very first batch.
As you become more comfortable with this recipe, don’t hesitate to make it your own. Experiment with different toppings, try folding in additional ingredients like nuts or chocolate chips, or adjust the sweetness level to match your preferences. The foundation recipe provided here is solid and tested, giving you the perfect starting point for endless variations and personal touches.
Whether these chocolate pancakes become your signature weekend breakfast, your go-to for special occasions, or simply a regular part of your morning rotation, I hope they bring as much joy to your kitchen as they have to mine over the years. There’s something magical about watching faces light up when you present a stack of these beautiful, aromatic chocolate pancakes, and that magic never gets old.
Now it’s time to heat up that griddle, pull out your mixing bowls, and experience the satisfaction of creating something truly special in your own kitchen. Your journey to chocolate pancake perfection starts now—enjoy every fluffy, chocolatey bite!
Print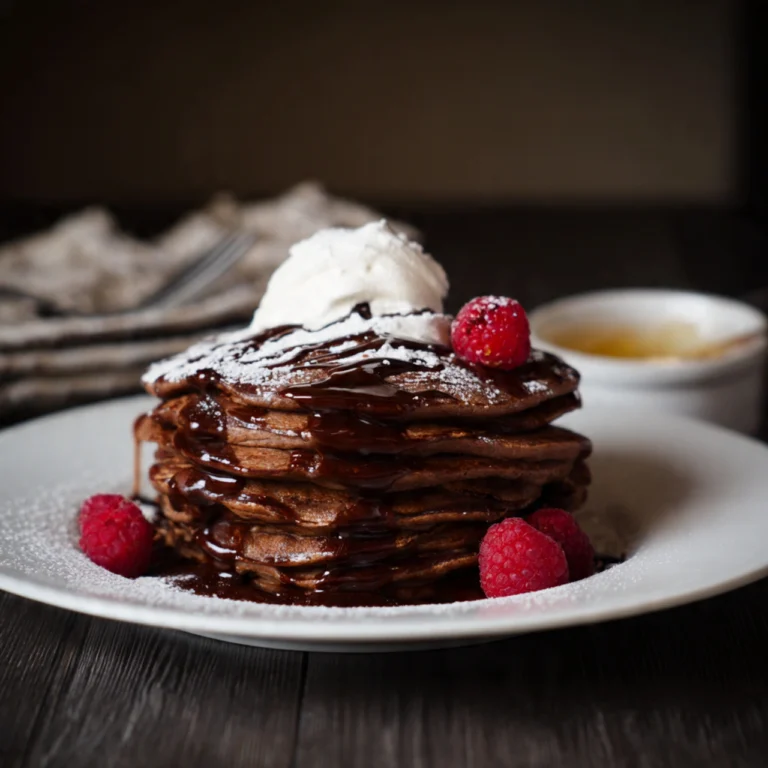
Chocolate Pancakes: The Ultimate Guide to Fluffy, Decadent Breakfast Heaven
These decadent chocolate pancakes are perfectly fluffy, rich with cocoa flavor, and incredibly easy to make. They’re ideal for special breakfasts, lazy weekend mornings, or any time you want to turn an ordinary day into something extraordinary.
- Total Time: 25 minutes
- Yield: 12 medium pancakes
Ingredients
Dry Ingredients:
- 1½ cups all-purpose flour
- ⅓ cup unsweetened cocoa powder
- ¼ cup granulated sugar
- 2 teaspoons baking powder
- ½ teaspoon baking soda
- ½ teaspoon salt
Wet Ingredients:
- 2 large eggs
- 1¼ cups buttermilk
- 3 tablespoons melted butter (cooled slightly)
- 1 teaspoon pure vanilla extract
For Cooking:
- Butter or neutral oil for greasing
Instructions
- Prepare dry ingredients: In a large bowl, whisk together flour, cocoa powder, sugar, baking powder, baking soda, and salt until well combined and free of lumps. Sift cocoa powder if it appears clumpy.
- Mix wet ingredients: In a separate medium bowl, whisk eggs until beaten. Add buttermilk, melted butter, and vanilla extract, whisking until thoroughly combined.
- Combine wet and dry: Pour wet ingredients into dry ingredients. Using a spatula or wooden spoon, gently fold together with broad strokes until just combined. Batter should be lumpy—do not overmix. A few small lumps and flour streaks are fine.
- Rest the batter: Let batter rest at room temperature for 5-10 minutes while you preheat your cooking surface. The batter will thicken slightly during this time.
- Preheat cooking surface: Heat a griddle or large non-stick skillet over medium heat until water droplets sizzle when sprinkled on the surface.
- Cook pancakes: Lightly grease the cooking surface. Pour ¼ cup of batter for each pancake. Cook for 2-3 minutes until bubbles form across the surface and edges appear set. Flip once and cook for 1½-2 minutes on the second side until cooked through.
- Keep warm: Transfer cooked pancakes to a plate in a 200°F oven while cooking remaining batches. Re-grease pan lightly between batches as needed.
- Serve: Serve immediately with your favorite toppings such as maple syrup, butter, whipped cream, fresh berries, or powdered sugar.
Notes
- For extra chocolate intensity, fold ½ cup mini chocolate chips into the batter just before cooking.
- Pancakes can be frozen for up to 3 months. Place parchment paper between each pancake before freezing in an airtight container.
- If you don’t have buttermilk, make a substitute by adding 1 tablespoon vinegar or lemon juice to 1¼ cups milk and letting it sit for 5 minutes.
- Natural cocoa powder is recommended over Dutch-processed for this recipe to ensure proper rise.
- Batter will be thicker than regular pancake batter—this is normal and correct.
- Medium heat is crucial—these pancakes burn more easily than regular pancakes due to cocoa and sugar content.
- Prep Time: 10 minutes
- Cook Time: 15 minutes
- Category: Desserts
- Method: Griddle, Stovetop
- Cuisine: American
- Diet: Vegetarian