Heart Palmiers: The Elegant French Pastry Perfect for Romance

Introduction
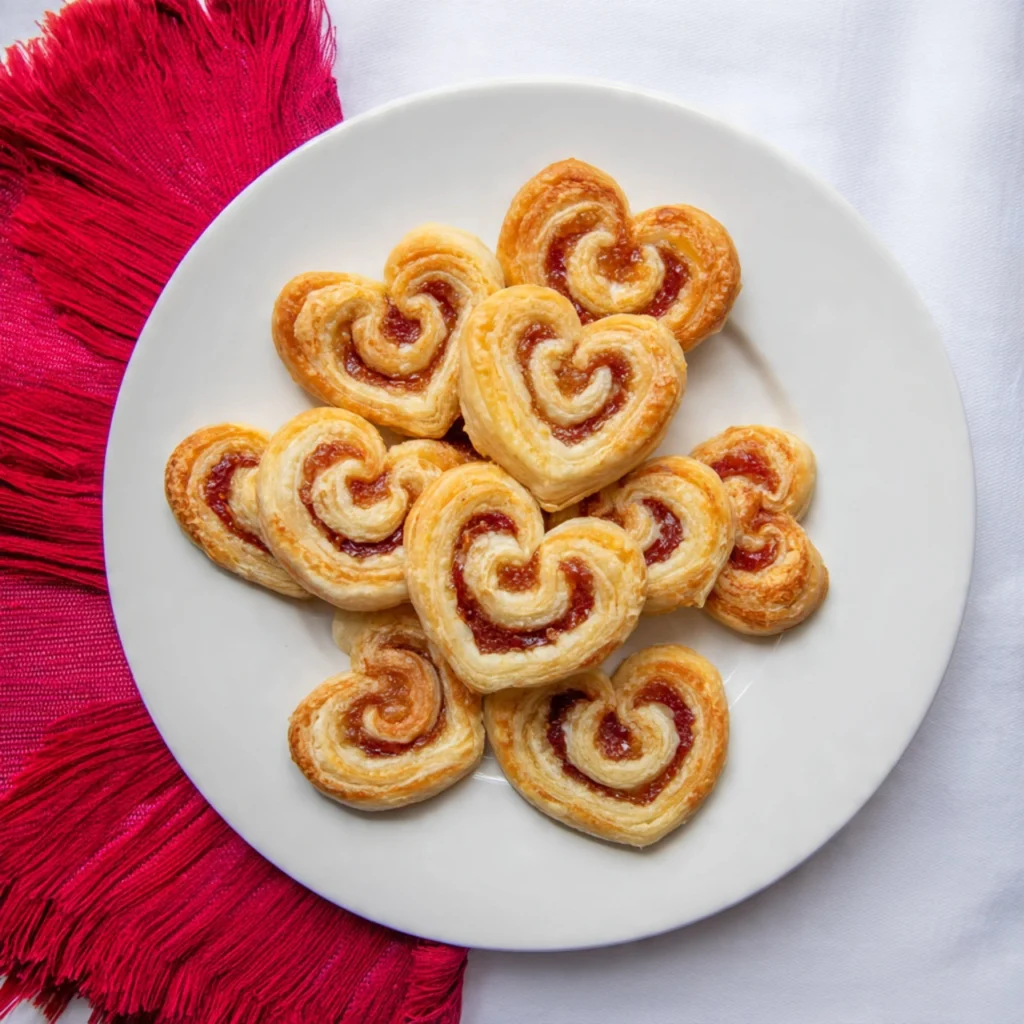
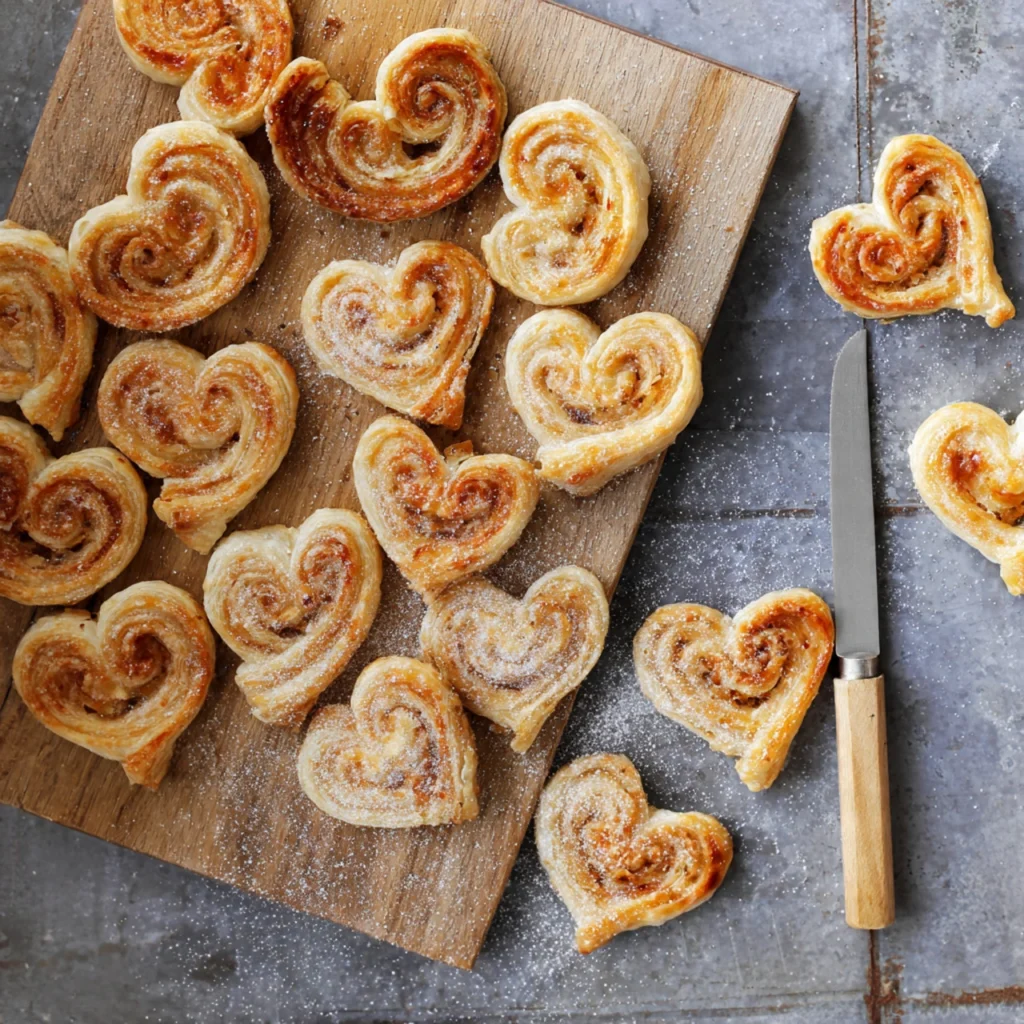
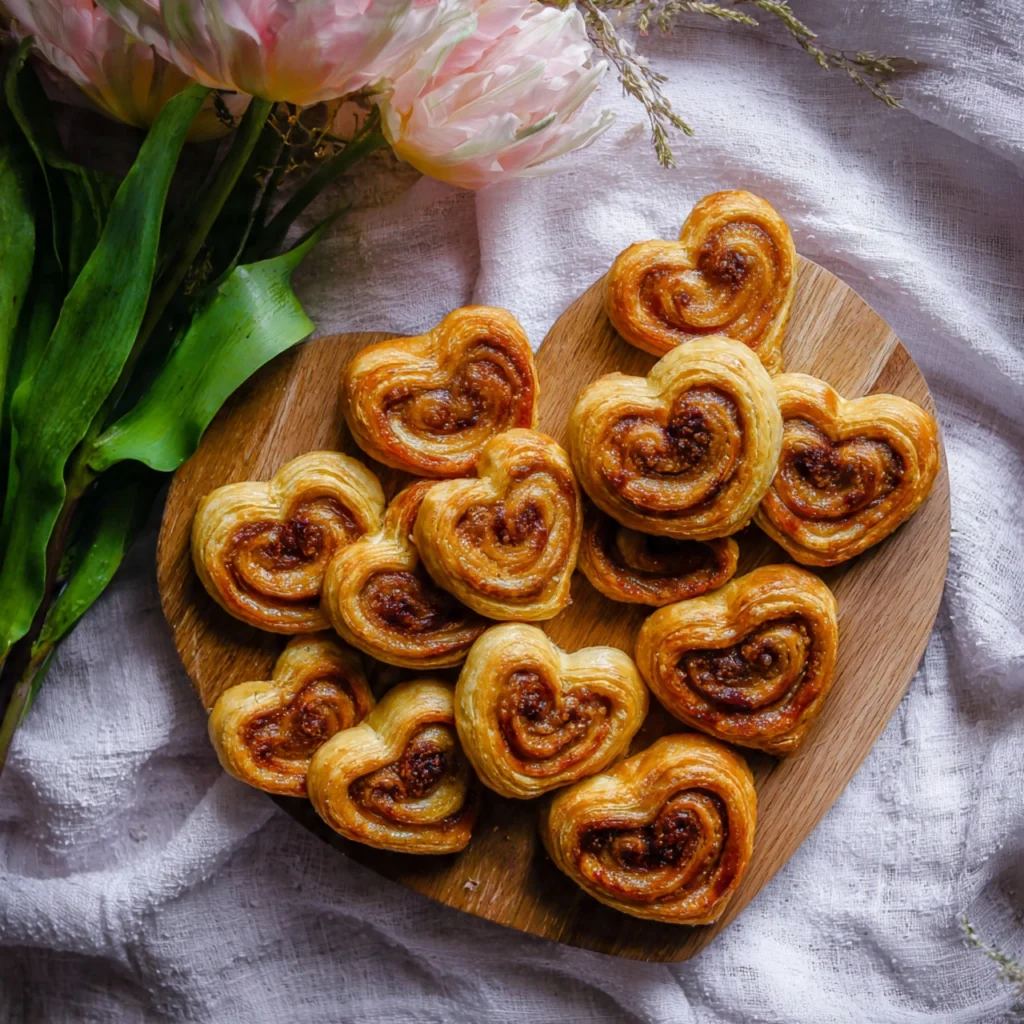
Heart Palmiers are the epitome of French elegance meets romantic charm—delicate, crispy layers of buttery puff pastry shaped into perfect hearts, caramelized with sugar until they’re golden and gloriously crunchy. These sophisticated cookies, also affectionately known as “elephant ears” or “palm leaves,” transform into the ultimate symbol of love when shaped into hearts for Valentine’s Day, anniversaries, or any occasion that celebrates romance.
What makes Heart Palmiers truly remarkable is the stunning visual impact they create with such minimal effort. The moment I pull a tray of these gorgeous pastries from the oven, with their golden-brown spirals glistening with caramelized sugar, I feel like a professional pastry chef. Yet the secret I’m about to share with you is that these impressive treats require only four basic ingredients and about twenty minutes of hands-on work.
I discovered the magic of Heart Palmiers years ago when I was searching for a dessert that looked sophisticated enough for a Valentine’s dinner party but wouldn’t keep me in the kitchen all day. The first time I served them, guests were absolutely convinced I’d spent hours making puff pastry from scratch. When I revealed I’d used store-bought puff pastry, there was a collective sigh of relief—everyone wanted the recipe immediately.
The beauty of these French pastries lies in their incredible versatility. While they’re absolutely perfect for Valentine’s Day with their romantic heart shape, you can easily adapt the classic palmier technique to create traditional spiral shapes for any occasion throughout the year. The crispy, flaky layers shatter satisfyingly with each bite, releasing waves of buttery, caramelized sweetness that pair beautifully with coffee, tea, or champagne.
What I love most about Heart Palmiers is how they bridge the gap between homemade and bakery-quality. They taste like you’ve mastered the art of French pastry-making, yet they’re accessible enough for beginners who’ve never worked with puff pastry before. The transformation that happens in the oven—watching flat hearts puff up into golden, crispy layers—never fails to feel like kitchen magic.
In this comprehensive guide, I’ll walk you through every step of creating these show-stopping Heart Palmiers, share the professional techniques I’ve learned from years of experimentation, and help you avoid the pitfalls that can turn delicate pastries into disappointing disasters.
Why You’ll Love This Recipe
Before we dive into the delicious details, let me share why Heart Palmiers have earned their place as one of my all-time favorite special occasion treats:
Deceptively Simple: With only four ingredients and store-bought puff pastry doing the heavy lifting, these look far more complicated than they actually are.
Impressive Presentation: The elegant heart shape and crispy, caramelized layers make these look like they came from an expensive French patisserie.
Quick Preparation: Active hands-on time is only about 20 minutes—the oven does most of the work.
Crowd-Pleasing: I’ve never met anyone who doesn’t love the combination of buttery pastry and caramelized sugar. These appeal to all ages and taste preferences.
Versatile: Perfect for Valentine’s Day, weddings, bridal showers, anniversaries, or whenever you want to impress.
Budget-Friendly: Four simple ingredients create elegant results without breaking the bank.
Make-Ahead Friendly: You can prepare these in advance and freeze them, making party planning stress-free.
Ingredients
Essential Ingredients:
- 1 package frozen puff pastry (17.3 oz/490g, containing 2 sheets), thawed according to package directions
- 1 cup granulated sugar (200g), divided, plus extra for rolling
- 1 tablespoon ground cinnamon (optional, but adds wonderful warmth)
- 1 large egg, beaten with 1 tablespoon water (for egg wash)
Optional Flavor Variations:
- 2 tablespoons cocoa powder mixed with sugar for chocolate palmiers
- 1 teaspoon vanilla extract added to egg wash
- Pinch of cardamom or nutmeg for spiced variation
- Finely grated lemon or orange zest mixed with sugar
- 2 tablespoons finely chopped nuts (pistachios, almonds) for added texture
Equipment Needed:
- Rolling pin
- Sharp knife or pizza cutter
- Parchment paper or silicone baking mats
- Pastry brush for egg wash
- Ruler (for precise measurements)
- Baking sheets (at least 2)
- Wire cooling rack
Step-by-Step Instructions
Step 1: Prepare Your Workspace and Ingredients
Begin by ensuring your frozen puff pastry has thawed properly—it should be cold but pliable, not frozen solid or warm and sticky. The ideal thawing time is about 40 minutes at room temperature, but this can vary depending on your kitchen’s warmth.
Prepare a large, clean work surface and lightly dust it with granulated sugar instead of flour. This is crucial—using sugar instead of flour not only prevents sticking but also adds to the caramelization and creates that signature crispy, sweet exterior.
In a small bowl, mix ½ cup of the granulated sugar with the cinnamon if using. Keep the remaining ½ cup of plain sugar nearby for sprinkling.
Line two baking sheets with parchment paper or silicone baking mats. Set them aside.
Step 2: Roll and Shape the First Sheet
Unfold one sheet of puff pastry onto your sugar-dusted work surface. If there are any cracks along the fold lines, gently press them together with your fingers.
Sprinkle the top of the pastry generously with the cinnamon-sugar mixture (or plain sugar if you prefer). Using your rolling pin, gently roll the pastry into a rectangle approximately 10 x 12 inches, pressing the sugar into the dough as you roll. The sugar should stick to both sides of the pastry.
Here’s where the magic happens: Starting from one of the shorter sides (10-inch side), tightly roll the pastry toward the center, like you’re rolling up a sleeping bag. Stop when you reach the middle of the rectangle.
Repeat the same tight rolling process from the opposite short side, rolling toward the center until the two rolls meet in the middle. You should now have what looks like a scroll or the number “3” lying on its side.
Step 3: Chill the Rolled Pastry
This step is absolutely critical for clean, beautiful heart shapes. Wrap the double-rolled pastry log tightly in plastic wrap and refrigerate for at least 30 minutes, or up to 2 days.
Chilling firms up the butter in the puff pastry, making it much easier to slice cleanly without squashing the delicate layers. This also helps the palmiers hold their shape during baking.
While the first sheet chills, repeat steps 2 and 3 with your second sheet of puff pastry.
Step 4: Slice the Hearts
Preheat your oven to 400°F (200°C). Position your oven racks in the upper and lower thirds of the oven for even baking.
Remove one chilled pastry log from the refrigerator. Using a sharp knife (wipe it clean between cuts), slice the log into ½-inch thick slices. You should get approximately 16-18 slices from each sheet.
Each slice will naturally form a heart shape when you look at it from the cut side—the two spirals create the rounded top of the heart, and the point where they meet forms the bottom point.
Step 5: Prepare for Baking
Arrange the sliced palmiers on your prepared baking sheets, spacing them at least 2 inches apart. These pastries will puff and spread significantly during baking, so don’t crowd them.
Lightly brush the top of each palmier with the egg wash. This creates a beautiful golden-brown color and glossy sheen.
Sprinkle each palmier generously with additional granulated sugar. This extra sugar caramelizes during baking and creates those irresistible crispy edges.
Step 6: Bake to Golden Perfection
Bake the palmiers for 12-15 minutes, rotating the pans halfway through baking and switching their positions (top to bottom, bottom to top) to ensure even browning.
The palmiers are done when they’re puffed, golden brown, and deeply caramelized on the bottom. The sugar should be bubbling and turning amber-colored at the edges.
Here’s a crucial step many people miss: Carefully flip each palmier using a spatula or fork, and return them to the oven for an additional 3-5 minutes. This caramelizes the second side and creates that signature crackly, crispy texture on both sides.
Step 7: Cool and Serve
Remove the baking sheets from the oven and immediately transfer the palmiers to a wire cooling rack. They’ll be extremely hot and the sugar will still be bubbling, so handle carefully.
Let the palmiers cool for at least 10 minutes before serving. As they cool, the caramelized sugar hardens into that perfect crispy shell that shatters so satisfyingly when you bite into them.
The palmiers are best enjoyed within a few hours of baking when they’re at their crispiest, though they’ll remain delicious for up to 2 days stored properly.
Pro Tips for Perfect Heart Palmiers
After making countless batches of these French beauties, I’ve discovered several secrets that separate good palmiers from absolutely extraordinary ones:
Tip 1: Temperature is Everything
Keep your puff pastry cold while working with it. If it becomes too warm and sticky, pop it back in the refrigerator for 10 minutes. Warm pastry is difficult to roll, loses its definition, and won’t puff properly.
Tip 2: Roll Tightly
The tighter you roll your pastry toward the center, the more defined and beautiful your heart shape will be. Loose rolls create misshapen, sloppy-looking palmiers.
Tip 3: Use a Sharp Knife
A dull knife squashes the layers instead of cutting cleanly through them. Wipe your knife clean between each slice for the neatest results.
Tip 4: Don’t Skip the Flip
Flipping the palmiers halfway through baking ensures both sides caramelize properly. This creates the signature crunch that makes palmiers so addictive.
Tip 5: Watch Closely Near the End
The line between perfectly caramelized and burnt can be thin. Keep a close eye during the final minutes of baking.
Tip 6: Sugar, Not Flour
Always use sugar (not flour) to dust your work surface when rolling puff pastry for palmiers. The sugar prevents sticking while adding to the caramelization.
Tip 7: Space Generously
Puff pastry expands dramatically in the oven. Leave at least 2 inches between each palmier to prevent them from merging into one giant pastry.
Tip 8: Fresh is Best
While these can be stored, they’re absolutely at their peak within the first few hours after baking when the caramelized layers are at their crispiest.
Tip 9: Freeze for Later
Unbaked, sliced palmiers freeze beautifully. Freeze them on a baking sheet until solid, then transfer to a freezer bag. Bake directly from frozen, adding 2-3 minutes to the baking time.
Tip 10: Embrace Imperfection
Not every palmier will be a perfect heart shape, and that’s okay! The rustic, handmade quality is part of their charm.
Common Mistakes to Avoid
Learning from common pitfalls can save you disappointment. Here are the mistakes I see most often:
Mistake 1: Using Warm Puff Pastry
Room temperature or warm puff pastry is sticky, difficult to work with, and won’t puff properly. Always keep it cold.
Mistake 2: Skipping the Chilling Step
Attempting to slice unchilled rolled pastry results in squashed, misshapen palmiers. The 30-minute chill time is non-negotiable.
Mistake 3: Cutting Slices Too Thick
Thick slices don’t crisp up properly and can remain doughy in the center. Stick to ½-inch thickness for best results.
Mistake 4: Crowding the Baking Sheet
Palmiers that touch during baking will stick together and won’t caramelize properly on the sides. Space them generously.
Mistake 5: Overbaking
Burnt sugar is bitter and unpleasant. Watch carefully during the final minutes and remove promptly when deeply golden.
Mistake 6: Not Using Egg Wash
Skipping the egg wash results in pale, matte palmiers instead of gorgeously glossy, golden ones.
Mistake 7: Using Old or Poor-Quality Puff Pastry
Not all puff pastry is created equal. Choose a high-quality brand with real butter for best flavor and texture.
Mistake 8: Storing While Still Warm
Storing warm palmiers creates condensation, which makes them soggy. Always cool completely first.
Storage and Serving Suggestions
Storage Guidelines
Room Temperature: Store completely cooled Heart Palmiers in an airtight container at room temperature for up to 2 days. Place parchment paper between layers to prevent sticking.
Refrigeration: Not recommended, as refrigeration introduces moisture that makes the pastries soggy.
Freezing Baked Palmiers: While possible, I don’t recommend freezing baked palmiers as they lose their crispy texture. If you must freeze them, store in an airtight container for up to 1 month and crisp them in a 350°F oven for 5 minutes before serving.
Freezing Unbaked Palmiers: This is the best make-ahead method! Slice the chilled pastry rolls, arrange on a parchment-lined baking sheet, and freeze until solid (about 2 hours). Transfer frozen slices to a freezer bag and store for up to 3 months. Bake directly from frozen, adding 2-3 minutes to the baking time.
Recrisping: If your palmiers have softened, you can restore some crispness by placing them in a 350°F oven for 3-5 minutes.
Serving Suggestions
For Valentine’s Day: Arrange on a cake stand, dust with powdered sugar, and scatter fresh rose petals around them for romantic presentation.
For Brunch: Serve alongside coffee, hot chocolate, or mimosas as an elegant pastry option.
For Tea Time: Present on a tiered serving tray with other petit fours and finger sandwiches for a French-inspired afternoon tea.
For Dessert: Serve with vanilla ice cream, fresh berries, and a drizzle of chocolate sauce for an elevated plated dessert.
For Gifts: Package in clear cellophane bags tied with ribbon for beautiful homemade gifts that look professionally made.
Pairing Suggestions:
- Hot coffee or espresso (the bitterness balances the sweetness)
- Champagne or sparkling wine
- Hot tea (Earl Grey pairs beautifully)
- Fresh berries and whipped cream
- Vanilla ice cream or gelato
- Hot chocolate for a decadent treat
Presentation Ideas
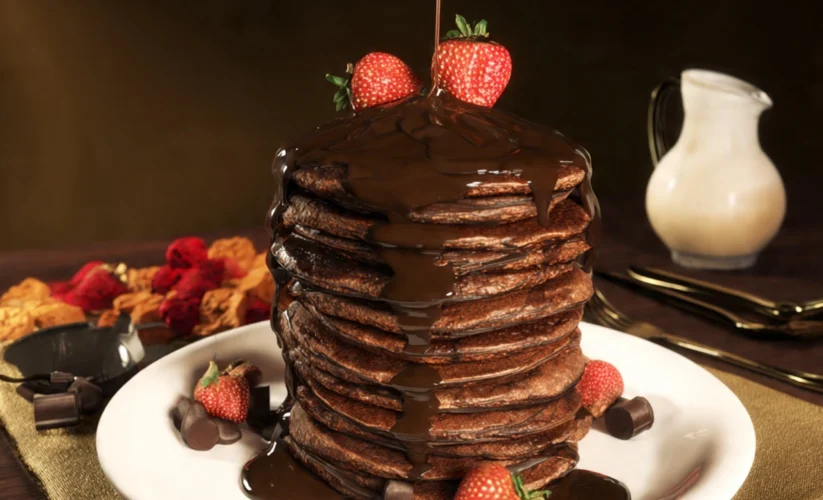
Dust with powdered sugar for an elegant, snowy effect Drizzle with melted chocolate for extra indulgence Serve with chocolate-dipped strawberries for Valentine’s Day Add to a dessert charcuterie board with other sweets Stand upright in small cups filled with chocolate mousse
Frequently Asked Questions (FAQ)
1. Can I make Heart Palmiers without puff pastry?
While store-bought puff pastry makes this recipe incredibly simple, you can make homemade puff pastry if you’re up for a challenge. However, I’ll be honest—puff pastry is one of the most labor-intensive pastries to make from scratch, requiring hours of rolling, folding, and chilling. The beauty of this recipe is its simplicity, and using quality store-bought puff pastry delivers excellent results without the extensive work. If you do want to make homemade puff pastry, allow yourself at least a full day for the process.
2. Why do my Heart Palmiers come out flat instead of puffy?
Several factors can prevent proper puffing: using warm puff pastry (the butter melts before creating steam), overworking the dough, using old puff pastry that’s been thawed and refrozen, or an oven temperature that’s too low. Make sure your oven is fully preheated to 400°F, your pastry is cold when it goes into the oven, and you’re using fresh, high-quality puff pastry. Also, verify your oven temperature with a thermometer—many ovens run cooler than their dials indicate.
3. Can I make these ahead for a party?
Absolutely! The best make-ahead method is to prepare the palmiers through the slicing stage, then freeze them unbaked. On the day of your party, bake them directly from frozen—they’ll taste freshly made because they are! Alternatively, you can bake them up to 8 hours ahead and store in an airtight container, though they’re definitely at their best within the first few hours after baking when the caramelization is at its crispiest.
4. What’s the difference between palmiers and elephant ears?
They’re actually the same pastry! “Palmiers” is the French name (meaning “palm trees” due to their palm leaf shape), while “elephant ears” is the American nickname. The traditional palmier shape is more of an abstract palm leaf or butterfly, while this recipe specifically shapes them into hearts for romantic occasions. All variations use the same basic technique of rolling puff pastry with sugar.
5. Can I add different flavors to Heart Palmiers?
Yes! The basic recipe is wonderfully versatile. Try these variations:
- Chocolate: Mix 2 tablespoons cocoa powder with the sugar
- Nutty: Sprinkle finely chopped pistachios, almonds, or pecans before rolling
- Citrus: Add finely grated lemon, orange, or lime zest to the sugar
- Spiced: Try cardamom, nutmeg, or ginger instead of cinnamon
- Savory: Use grated Parmesan and herbs instead of sugar for a savory version
- Matcha: Mix 1 tablespoon matcha powder with the sugar
6. My palmiers are burning on the bottom but still pale on top. What’s wrong?
This typically indicates your oven has a hot spot on the bottom or you’re baking on too low a rack position. Try these solutions: use an oven thermometer to verify actual temperature, bake on the middle rack, place a second baking sheet under the first to create insulation, or reduce temperature slightly to 375°F and bake a few minutes longer. Also, make sure you’re using parchment paper or silicone mats, which help protect the bottoms.
7. Can I make mini or giant Heart Palmiers?
Definitely! For mini palmiers, slice them ¼-inch thick instead of ½-inch and reduce baking time to 8-10 minutes before flipping. For larger palmiers, slice them ¾-inch thick and increase baking time to 15-17 minutes before flipping. Remember that cooking times can vary, so watch them carefully and look for that deep golden caramelization as your indicator of doneness.
8. How do I get the heart shape perfect?
The heart shape comes naturally from how you roll the pastry. Make sure you’re rolling from both short ends toward the center (not from long ends), rolling very tightly, and ensuring the two rolls meet precisely in the middle. The tighter and more uniform your rolls, the more defined your heart shape will be. When you slice and look at the cross-section, you should see two equal spirals that touch in the middle—this creates the heart shape when baked.
Final Thoughts
Heart Palmiers represent everything I love about baking—they’re simple enough for beginners yet impressive enough to wow even the most discerning dessert lovers. The transformation that happens in your oven, watching flat hearts puff into golden, crispy layers of caramelized perfection, never gets old no matter how many times I make them.
What makes these French pastries truly special is the remarkable return on investment. Twenty minutes of hands-on work yields elegant, bakery-quality results that make you look like a pastry chef extraordinaire. When guests discover you made these stunning treats at home with just four ingredients, the looks of amazement are absolutely priceless.
I’ve served Heart Palmiers at countless Valentine’s celebrations, wedding showers, anniversary dinners, and romantic gatherings over the years. Every single time, they disappear faster than anything else on the dessert table. There’s something universally appealing about the combination of buttery, flaky pastry and crispy caramelized sugar that transcends age, dietary preferences, and personal taste.
The beauty of this recipe is its adaptability. While the classic cinnamon-sugar version is timeless, don’t hesitate to experiment with the flavor variations I’ve suggested. Some of my favorite variations came from spontaneous additions when I was feeling creative or needed to use up ingredients in my pantry.
Whether you’re baking these for someone special, celebrating a romantic occasion, or simply want to treat yourself to something delicious, Heart Palmiers deliver on every level. They prove that homemade doesn’t have to mean complicated, and that with the right techniques, you can create something truly extraordinary from the simplest ingredients.
The next time Valentine’s Day approaches or you want to surprise someone with a homemade treat that looks like it required hours of work, remember these Heart Palmiers. Your secret—that they took less than thirty minutes of actual effort—can remain safely between us.
Happy baking, and may your pastries always puff perfectly!
Bon appétit!
Print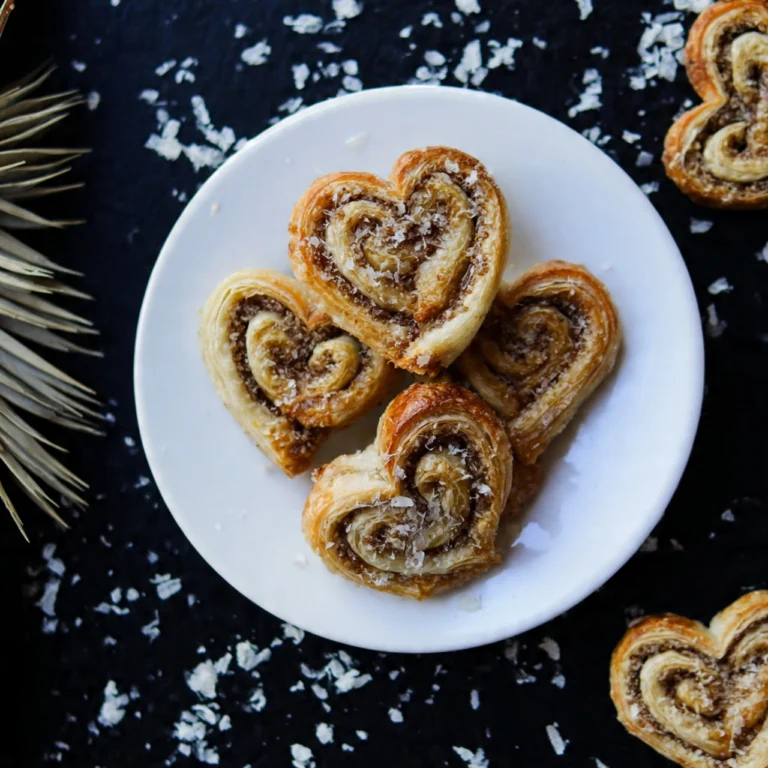
Heart Palmiers: The Elegant French Pastry Perfect for Romance
Elegant Heart Palmiers are crispy, flaky French pastries made from puff pastry and caramelized sugar, shaped into perfect hearts. These impressive cookies require just 4 ingredients and minimal effort, yet deliver bakery-quality results perfect for Valentine’s Day, weddings, anniversaries, or any romantic celebration.
- Total Time: 38 minutes
- Yield: 32-36 palmiers
Ingredients
- 1 package frozen puff pastry (17.3 oz, 2 sheets), thawed
- 1 cup granulated sugar, divided, plus extra for rolling
- 1 tablespoon ground cinnamon (optional)
- 1 large egg, beaten with 1 tablespoon water
Instructions
- Dust work surface with sugar and unfold one sheet of puff pastry
- Sprinkle pastry with cinnamon-sugar mixture
- Roll into 10×12-inch rectangle, pressing sugar into dough
- Starting from short ends, tightly roll both sides toward center until they meet
- Wrap in plastic and refrigerate for at least 30 minutes
- Repeat with second pastry sheet
- Preheat oven to 400°F and line baking sheets with parchment
- Slice chilled rolls into ½-inch thick slices
- Arrange on baking sheets 2 inches apart
- Brush with egg wash and sprinkle with sugar
- Bake 12-15 minutes until golden, flip, and bake 3-5 minutes more
- Cool on wire rack before serving
Notes
- Keep puff pastry cold while working for best results
- Chill rolled pastry at least 30 minutes before slicing
- Use sugar (not flour) for rolling surface
- Space palmiers 2 inches apart—they expand significantly
- Flip halfway through baking for even caramelization
- Best enjoyed within a few hours of baking
- Freeze unbaked sliced palmiers for up to 3 months
- Bake frozen palmiers directly, adding 2-3 minutes to baking time
- Wipe knife clean between slices for neat cuts
- Prep Time: 20 minutes
- Cook Time: 18 minutes
- Category: Desserts
- Method: Baking
- Cuisine: French
- Diet: Vegan