

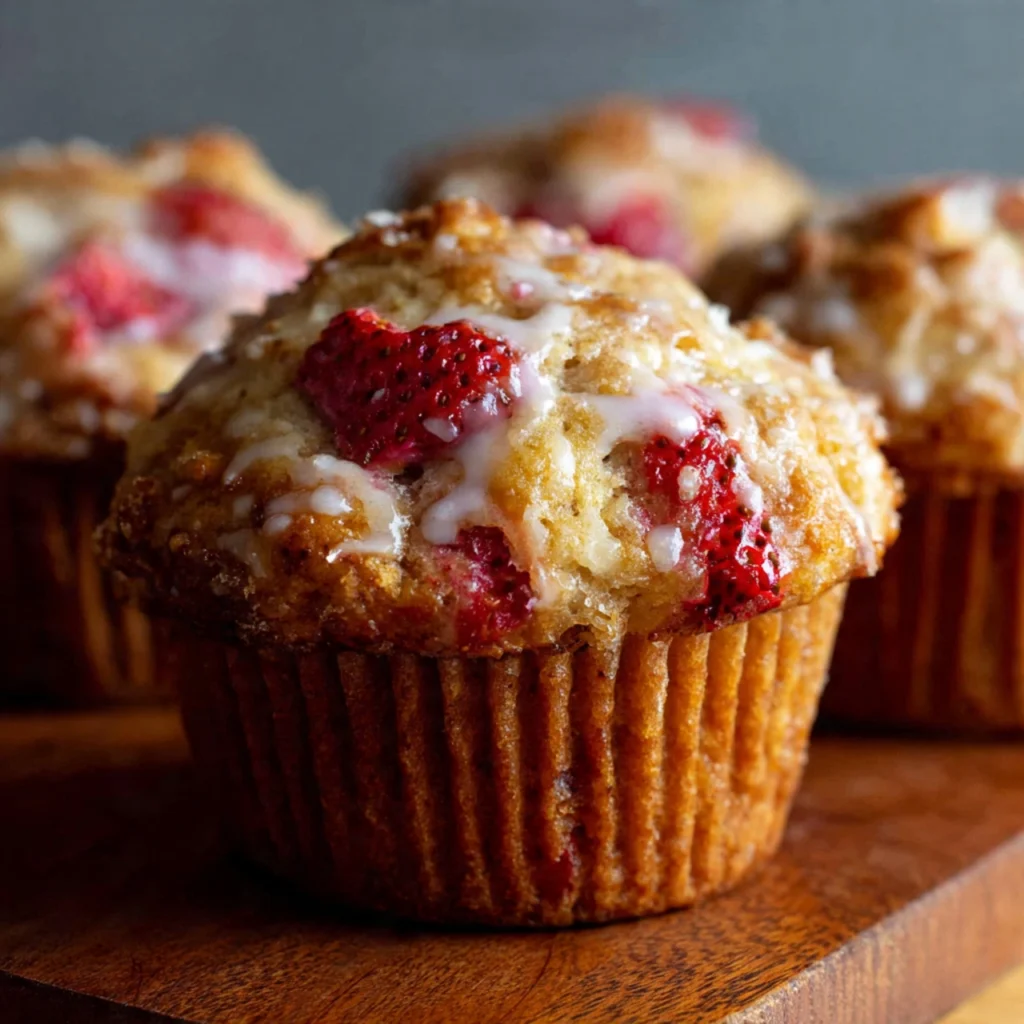
Bakery-Style Strawberry Muffins That’ll Make Your Kitchen Smell Like Heaven

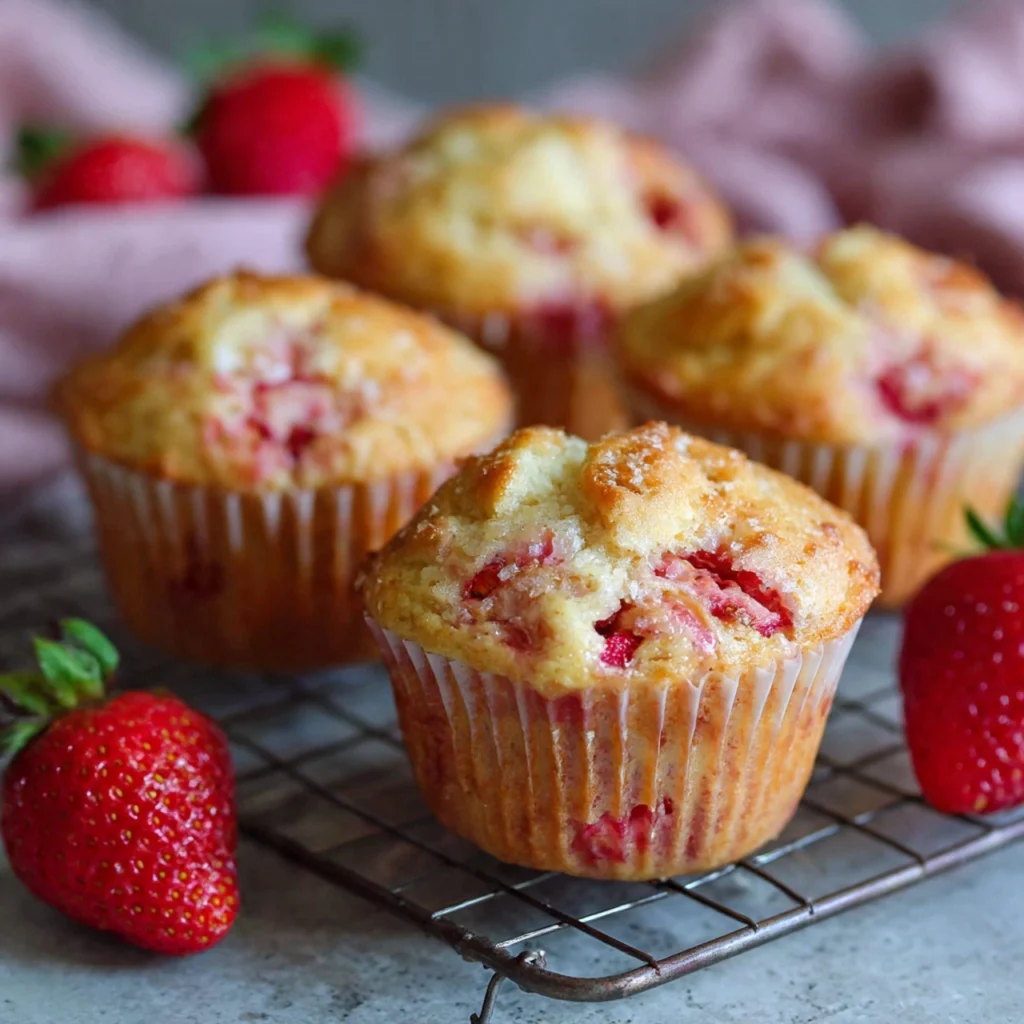
Strawberry muffins recipe are the perfect way to celebrate fresh berry season, combining tender, fluffy crumb with sweet-tart bursts of juicy fruit in every bite. Whether you’re planning a weekend brunch, packing school lunchboxes, or simply craving a homemade treat that rivals your favorite bakery, this foolproof recipe delivers picture-perfect results without requiring professional baking skills.
I’ve spent years perfecting this strawberry muffin recipe through countless kitchen experiments, and I’m thrilled to share every secret that transforms ordinary muffins into extraordinary ones. The beauty of these muffins lies in their simplicity—basic pantry ingredients come together in under an hour to create something truly special. Unlike dense, rubbery store-bought versions, these homemade beauties boast tall, domed tops with that signature bakery-style appearance and a texture so light it practically melts on your tongue.
What makes this recipe stand out is the careful balance of moisture and structure. Too often, fruit muffins turn out soggy from excess berry juice or dry from overmixing. My method addresses both issues with techniques borrowed from professional pastry chefs, ensuring your muffins emerge from the oven with golden edges, moist interiors, and strawberries distributed evenly throughout rather than sinking to the bottom.
Fresh strawberries add natural sweetness and gorgeous color that frozen varieties simply can’t match during peak season. That said, I’ll show you how to adapt this recipe for year-round baking because sometimes you just need strawberry muffins in January. The vanilla-scented batter provides the perfect canvas for showcasing the berries while subtle hints of lemon zest brighten the overall flavor profile.

Why This Strawberry Muffin Recipe Works
The secret weapon in achieving bakery-quality texture is the combination of both butter and oil. Butter contributes rich flavor and helps create those coveted crispy edges, while oil ensures the crumb stays tender and moist for days. The mixture of granulated and brown sugar adds complexity—white sugar provides sweetness and helps with rise, while brown sugar introduces moisture and a hint of caramel undertone.
Another critical element is the initial high-temperature bake. Starting at 425°F for the first five minutes creates rapid steam that pushes the batter upward, forming those beautiful domed tops. Reducing the temperature afterward allows the interior to bake through gently without drying out the exterior.
Ingredients You’ll Need
For the Muffins:
- 2 cups all-purpose flour (spooned and leveled, not scooped)
- 2 teaspoons baking powder
- ½ teaspoon baking soda
- ½ teaspoon salt
- ½ cup unsalted butter, melted and slightly cooled
- ¼ cup vegetable or canola oil
- ¾ cup granulated sugar
- ¼ cup light brown sugar, packed
- 2 large eggs, at room temperature
- 1 cup whole milk, at room temperature
- 2 teaspoons pure vanilla extract
- Zest of 1 medium lemon (optional but recommended)
- 1½ cups fresh strawberries, hulled and chopped into ½-inch pieces
- 1 tablespoon all-purpose flour (for tossing berries)
For the Topping:
- 2 tablespoons coarse sugar (turbinado or sanding sugar)
Special Equipment:
- Standard 12-cup muffin tin
- Paper liners or non-stick cooking spray
- Large mixing bowl
- Medium mixing bowl
- Whisk
- Rubber spatula
- Ice cream scoop or large spoon
Step-by-Step Instructions
Preparation (10 minutes)
Step 1: Preheat and Prepare
Position your oven rack in the center and preheat to 425°F. Line a 12-cup muffin tin with paper liners or generously grease each cup with butter or non-stick spray. Paper liners make for easier cleanup and prettier presentation, but greased tins yield slightly crispier edges if that’s your preference.
Step 2: Prepare the Strawberries
Hull the strawberries and cut them into roughly ½-inch pieces—not too small or they’ll disappear into the batter, but not too large or they’ll create air pockets. Pat them dry with paper towels to remove excess moisture. Toss the chopped berries with one tablespoon of flour in a small bowl. This coating helps prevent the strawberries from sinking and creates a barrier that minimizes bleeding into the batter.
Step 3: Mix Dry Ingredients
In your large mixing bowl, whisk together the flour, baking powder, baking soda, and salt until completely combined. This step ensures even distribution of leavening agents, which is crucial for uniform rise. Set aside.
Making the Batter (10 minutes)
Step 4: Combine Wet Ingredients
In your medium bowl, whisk together the melted butter and oil until smooth. Add both sugars and whisk vigorously for about 30 seconds until the mixture lightens slightly in color. Add the eggs one at a time, whisking well after each addition. Pour in the milk, vanilla extract, and lemon zest if using. Whisk until the mixture is smooth and emulsified—it should look cohesive rather than separated.
Step 5: Combine Wet and Dry
Create a well in the center of your dry ingredients. Pour all the wet ingredients into this well. Using a rubber spatula, gently fold the mixture together using broad strokes from the bottom of the bowl upward. Stop mixing as soon as you no longer see dry flour streaks. The batter should look slightly lumpy—this is exactly what you want. Overmixing develops gluten, resulting in tough, chewy muffins with tunnels running through them.
Step 6: Add Strawberries
Gently fold the flour-coated strawberries into the batter with just a few strokes. Some berries will be suspended throughout while others peek out—both are fine. The batter will be thick and somewhat chunky, which is perfect.
Baking (25-30 minutes)
Step 7: Fill Muffin Cups
Using an ice cream scoop or large spoon, divide the batter evenly among the prepared muffin cups. Fill each cup nearly to the top—about ¾ full or even slightly more. Don’t worry about overfilling; proper strawberry muffins should be generous and billowy. Sprinkle the top of each muffin with a pinch of coarse sugar for added crunch and visual appeal.
Step 8: The Two-Temperature Bake
Place the muffin tin in the preheated 425°F oven and immediately set a timer for 5 minutes. This initial blast of heat is critical for achieving sky-high tops. After 5 minutes, reduce the oven temperature to 350°F without opening the door. Continue baking for an additional 18-22 minutes, until the muffin tops are golden brown and spring back when lightly pressed.
Step 9: Test for Doneness
Insert a toothpick into the center of one of the middle muffins. It should come out clean or with just a few moist crumbs—wet batter means they need more time. Keep in mind that strawberry pieces may make the toothpick appear slightly wet even when the muffin is done.
Step 10: Cool Properly
Remove the muffin tin from the oven and let it sit for 5 minutes. This brief resting period allows the muffins to set and makes them easier to remove without falling apart. After 5 minutes, transfer the muffins to a wire cooling rack. Leaving them in the hot tin will continue cooking them and may result in soggy bottoms.
Pro Tips for Perfect Strawberry Muffins
Use Room Temperature Ingredients
Cold eggs and milk straight from the refrigerator won’t properly emulsify with the butter and oil, creating a separated batter that bakes unevenly. Set eggs and milk out 30 minutes before baking, or quick-warm eggs by placing them in a bowl of warm water for 5 minutes.
Don’t Skip the Lemon Zest
While optional, lemon zest elevates these muffins from good to exceptional. The citrus brightens the strawberry flavor without making the muffins taste lemony. Use a microplane to zest only the yellow part of the peel, avoiding the bitter white pith underneath.
Measure Flour Correctly
The number one cause of dense, heavy muffins is too much flour. Never scoop flour directly from the bag with your measuring cup, as this compacts it significantly. Instead, fluff the flour with a spoon, sprinkle it into your measuring cup, and level it off with a straight edge. Better yet, weigh your flour—2 cups equals 240 grams.
Keep Strawberry Pieces Uniform
Cutting berries into consistent ½-inch chunks ensures even distribution and prevents some pieces from drying out while others remain mushy. Very large strawberries should be cut into smaller pieces than tiny berries.
Fill Cups Generously
Bakery muffins look impressive because they’re not shy about portion size. Nearly filling your muffin cups to the top creates those characteristic mushroom-shaped crowns. Underfilled cups produce flat, sad-looking muffins.
The High-Low Temperature Trick
Starting at high heat and then reducing temperature isn’t just a gimmick—it’s the secret to professional-looking muffins. That initial 425°F blast sets the structure quickly, creating lift. The lower finishing temperature prevents burning while allowing the interior to bake through completely.
Avoid Overmixing at All Costs
Mix the batter only until the flour disappears. Vigorous or prolonged stirring develops gluten strands that make muffins tough and create those unappetizing tunnels. Lumpy batter is your friend—it means you’ve exercised restraint.
Adjust for Frozen Strawberries
If using frozen berries, don’t thaw them first or they’ll release too much liquid. Toss frozen berries with two tablespoons of flour instead of one, and add 2-3 minutes to the baking time. Expect slightly less vibrant color and a bit more moisture.
Create Bakery-Style Tops
For extra-impressive tops, reserve a few strawberry pieces and press them into the top of each muffin just before baking. This ensures beautiful berry visibility and Instagram-worthy presentation.
Test Your Baking Powder
Old leavening agents lose potency and won’t give proper rise. Test baking powder by stirring a teaspoon into hot water—it should bubble vigorously. If it doesn’t, replace it before making these muffins.
Common Mistakes to Avoid
Mistake 1: Using Wet Strawberries
Strawberries contain substantial water content that increases when they’re cut. Failing to pat them dry introduces excess moisture that can make your muffins gummy. Always blot cut berries with paper towels and toss with flour to create a protective coating.
Mistake 2: Opening the Oven Door Early
I know the temptation is real, but opening the oven during the first 20 minutes releases heat and causes muffins to deflate. The sudden temperature drop interrupts the rising process and can result in dense, sunken centers. Use your oven light to check progress instead.
Mistake 3: Substituting Low-Fat Ingredients
Reduced-fat milk, margarine instead of butter, or egg substitutes all compromise texture and flavor. The fat content in whole milk and real butter is essential for creating tender, moist strawberry muffins. This isn’t the recipe for cutting corners on richness.
Mistake 4: Skipping the Flour Coating on Berries
It seems like an unnecessary step, but tossing strawberries in flour really does prevent sinking. The flour absorbs some of the berry juice and creates friction that helps suspend the fruit throughout the batter rather than letting gravity pull everything to the bottom.
Mistake 5: Baking at One Consistent Temperature
Using 350°F or 375°F for the entire baking time produces acceptable but not spectacular muffins. They’ll lack those impressive domed tops that make strawberry muffins so appealing. Trust the two-temperature method even if it seems fussy.
Mistake 6: Not Letting Muffins Rest Before Removing
Pulling muffins from the tin immediately after removing from the oven often results in torn, crumbling disasters. That 5-minute rest allows the structure to firm up just enough for clean removal while preventing the soggy bottoms that develop from extended time in a hot pan.
Mistake 7: Using Overripe or Underripe Berries
Mushy, overripe strawberries release too much liquid and turn to jam during baking. Rock-hard underripe berries lack flavor and remain unpleasantly firm. Choose strawberries that are deeply red but still slightly firm with no soft spots.
Storage and Serving Suggestions
How to Store Strawberry Muffins
Room Temperature: Store completely cooled muffins in an airtight container at room temperature for up to 3 days. Place a paper towel in the bottom of the container to absorb excess moisture and prevent sogginess. Don’t refrigerate muffins unless your kitchen is extremely warm, as refrigeration dries them out quickly.
Freezing: These muffins freeze beautifully for up to 3 months. Wrap each cooled muffin individually in plastic wrap, then place all wrapped muffins in a freezer-safe bag or container. This double-layer protection prevents freezer burn and makes it easy to grab individual portions.
Thawing: Remove muffins from the freezer and let them thaw at room temperature for 1-2 hours, or microwave individually for 20-30 seconds. For that fresh-baked taste, warm thawed muffins in a 300°F oven for 5 minutes.
Serving Suggestions
Strawberry muffins shine on their own, but here are some delightful ways to enjoy them:
Classic Butter Spread: Slice a warm muffin in half and spread with salted butter that melts into all the nooks and crannies. The contrast between sweet muffin and savory butter is unbeatable.
Cream Cheese Topping: Whipped cream cheese, plain or strawberry-flavored, turns these muffins into something truly decadent. Add a drizzle of honey for extra indulgence.
Breakfast Pairing: Serve alongside scrambled eggs, yogurt parfaits, or fresh fruit salad for a complete breakfast spread.
Brunch Star: These muffins are perfect for potlucks, baby showers, or Mother’s Day brunch. Arrange them on a tiered stand with fresh strawberries scattered around for beautiful presentation.
Afternoon Tea: Pair with hot tea or coffee as an afternoon pick-me-up. The muffins are sweet enough to satisfy without being overwhelming.
Dessert Upgrade: Warm a muffin slightly, top with vanilla ice cream and fresh strawberry sauce for an easy but impressive dessert.
Make-Ahead Options
Prepare the dry ingredients and store in an airtight container up to 1 week in advance. Cut strawberries the night before, toss with flour, and refrigerate in a covered bowl. In the morning, prepare the wet ingredients and combine everything for fresh-baked muffins in under 30 minutes.
Alternatively, portion the batter into muffin cups, cover the entire tin tightly with plastic wrap, and refrigerate overnight. Bake directly from cold, adding 2-3 minutes to the baking time.
Frequently Asked Questions
Can I use frozen strawberries instead of fresh?
Yes, frozen strawberries work in this recipe with a few modifications. Don’t thaw them before using, as they’ll release too much liquid. Toss frozen berries with two tablespoons of flour instead of one to absorb extra moisture. Add 2-3 minutes to the baking time since the frozen fruit lowers the batter temperature. Keep in mind that frozen berries often bleed more color into the batter, creating a pink-tinted muffin rather than the golden color you get with fresh berries.
Why did my strawberries sink to the bottom?
Strawberries sink when they’re too heavy for the batter to support or when the batter is too thin. Make sure you’re tossing the berries in flour before folding them in—this coating creates friction that helps suspend them. Also check that you haven’t added extra liquid or overmixed the batter, which can thin it out. Finally, ensure your baking powder is fresh and active, as proper rise helps keep berries distributed throughout. Cutting berries into smaller pieces also helps prevent sinking.
How can I tell when strawberry muffins are done baking?
Look for golden-brown tops that spring back when gently pressed with your finger. The edges should have pulled away slightly from the muffin tin. Insert a toothpick into the center of a muffin—it should come out clean or with just a few moist crumbs. Keep in mind that hitting a strawberry piece might make the toothpick appear wet even when the muffin is fully baked, so test in multiple spots. The muffins should feel set rather than jiggly when you gently shake the pan.
Can I reduce the sugar in this recipe?
While you can reduce sugar slightly, I don’t recommend cutting it by more than ¼ cup total. Sugar doesn’t just provide sweetness—it also contributes to moisture, tenderness, and browning. Reducing it too much results in pale, dense, bread-like muffins. If you prefer less sweet strawberry muffins, try reducing the granulated sugar by 2-3 tablespoons rather than eliminating sugar entirely. The natural tartness of strawberries means these muffins aren’t overly sweet to begin with.
What’s the best way to reheat strawberry muffins?
For the best texture, reheat muffins in a 300°F oven for 5-7 minutes until warmed through. This method revives the crispy exterior while warming the interior evenly. If you’re in a hurry, microwave individual muffins for 15-20 seconds, though this softens the exterior. Avoid microwaving for longer than 30 seconds or the muffins will become rubbery. For frozen muffins, thaw at room temperature first, then warm using either method. Never reheat muffins in a toaster or they may catch fire from the sugar content.
Can I make mini muffins or jumbo muffins with this recipe?
Absolutely! This batter works well for different sizes. For mini muffins, reduce the initial baking temperature to 400°F for 4 minutes, then 350°F for 8-10 minutes. You’ll get about 36 mini muffins. For jumbo muffins, keep the temperature the same but extend baking time to 25-28 minutes at 350°F after the initial 5 minutes at 425°F. This recipe makes about 6 jumbo muffins. Adjust strawberry pieces to size—smaller chunks for mini muffins, larger for jumbo.
Why are my muffins dense and heavy instead of fluffy?
Dense muffins usually result from too much flour (from scooping instead of spooning and leveling), overmixing the batter, or expired leavening agents. Make sure you’re measuring flour correctly—240 grams for 2 cups if using a scale. Mix only until the flour disappears and the batter looks lumpy. Test your baking powder by stirring it into hot water—it should bubble vigorously. Also check that your ingredients are at room temperature, as cold ingredients don’t create the proper emulsion. Finally, don’t skip the high-temperature start, which creates the initial rise.
Can I add other mix-ins to strawberry muffins?
Yes! White chocolate chips, chopped pecans, or blueberries all complement strawberries beautifully. Keep total mix-in volume to about 1½ to 2 cups maximum or the muffins won’t hold together properly. Toss any additional mix-ins with flour just like the strawberries. Consider reducing strawberries to 1 cup if adding other substantial mix-ins. Avoid mixing too many different flavors, which can muddy the taste rather than enhancing it.
Final Thoughts
There’s something magical about pulling a pan of golden, dome-topped strawberry muffins from your own oven. The sweet aroma fills your kitchen, promising tender crumb and juicy berry bursts in every bite. This recipe has become my go-to for everything from lazy Sunday mornings to special occasion brunches because it delivers consistent, impressive results without requiring advanced baking skills.
The beauty of homemade strawberry muffins lies not just in their superior taste compared to store-bought versions, but in the joy of creating something wonderful with your own hands. Each step in this recipe serves a specific purpose, from the two-temperature baking method to the flour-coated berries, all working together to produce muffins that look and taste bakery-quality.
I encourage you to make this recipe your own by experimenting once you’ve mastered the basics. Try different extracts like almond instead of vanilla, swap the lemon zest for orange, or add a cinnamon-sugar topping. The foundation is solid enough to support your creativity while remaining foolproof enough for beginners.
Whether you’re an experienced baker or just starting your journey, these strawberry muffins will quickly become a favorite in your recipe collection. They prove that the best things in life don’t have to be complicated—sometimes all you need is quality ingredients, proven techniques, and a little bit of love baked right in.
Now grab those fresh strawberries and get baking. Your future self will thank you when you bite into that first warm, berry-studded muffin tomorrow morning!
for more recipe check our Pinterest .
Print
Bakery-Style Strawberry Muffins
These bakery-style strawberry muffins are soft, fluffy, and bursting with fresh strawberries in every bite. With tall domed tops, tender crumb, and a hint of lemon, this foolproof recipe delivers professional results using simple pantry ingredients—perfect for brunch, breakfast, or a sweet homemade treat.
- Total Time: 40 minutes
- Yield: 12 muffins
Ingredients
- 2 cups all-purpose flour (spooned and leveled)
- 2 teaspoons baking powder
- ½ teaspoon baking soda
- ½ teaspoon salt
- ½ cup unsalted butter, melted and cooled
- ¼ cup vegetable or canola oil
- ¾ cup granulated sugar
- ¼ cup light brown sugar, packed
- 2 large eggs, room temperature
- 1 cup whole milk, room temperature
- 2 teaspoons pure vanilla extract
- Zest of 1 lemon (optional)
- 1½ cups fresh strawberries, chopped
- 1 tablespoon all-purpose flour (for strawberries)
- 2 tablespoons coarse sugar for topping
Instructions
- Preheat oven to 425°F (220°C). Line a 12-cup muffin tin with liners or grease well.
- Pat strawberries dry, toss with 1 tablespoon flour, and set aside.
- In a large bowl, whisk flour, baking powder, baking soda, and salt.
- In another bowl, whisk melted butter, oil, and both sugars until smooth.
- Add eggs one at a time, then mix in milk, vanilla, and lemon zest.
- Pour wet ingredients into dry ingredients and gently fold until just combined.
- Fold in strawberries carefully without overmixing.
- Divide batter evenly between muffin cups, filling nearly to the top.
- Sprinkle tops with coarse sugar.
- Bake at 425°F for 5 minutes, then reduce oven to 350°F (175°C).
- Continue baking for 18–22 minutes until tops are golden and spring back.
- Cool in pan for 5 minutes, then transfer to a wire rack.
Notes
Do not overmix the batter—lumps are normal and produce tender muffins. For frozen strawberries, do not thaw and toss with 2 tablespoons flour. Muffins freeze well for up to 3 months.
- Prep Time: 15 minutes
- Cook Time: 25 minutes
- Category: Breakfast
- Method: Baked
- Cuisine: American


