

The Ultimate Guide to Perfect Lemon Bars with Powdered Sugar

Introduction: Why Lemon Bars with Powdered Sugar Are the Ultimate Dessert
Lemon bars with powdered sugar are the perfect harmony of tangy citrus filling and buttery shortbread crust, finished with a delicate dusting of sweetness that makes every bite irresistible. These classic treats have graced countless potlucks, bake sales, and family gatherings for generations, and there’s a good reason why they remain a beloved favorite.
There’s something magical about cutting into a pan of perfectly set lemon bars—the way the knife glides through the creamy filling, revealing that golden-yellow center crowned with a snowy blanket of powdered sugar. Whether you’re an experienced baker or just starting your culinary journey, this comprehensive guide will walk you through everything you need to know to create bakery-quality lemon bars in your own kitchen.
What sets truly exceptional lemon bars apart from mediocre ones? The answer lies in understanding the delicate balance between sweet and tart, achieving the perfect texture, and knowing the little tricks that professional bakers use. Throughout this article, you’ll discover not just a recipe, but the science and art behind creating lemon bars that will have everyone asking for seconds—and the recipe.
The beauty of lemon bars with powdered sugar lies in their simplicity. With just a handful of basic ingredients that you likely already have in your pantry, you can create an elegant dessert worthy of any occasion. From casual weekend baking to impressive dinner party finales, these versatile bars fit every need.
Why This Recipe Works
Before diving into the ingredients, let’s talk about what makes this particular recipe stand out. The secret to extraordinary lemon bars lies in three key elements: a sturdy yet tender crust that holds up to the filling, a smooth custard-like filling with bright lemon flavor, and that signature powdered sugar topping that adds both visual appeal and a sweet finish to balance the tartness.
This recipe has been tested and refined countless times to ensure consistent, foolproof results. The proportions are carefully calibrated to create the ideal ratio of crust to filling, while the baking times and temperatures are optimized for different oven types and altitudes.
Ingredients for Perfect Lemon Bars with Powdered Sugar
For the Shortbread Crust:
- 2 cups (250g) all-purpose flour
- ½ cup (60g) powdered sugar
- ¼ teaspoon fine sea salt
- 1 cup (227g) unsalted butter, cold and cut into cubes
- 1 teaspoon pure vanilla extract
For the Lemon Filling:
- 6 large eggs, room temperature
- 2½ cups (500g) granulated sugar
- ¾ cup (180ml) fresh lemon juice (about 5-6 medium lemons)
- 2 tablespoons lemon zest (from about 2-3 lemons)
- ⅔ cup (85g) all-purpose flour
- ½ teaspoon baking powder
- ¼ teaspoon salt
For Topping:
- ½ cup (60g) powdered sugar for dusting
Optional Additions:
- 1 tablespoon cornstarch (for extra-firm filling)
- ½ teaspoon lemon extract (for intensified lemon flavor)

Step-by-Step Instructions for Lemon Bars with Powdered Sugar
Step 1: Prepare Your Pan and Preheat the Oven
Begin by positioning your oven rack to the middle position and preheating to 350°F (175°C). This temperature is crucial for achieving both a properly baked crust and a set filling without overbaking.
Line a 9×13-inch baking pan with parchment paper, leaving an overhang on two opposite sides. This overhang will serve as handles to lift the finished bars out of the pan for easier cutting. Lightly spray the parchment with non-stick cooking spray to prevent any sticking.
Step 2: Make the Shortbread Crust
In a large mixing bowl or food processor, combine the flour, powdered sugar, and salt. Pulse or whisk to blend thoroughly. Add the cold butter cubes and vanilla extract.
If using a food processor, pulse 15-20 times until the mixture resembles coarse sand with some pea-sized butter pieces remaining. If mixing by hand, use a pastry cutter or your fingertips to work the butter into the flour mixture until it reaches the same consistency. The mixture should hold together when squeezed but still appear crumbly.
Press the crust mixture evenly into the bottom of your prepared pan. Use the bottom of a measuring cup or your hands to create a firm, even layer that extends slightly up the sides (about ¼ inch). This helps contain the filling and prevents leakage.
Dock the crust by pricking it all over with a fork—this prevents bubbling during baking. Bake for 18-22 minutes until the edges are just beginning to turn golden brown. The center may still look slightly pale, which is perfect.
Step 3: Prepare the Lemon Filling
While the crust bakes, prepare your lemon filling. In a large bowl, whisk together the eggs and granulated sugar until well combined and slightly pale, about 2 minutes. You don’t need to whip air into the mixture; you’re simply combining ingredients thoroughly.
Add the fresh lemon juice and lemon zest, whisking until smooth. The acid in the lemon juice will begin to “cook” the eggs slightly, which is normal.
In a separate small bowl, whisk together the flour, baking powder, and salt. Gradually add this dry mixture to the wet ingredients, whisking constantly to prevent lumps. Whisk until the batter is completely smooth with no flour streaks visible. Let this mixture sit while the crust finishes baking—this rest period allows the flour to hydrate fully and helps prevent a gummy texture.
Step 4: Assemble and Bake
Once your crust comes out of the oven, reduce the temperature to 325°F (165°C). Give your lemon filling mixture one final gentle whisk to recombine any settled ingredients.
Carefully pour the filling over the hot crust. The heat from the crust will help the bottom of the filling set quickly, creating better definition between layers. Use a spatula to spread the filling evenly if needed, ensuring it reaches all corners.
Return the pan to the oven and bake for 22-28 minutes. The filling is done when the edges are set and the center jiggles only slightly when you gently shake the pan—think of the wobble of soft-set Jell-O. The surface should look matte rather than shiny, and it should no longer look liquid.
Critical tip: Do not overbake! The filling will continue to set as it cools. Overbaking results in a grainy, curdled texture rather than the creamy, smooth consistency you want.
Step 5: Cool Completely
Remove the pan from the oven and place it on a wire cooling rack. Allow the lemon bars to cool at room temperature for about 1 hour. The filling will sink slightly as it cools, which is completely normal.
Once cooled to room temperature, cover the pan with plastic wrap or aluminum foil and refrigerate for at least 3 hours, or preferably overnight. This chilling time is essential—it allows the filling to firm up completely, making the bars much easier to cut cleanly.
Step 6: Cut and Dust with Powdered Sugar
When ready to serve, use the parchment paper overhang to lift the entire slab of lemon bars out of the pan and onto a cutting board. Use a large, sharp knife to cut the bars. For clean cuts, wipe the knife with a damp cloth between each slice.
Cut into 16-24 squares, depending on your preferred size. Smaller bars (24 pieces) are perfect for parties and potlucks, while larger bars (16 pieces) make a more substantial dessert.
Just before serving, place the powdered sugar in a fine-mesh sieve and dust generously over the top of all the bars. The powdered sugar not only adds sweetness but also creates that classic, bakery-style appearance that makes lemon bars so visually appealing.
Pro serving tip: Dust the bars with powdered sugar just before serving rather than hours in advance, as the sugar can absorb moisture from the filling and disappear or become sticky.
Pro Tips for the Perfect Lemon Bars with Powdered Sugar
1. Use Fresh Lemon Juice Always
Fresh lemon juice has a bright, vibrant flavor that makes all the difference in the final product. The bottled variety often tastes flat or artificially tart. Plan to squeeze your lemons just before making the filling for maximum freshness.
2. Room Temperature Eggs Are Essential
Cold eggs don’t incorporate as smoothly and can cause the filling to separate or become grainy. Take your eggs out of the refrigerator 30-60 minutes before baking. If you forget, place them in a bowl of warm (not hot) water for 5-10 minutes.
3. Don’t Skip the Pre-Baking of the Crust
Pre-baking (or blind baking) the crust ensures it stays crisp and doesn’t become soggy from the wet filling. This step is non-negotiable for the perfect texture.
4. Control Your Oven Temperature
Use an oven thermometer to verify your actual oven temperature. Many ovens run hot or cold by 25°F or more, which can dramatically affect your results. Overbaking is the most common mistake that ruins lemon bars.
5. The Toothpick Test Doesn’t Work Here
Unlike cakes or brownies, you cannot use a toothpick to test doneness. The filling should jiggle slightly in the center when gently shaken—this ensures a creamy, custard-like texture. If there’s no jiggle at all, the bars are overbaked.
6. Invest in Quality Lemons
Choose lemons that are heavy for their size, as these contain the most juice. The best lemons have thin, bright yellow skins with minimal green tinting. Organic lemons are ideal if you’re using the zest, as conventional lemons may have pesticide residues on the peel.
7. Strain Your Filling for Silky Smoothness
For ultra-smooth filling without any bits of cooked egg or lemon pulp, pour your prepared filling through a fine-mesh strainer before adding it to the crust. This extra step takes only a minute but ensures professional results.
8. Consider Adding Cornstarch for Firmness
If you prefer your lemon bars on the firmer side (easier for handheld eating), add 1 tablespoon of cornstarch to the flour in the filling. This helps the bars set up more firmly while maintaining a smooth texture.
9. Chill Overnight for Best Results
While 3 hours is the minimum chilling time, overnight refrigeration allows the flavors to meld and the texture to perfect itself. The bars will also cut much more cleanly.
10. Use a Bench Scraper for Professional Cuts
A large bench scraper or dough scraper makes cutting lemon bars much easier than a knife. The straight edge and height give you more control and cleaner lines.

Common Mistakes to Avoid When Making Lemon Bars with Powdered Sugar
Mistake #1: Using Melted Butter in the Crust
Cold butter creates a tender, shortbread-like texture. Melted butter results in a dense, cookie-like crust that won’t have the proper crumbly texture. Always use cold butter cut into small pieces.
Mistake #2: Not Pressing the Crust Firmly Enough
A loosely pressed crust will crumble apart when you try to cut the bars. Apply firm, even pressure across the entire surface to compact the crust mixture. It should feel solid, not loose or sandy.
Mistake #3: Overbaking the Filling
This is the number one mistake home bakers make. Overbaked filling becomes grainy and curdled rather than smooth and creamy. Remember, the center should still have a slight jiggle when you remove it from the oven.
Mistake #4: Cutting Before Fully Chilled
Impatience leads to messy, crumbly bars with filling that oozes out. The chilling period is essential for the filling to set properly. Resist the urge to cut into warm or room-temperature bars.
Mistake #5: Using Old Baking Powder
If your baking powder is more than 6 months old, it may have lost its potency. Fresh baking powder helps the filling set with a lighter texture. Test it by adding a pinch to hot water—it should fizz vigorously.
Mistake #6: Skipping the Parchment Paper
Trying to cut and serve lemon bars directly from the pan is a recipe for frustration. The parchment paper sling makes removal effortless and allows for much cleaner cutting.
Mistake #7: Adding Powdered Sugar Too Early
Dusting the bars with powdered sugar hours before serving means the sugar will absorb moisture and partially dissolve, leaving a spotty appearance. Always dust just before serving for that fresh, snowy look.
Mistake #8: Not Zesting Before Juicing
Once you’ve juiced a lemon, getting the zest off becomes much more difficult. Always zest your lemons first, then juice them.
Mistake #9: Using a Dull Knife to Cut
A dull knife drags through the bars, creating ragged edges and causing the filling to separate from the crust. Use a large, sharp knife and wipe it clean between cuts.
Mistake #10: Incorrect Pan Size
Using a different pan size throws off the crust-to-filling ratio and baking times. Stick to the 9×13-inch pan specified in the recipe for consistent results.
Storage and Serving Suggestions for Lemon Bars
Storage Instructions
Refrigerator Storage: Store lemon bars with powdered sugar in an airtight container in the refrigerator for up to 5 days. Layer the bars between sheets of parchment paper to prevent sticking. The powdered sugar may absorb some moisture during storage, so you may want to dust with fresh powdered sugar before serving.
Freezer Storage: These bars freeze beautifully! Place uncut bars (or individual cut bars) on a parchment-lined baking sheet and freeze until solid, about 2 hours. Transfer to a freezer-safe container or zip-top bag, separating layers with parchment paper. Freeze for up to 3 months. Thaw overnight in the refrigerator before serving. Do not dust with powdered sugar until after thawing.
Make-Ahead Tips: Lemon bars are an excellent make-ahead dessert. Prepare them 1-2 days before your event and store covered in the refrigerator. Add the final dusting of powdered sugar just before serving.
Serving Suggestions
Classic Presentation: Serve the bars chilled or at cool room temperature with a generous dusting of powdered sugar. Arrange them on a pretty platter for a simple yet elegant presentation.
With Whipped Cream: Top each bar with a dollop of fresh whipped cream and a small mint leaf for a restaurant-quality presentation.
Berry Accompaniment: Serve alongside fresh raspberries, blueberries, or strawberries. The additional fruit complements the lemon flavor beautifully and adds visual interest.
Ice Cream Pairing: Crumble a lemon bar over vanilla or lemon ice cream for an indulgent dessert parfait.
Tea or Coffee Service: Lemon bars pair wonderfully with afternoon tea or coffee. Cut them into smaller, bite-sized pieces for tea service.
Seasonal Variations: In summer, serve these bars cold with fresh berries. In cooler months, bring them closer to room temperature and pair with hot tea.

Frequently Asked Questions About Lemon Bars with Powdered Sugar
1. Can I use bottled lemon juice instead of fresh?
While you technically can, it’s strongly not recommended. Fresh lemon juice has a bright, complex flavor that bottled juice simply cannot replicate. Bottled lemon juice often tastes flat or has an off-putting chemical note. Fresh lemons make a dramatic difference in the final flavor of your bars. If you absolutely must use bottled juice in an emergency, look for brands that contain only lemon juice with no additives.
2. Why is my lemon bar filling grainy instead of smooth?
A grainy texture typically results from one of three issues: overbaking (the most common cause), using cold eggs, or not whisking the ingredients thoroughly. The eggs curdle when exposed to too much heat, creating a grainy rather than creamy texture. Always remove the bars when the center still has a slight jiggle, use room-temperature eggs, and whisk your filling until completely smooth before baking.
3. How do I know when my lemon bars are done baking?
The edges should be set and slightly puffed, while the center should jiggle just slightly when you gently shake the pan—similar to the movement of soft-set Jell-O. The surface should appear matte rather than liquid and shiny. Remember that the filling continues to set as it cools, so a slight jiggle is exactly what you want. When in doubt, slightly underbake rather than overbake.
4. Can I make lemon bars without the powdered sugar on top?
Absolutely! The powdered sugar is traditional and adds a sweet finish that balances the tart filling, but it’s entirely optional. Some people prefer their lemon bars without it to experience the full tartness of the lemon filling. You could also substitute a light drizzle of lemon glaze, a dollop of whipped cream, or even a sprinkle of coarse sugar for a different presentation.
5. Why did my crust become soggy?
A soggy crust usually occurs when the crust isn’t pre-baked long enough before adding the filling, or if the bars aren’t allowed to cool and set properly. Make sure your crust is golden at the edges before adding the filling, and always refrigerate the finished bars for at least 3 hours. Also ensure you’re pressing the crust firmly into the pan—a loosely packed crust won’t hold up as well.
6. Can I halve this recipe for a smaller batch?
Yes! Use an 8×8-inch or 9×9-inch square pan and halve all the ingredients. The baking time for the crust will remain about the same, but watch the filling carefully—it may need 3-5 minutes less baking time in the smaller pan since the filling layer will be thicker.
7. My lemon bars turned out too sweet. What can I do next time?
Increase the lemon juice by 2-3 tablespoons and add an extra tablespoon of zest for more tartness. You can also reduce the sugar in the filling by ¼ cup. Keep in mind that the powdered sugar on top adds sweetness too, so you might dust more lightly or skip it entirely if you prefer less sweet desserts.
8. Can I make these gluten-free?
Yes! Substitute a 1:1 gluten-free flour blend for the all-purpose flour in both the crust and filling. Make sure your blend contains xanthan gum or another binder. The texture may be slightly different but should still be delicious. Some bakers report success using almond flour for the crust with adjustments to the butter ratio.
Nutrition Information (Per Bar, Based on 24 Servings)
- Calories: 185 kcal
- Total Fat: 8g
- Saturated Fat: 5g
- Trans Fat: 0g
- Cholesterol: 65mg
- Sodium: 75mg
- Total Carbohydrates: 28g
- Dietary Fiber: 0g
- Sugars: 21g
- Protein: 3g
- Vitamin D: 4% DV
- Calcium: 2% DV
- Iron: 4% DV
- Potassium: 30mg
Note: Nutritional values are approximate and will vary based on specific ingredients used and portion sizes. These calculations are based on standard ingredients and cutting the recipe into 24 bars.
Conclusion
Mastering the art of lemon bars with powdered sugar is easier than you might think when you understand the fundamentals. By following this detailed guide—from selecting the freshest lemons to achieving the perfect custard-like filling and applying that signature powdered sugar finish—you’ll create bars that rival any professional bakery.
Remember the key principles: cold butter for the crust, room-temperature eggs for smooth filling, careful attention to baking times, and patience during the chilling process. These seemingly small details make the difference between good lemon bars and absolutely exceptional ones.
Whether you’re baking for a special celebration, contributing to a potluck, or simply satisfying a citrus craving, this foolproof recipe delivers consistent, delicious results every time. The combination of tangy lemon, buttery crust, and sweet powdered sugar creates a dessert that’s both timeless and universally loved.
Now that you’re armed with professional tips, common pitfalls to avoid, and storage techniques, you’re ready to create lemon bars that will earn rave reviews. Don’t be surprised when these become your most-requested dessert—once people taste homemade lemon bars made with care and quality ingredients, there’s no going back to store-bought versions.
Happy baking, and enjoy every sweet-tart, powdered-sugar-dusted bite!
Print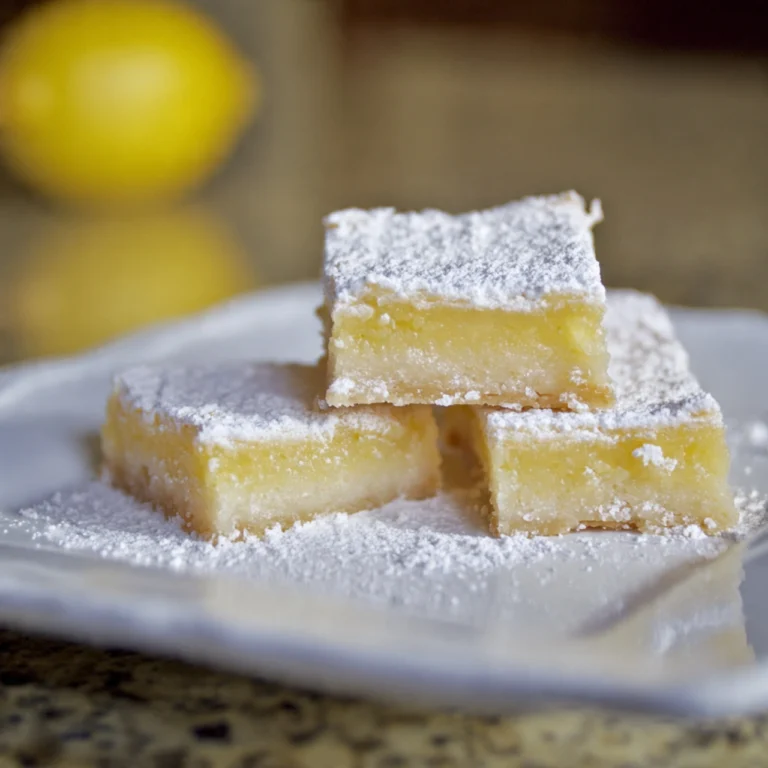
The Ultimate Guide to Perfect Lemon Bars with Powdered Sugar
Classic lemon bars with powdered sugar feature a buttery shortbread crust topped with tangy, creamy lemon filling and finished with a sweet dusting of powdered sugar. These bakery-style bars are perfect for any occasion and easier to make than you think!
- Total Time: 4 hours 5 minutes (including cooling and chilling)
- Yield: lemon bars, lemon bars with powdered sugar, lemon dessert bars, lemon squares, easy lemon bars, homemade lemon bars, shortbread lemon bars, classic lemon bars
Ingredients
- Shortbread Crust: flour, powdered sugar, salt, butter, vanilla
- Lemon Filling: eggs, sugar, lemon juice, lemon zest, flour, baking powder, salt
- Topping: powdered sugar
Instructions
- Preheat oven and prepare pan with parchment paper
- Make and press shortbread crust into pan
- Pre-bake crust until golden
- Prepare lemon filling while crust bakes
- Pour filling over hot crust
- Bake until just set with slight jiggle
- Cool and refrigerate minimum 3 hours
- Cut into bars and dust with powdered sugar
Notes
- Use fresh lemon juice for best flavor
- Don’t overbake the filling—slight jiggle is perfect
- Chill completely before cutting for cleanest edges
- Dust with powdered sugar just before serving
- Bars freeze well for up to 3 months
- Prep Time: 20 minutes
- Cook Time: 45 minutes
- Category: Desserts
- Method: Baking
- Cuisine: American
- Diet: Vegetarian


1 Comment
[…] summer afternoons, and pure, uncomplicated pleasure. Despite its simplicity, creating the perfect vanilla milkshake requires understanding the delicate balance between thickness and drinkability, sweetness and […]